3 Basic Embroidery Stitches – Mexican Embroidery
Mexican Embroidery will make any garment look stunning, today I will share you the 3 easy basic embroidery stitches for you to do.
When you love to sew and to do some embroidery and when you also love to wear garments that are eye-catching, sooner or later you’ll be wanting to do some Mexican embroidery.
Any piece of garment with some Mexican embroidery on it will look stunning no matter if it’s just a t-shirt, a blouse, a skirt or a dress, every region and every state in Mexico is proud of the people who do their embroidery.
There are a few reason why I love to wear the garments made by the Mexican artisans:
- They are so pretty
- They are fresh
- They are so comfy to wear
- And you can help them to make an income
- Each piece is an art work
When I moved to live in Canada 8 years ago, I couldn’t buy anymore Mexican embroidered blouses from Mexico, but as a quilter and as a person who loves to do some embroidery I decided to give it a try and make the first embroidered blouse for myself.
Today, I’m lucky to own a small collection of embroidered blouses made by myself and there’s a few reasons why you might want to make one for you too.
- You can make a blouse for your size
- You can use different types of fabric for the weather where you live, it doesn’t need to be made on cotton fabric, you can use different types of fabric as well.
- You can make your own designs, V-neck, round neck, short or long sleeves, long or short.
- You can decide whether to use just one color or to use as many different colors in one embroidery.
- It can be simple with a small embroidery or you can work on the full piece.
Today, I want to share a short tutorial so you can see how I use only 3 basic embroidery stitches to make the Mexican embroidery.
Nothing fancy and easy to follow.
As my blog is about quilting and patchwork, I want to make the Mexican embroidery as a first part of a quilted bag I’m making later.
Note: I’m sharing the same Mexican embroidery design I made by myself, I’m always inspired by the beautiful work of the Mexican people who do this type of embroidery, but I want to respect their work, so I did the design by myself, it is something simple and it might look like many others.
If you want to use the embroidery free pattern, you can download it here, but if you want to make your own design, get inspired by the Mexican artists and I’m sure you’ll make a beautiful design by yourself.
Materials to make the floral Mexican embroidery
1 piece of cotton fabric of 12 x 11 ” (any color and any prints on the fabric)
2 skeins of embroidery floss “mouline” (DMC)
1 embroidery needle
Scissors
Thimble
Pins
Masking Tape
Pencil
Embroidery pattern
Video
Mexican Embroidery Tutorial
1. Cut the cotton fabric piece and press, fold the piece in the middle and press to mark the center, fold it again and press again.
As you open the piece of fabric you can see the center of the piece is marked.
Download and print the FREE Mexican embroidery pattern and print it out, lay the pattern under the piece of fabric, center with center, and pinch a few pins.

2. Trace the pattern into the fabric.
I used the window system to trace the pattern on the fabric, I used a pencil (4B) but you can use a pencil or a pen for fabric.

3. This is how the pattern looks like on your fabric.
Once you finished tracing the pattern, remove the pins from the fabric to remove the pattern from the back.
Place the fabric on the embroidery hoop and prepare your needle with three strands of moline floss on it, make a knot at the end of the thread.

4. Mexican basic embroidery stitches:
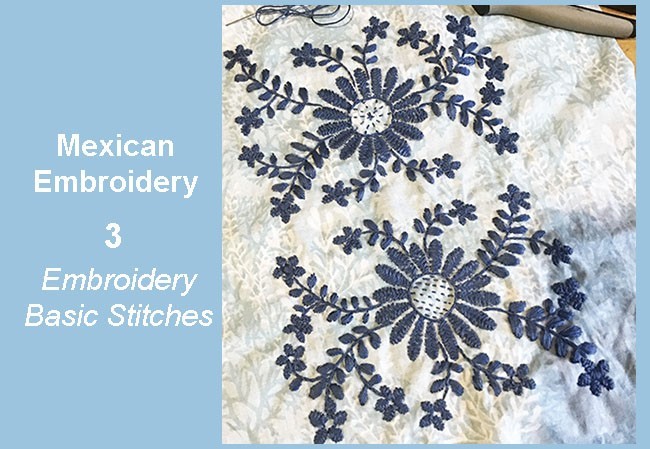
- Back stitch – stems and center of the two big flowers
- Satin stitch – leaves and center of small flowers
- Herringbone stitch – flowers petals (small and big flowers)
- Running stitch – center of the two big flowers
You can watch me working on the different stitches on the video.

5. Finished Mexican Embroidery.
It takes some time to finish the Mexican embroidery, it took me two to three days to work on it for one or two hours at the time.
Take your time to work on it, as you keep working it will get more relaxed and you’ll see how good it comes up.

6. Press the embroidery upside down
 Press gently the embroidered piece by turning the fabric wrong side down, by doing this it will help the embroidery to stand out.
I hope you like this tutorial and you give it a try. Next tutorial on my blog will be about how to make a half quilted bag with the Mexican embroidery on it.
Don’t forget to follow me on Social Media, buttons are on the right top corner on the blog!
Enjoyed this tutorial, give my pin a share!
