Quilted Phone Cross Body Bag is easy to make, and it will help you to keep track of your phone all the time!
When you love to sew, you might be wondering if you can make a cross body bag to carry your phone in it, and the answer is even if you’re a beginner, you can make a cute bag with some easy to do applique for your phone.
Why to pay the over priced small bags to carry your phone all the time, when you can make it, all you need to do is to find some pretty cotton fabrics, and follow the easy steps to make it.
Supplies For the Quilted Phone Cross Body Bag
Keep in mind than phones come in different sizes, for this reason you should take the measures of your phone before cutting your fabrics, the same steps can be followed to make any size quilted phone cross body bag.
- 1 piece of solid cotton fabric of 18 x 5 inches
- 1 piece of thin batting fabric of 18 x 5 inches.
- 1 piece of linen fabric of 18 x 5 inches.
- Assorted cotton fabrics for the applique
- 6 pieces of cotton fabric of 1 1/2 x 1 1/2 inches
- 1 piece of cotton fabric of 3 x 36 inches
- 1 snap button
How To Make The Quilted Phone Cross Body Bag
1. How To Do The Needle Turn Applique

Press the piece of solid cotton fabric, fold the piece in the middle lengthwise and finger press, open the piece and lay over it all the pieces for the hand applique, pin each fabric piece for the applique to the cotton fabric.
Do the needle turn applique of all the pieces, when all the pieces are appliqued to the cotton fabric, remove all the pins.
>>>> Quilted Phone Cross Body Bag, Free Pattern <<<
2. How To Do The Hand Quilting

Lay on your work table the piece of thin batting fabric, lay over it the cotton fabric with the applique, pretty side up, pinch enough safety pins to hold the two fabrics together, while you do the hand quilting.
With the help of a quilting ruler, trace one first line, 45 degrees, mark 1 1/2 inch apart from the first line, and continue marking more lines until you cover all the piece of fabric for the bag.
When you finish marking all the lines one way, you need to turn the ruler the other way to mark all the lines to create a diamond shape for the quilting.
Do the hand quilting on all the lines you marked and also on all the applique pieces.
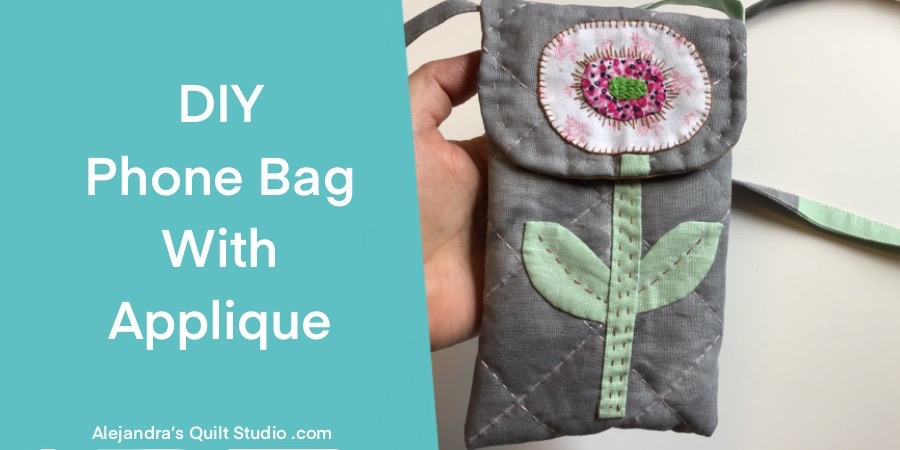
3. How To Add Some Embroidery Stitches On The Applique Flower
The embroidery on the Quilted Phone Cross Body Bag is easy to do:
- Buttonhole Stitch – On the edge of the flower
- Big stitches – around the edge of the center of the flower
- Daisy stitch – two strands of embroidery floss on the center of the flower.
4. How To Sew On The Quilted Phone Cross Body Bag

Lay on your work table the quilted piece, pretty side up, lay over it the piece of fabric for the lining, pretty side down, sew on one side, 1/4 inch for the seam allowance, open the seams and finger press.
Turn to the back the fabric for the lining.
Lay on your work table the whole piece with the quilted piece up, and mark the quilted piece 6 1/2 inches from the edge, fold the rest up to cover the quilted piece.
Turn the piece down, and mark the lining piece 6 1/2 inches, and fold the lining up. Pinch enough pins to hold the whole piece folded this way.

With the help of a quilting ruler, mark the seam allowance of 1/4 inch on the three sides on the lining, and mark the curved corners.
Sew on the whole piece as it’s shown on the image on your sewing machine, leave a gap open of 2 inches on one side to turn the piece out later. When sewing on the piece, reinforce all the stitching at the beginning and at the end.

Trim the curved pieces, leave the 1/4 inch for the seam allowance, and make some small cuts with a pair of scissors on the curved seams.
Turn the piece out, tuck in the seams on the gap, and stitch to close (ladder stitching)
6. Hand Quilting On The Edge
To add some more cuteness to the bag, do some hand stitching on the cover of the bag, 1/4 inch from the edge, you can do some big quilting stitches.
7. How To Do The Strap For The Quilted Phone Cross Body Bag
Take the piece of fabric for the strap, and fold the piece in the middle lengthwise, and press, open the piece and fold each side to the center and press, fold the piece again in the middle lengthwise and do the top stitching on both sides of the piece.
Sew on by hand both ends of the strap to the bag inside the cover.
8. Sew On The Snap Button
It’s time to sew on the snap button on the quilted phone cross body bag.
The Quilted Phone Cross Body Bag is done and it looks amazing!
I’m sure when you see how easy it is to make, and how cute it looks, you will be making more than one!
Related Posts:
Thanks so much for sharing my tutorials on your Social Media!

Video Tutorial: