Make the Boro Snap Pouch with all those scraps of fabric you have saved to make something cute with them.
This cute snap pouch is easy to make for beginners and more advanced quilters, and you can make it in any color you like, it can be used to carry an extra face mask, a sanitary pad, or anything you need to carry with you and it’s easy to keep in one place.
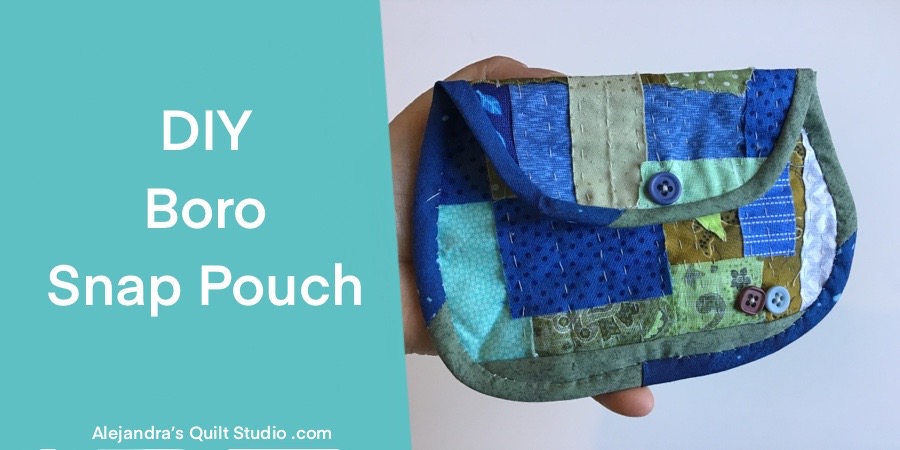
The Boro is a Japanese mending technique, which is used to mend a used piece of clothing, by patching a hole with a small piece of fabric, it can be the same color and pattern or it can be done with any piece of clothing, this piece of fabric is stitched by hand to the used cloth.
Today, as many quilters around the world, we know the value of those tiny scraps of fabric, that are left after you finish your quilts, some are so pretty, that we love to save them to make something with you, on this tutorial, I will share the steps to follow to make a cute snap pouch.
Boro Snap Pouch

The method to make a piece of Boro is done by cutting a piece of cloth and cover the back of this piece with small pieces of fabric, any piece of any size and any shape, the goal is to cover the main piece with small pieces.
The small pieces of fabric used to make a Boro piece, can be raw edge or you can fold to the back all edges of each piece of fabric, on this tutorial I’ll be working with raw edges.
When the main piece of fabric is all covered with small pieces, you can pin the small pieces of fabric to the main piece, or you can make a big basting stitch, to hold all the pieces on their place while you do the stitching.
The stitching can be done with big quilting stitches, and you can use any quilting thread or an embroidery thread on any color you like.
When you finish doing the two pieces of Boro stitching, you’re ready to start making the Snap Pouch
How To Do A Boro Snap Pouch
1. Sew On The Bias On The Small Boro Piece
Sew on the bias on the small Boro piece, the bias used on this piece can be cut as a straight piece of fabric of 6 x 1 1/2 inches.
Sew on the bias on the pretty side and roll it over the back, and stitch to close the bias, it can be done by hand or with your sewing machine.
2. Stitch On The Snap Pouch

Lay on your work table the big piece of Boro, pretty side down, lay over this piece the small Boro piece, pretty side up.
Lay over the Boro pieces the paper template (you will be using the same paper template on the previous tutorial), pin the paper template to the two pieces of Boro.
Run a stitching all around the paper template, (you can trace the shape of the paper template on the Boro Pieces, but it might be hard to see as the Boro is done with different fabrics, so I find easier to pin the paper template on, and use it as a reference for the stitching)
Remove the pins and remove the paper template, trim the Boro pieces, when trimming the pouch, leave a 1/4 inch for the seam allowance.
3. Stitch On The Small Piece Of Fabric
Cut a piece of fabric of 1 1/2 x 3 inches, and fold both sides lengthwise to the center, press, fold to the middle lengthwise again and top stitch this piece, the top stitching can be done on one side to close the piece of fabric, or it can be top stitching both sides.
Fold this piece in the middle and pin it to the back of the pouch.
4. Sew On The Bias Tape

You can make a bias tape by cutting some fabrics you used to make the Boro pieces, or you can use a bias tape made from one piece of fabric. (24 inches)
Sew on the bias tape on the pretty side of the pouch all around on your sewing machine, roll it over to the back and stitch on to close, this step can be done by hand or on your sewing machine.
5. Sew On The Snap Button
Sew on the snap button on the cover first, then mark the place on the small Boro piece, where the other part of the snap button should be sewn.
6. How To Finish The Boro Snap Button
You can sew on a button on the pretty side on the cover where the snap button is, and sew on two buttons on the front Boro piece.
Place a key ring on the folded piece of fabric on the side, it will help you to attach this bag to a tote bag or any bag you use to carry all your things.
The Boro Snap Pouch is finished and it looks amazing.
Related posts:
Thanks so much for sharing my tutorials on your Social Media!

Video Tutorial: