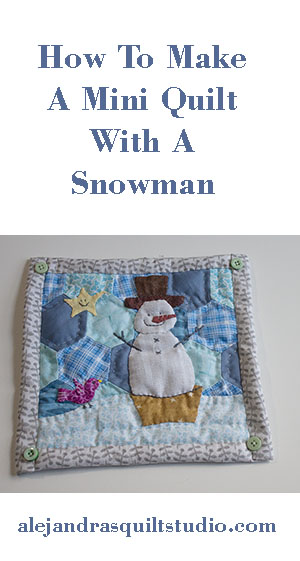
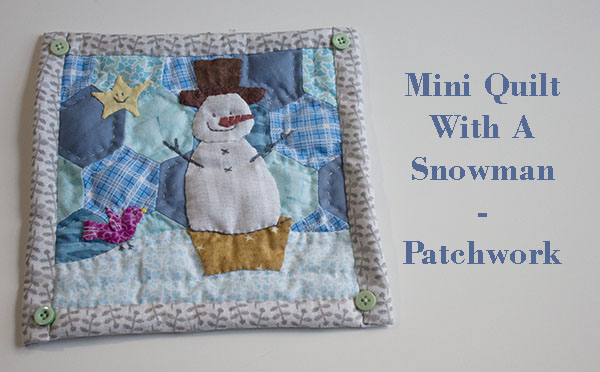
Christmas is around the corner and it’s time to make a fun and easy mini quilt with a snowman!
I’m sure you might have a few fabrics to make it at home, this is a small quilt and you can place it anywhere in your home to bring happiness during the cold weather winter months, as there’s nothing more cheerful than a happy snowman!
From all the Christmas decorations themes, I think snowmen are my favorites, I’ve been making a mini quilt with snowmen every year, so it’s time to make one for this year.
You will need to make this mini quilt with a snowman:
1 piece of fabric for the back of the mini quilt of 10 x 10 ”
1 piece of thin batting fabric of 8 1/2 x 8 1/2″
18 hexagons of 2 1/2″
1 piece of fabric for the snow 8 1/2 x 3 ”
Small pieces of fabric for the snowman, the star, and the bird.
Sewing machine, rotatory cutter, mat, scissors, needle, regular thread, DMC embroidery floss.
4 small buttons.
* I added a few affiliate links on this post, if you buy anything at amazon with my affiliate links, I’ll receive a small % of your purchase, price will not change for you, when you make a purchase using affiliate links you pay the regular price, I thank you for supporting me to keep working to share more tutorials to make patchwork and quilts.
Video
Download the FREE pattern and the diagram of the mini quilt here.
Tutorial
Step 1
You can cut the 18 hexagons to make the top of the mini quilt using the patchwork ruler with the 60 degree line or you can download the patterns and cut the hexagons using the template and scissors.
Once you have all the hexagons, make the top of the quilt, you can follow the diagram to sew the hexagons on this photo below.
When the top is finished, press it gently.

Step 2
With the help of the ruler and the rotary cutter, trim three sides of the top.

Step 3
Cut out the patterns, and place the template for the snow on the white fabric and cut the fabric adding 1/4″ for the seam.
Place two or more pins to keep the template on its place on the fabric and with the scissors make small cut anywhere where the lines are curved.
Fold all the seams on the paper to give the fabric the shape of the template. Keep the paper while you work on the applique.

Step 4
Put a few more pins to place the piece of fabric to applique on its place, and do the applique.

Step 5
Once you finished appliqueing the new piece of fabric on the top of the mini quilt, remove the paper template from it and trim on the back the fabric. By doing this, it will make easier for you to work on the quilting.

Step 6
Cut out the rest of the templates and cut the fabric for each one of them, this time I didn’t place pins on these pieces to hold the paper template on them, I did a running stitches as the pieces are small.

Step 7
Work on the applique of the pieces of fabric to make the snowman, and do the applique of each piece.

Step 8
When you finish the applique, remove the paper templates, to keep all the paper templates for this mini quilt I keep all the paper templates in a safety pin, this way I can keep all the templates for each quilt all together and it will be easier to find them later if I want to make this mini quilt later.

Step 9
I show you on this photo below, how it looks like on the back after I cut the back fabric after I did the applique of each piece for the snowman.

Step 10
Once the top is finished, place it on the batting fabric, and place the two fabrics on the fabric for the back of the quilt, this fabric should face down.
Place a few safety pins to keep the three layers of fabric in their place while you work on the quilting.
You can do the quilting by hand or by machine.

Step 11
When the quilting is done, it’s time to work on the self binding of this mini quilt, fold the back fabric twice over the edge of the mini quilt and place a few pins to keep each side while you work to sew it, you can sew it with the same stitch you use for the applique.

Step 12
On this photo below you can see the four side of the mini quilt folded and ready to sew.

Step 13
It’s time to work on the embroidery to add the quilt the final touches.

Step 14
As a final touch I added a small button on each corner.
To hang this mini quilt, on the back you can sew a plastic ring or do a button hole by hand, I show how it looks like on the video.

Your mini quilt is finished!! Congratulations!
It’s ready to help you to decorate your home for the Holidays!
It’s so easy and fun to make this mini quilt with a snowman that I’m sure you’ll make more than one.
Don’t forget if you make it, you can share a photo of it on my Facebook page Alejandra’s Quilt Studio on a comment, or if you blog about it or if you share it on your Social Media, let me know so I can give you a like to your mini quilt, I will love to see it!
Make more quilts with snowmen:
Christmas Time Redwork Free pattern
If you like this mini quilt with a snowman and you’ll make it later, PIN it so you can find it again.

