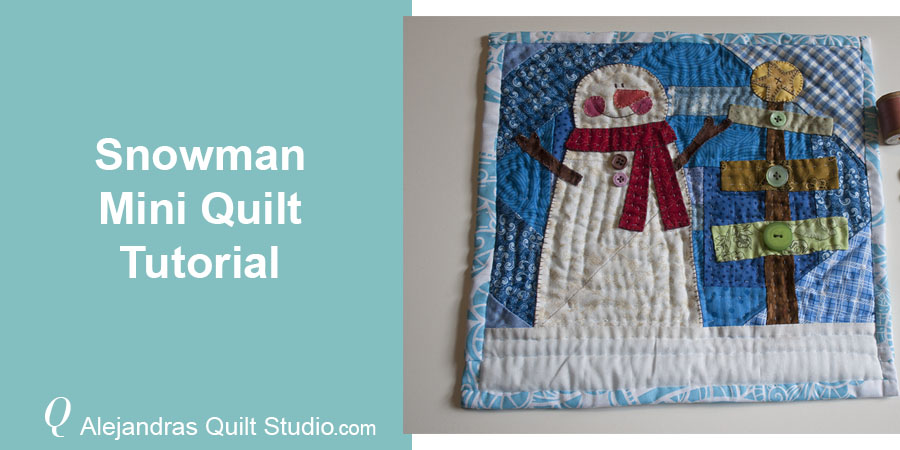
A cute Snowman Mini Quilt Tutorial to make on time for the Holidays, easy to follow step by step tutorial to make an appliqued snowman mini quilt to decorate any corner of your home!
With the Holidays around the corner and when weather starts to get fresher, its time to get indoors and work on a small quilting project to decorate our home during the Holidays.
 If you have followed me for some time, you might know I own a small Snowman Mini Quilt Collection, every year I like to make one or two more to add to the collection.
This year I decided to make a Mini Quilt that can be used as a mini quilt to decorate a table-top, or it can be hung on a wall, but it can be also used as a pillow case or even to keep the young people in your families pj’s in it, easy to fold the pj’s and just put in the pillow case and it will look so cute on their beds. I’m sure you’ll be making more than one!
Snowman Mini Quilt Tutorial
You will need:
- Different pieces of fabric to work on the crazy quilt
- Different pieces of cotton fabric to work on the applique
- 1 piece of white fabric
- 1 piece of thin batting fabric of 12 x 11.5 inches of 12 x 2.5 inches
- 1 piece of cotton fabric any color for the back of the pillow case of 12 x 11.5 inches
- 1 piece of cotton fabric any color for the back of the pillow case of 13 x 12.5 inches
- 1 piece of cotton fabric any color for the back of the pillow case of 13 x 5 inches
- Scissors
- Sewing Machine
- Needle
- Pins
- Safety pins
- Patchwork ruler, rotary cutter, cutting mat
- 5 Buttons
- Embroidery Thread
Snowman Mini Quilt Step by Step Tutorial
Click here to download the free pattern.
1 – How To Make A Crazy Quilt
For this mini quilt, you need to start working on making a crazy quilt.
When you make a Crazy Quilt, you start sewing together two small pieces of fabric, 1/4″ seam by hand or with your sewing machine, open and press and then you will sew on another piece of fabric to the two pieces you have sewn first, open and press and you will sew on another piece of fabric.
You need to keep working on it the same way until you reach the size of the quilt required to make this mini quilt, press.

2 – Trim The Top Of The Quilt
With a patchwork ruler, a rotary cutter and a cutting mat, trim out the top of the quilt.

3 – Prepare All Pieces For The Applique
You can download the Snowman Mini Quilt FREE pattern here, print it out and make a copy of it, so you can cut out all the pieces you need for the mini quilt from one copy and save the other copy in case you want to make a new mini quilt later.
Once you have all the paper templates cut, lay the snowman template over a white fabric on the right side and with the help of a pencil, trace the shape of the snowman, cut out the piece adding 1/4″ for the seam.
With the rest of the templates, as they are smaller in size, lay each template on the wrong side of the fabric and pinch a pin or make one or two stitches on each piece, cut out each piece from the fabric adding 1/4″ for the seam.
This time I won’t use the glue to stick each template to the fabric, but you can press each piece seams with your fingers to give the shape of each piece to the fabric, by doing this it will help you to work on the applique with ease.

4 – Do The Applique
Lay each piece for the applique on the crazy quilt, you can pinch one or two pins on each piece or do some stitches as I do on the video to keep each piece on its place while I work on the applique.
Once you have all the applique pieces on their place, you can work on the applique of each piece by folding the seam inside and by doing small stitches.
When you finish the applique of all the pieces, you can cut out the crazy quilt from the back from the snowman, by doing this it will help to show the snowman fabric white and the fabric from the crazy quilt will not shade the snowman white fabric.
You don’t need to trim out the crazy quilt fabric from the rest of the pieces as they are two small.

5 – Make the Quilting Sandwich
Sew on the white piece of fabric and press. Your mini quilt is ready to make the quilting sandwich.
Lay on your work table the fabric for the back of the quilt, right side down, lay over it the batting fabric and lay over the batting fabric the top of the mini quilt, you can pinch a few pins or safety pins.

6 – Quilting Time!
It’s time to work on the quilting, I love to do it by hand, but if you want to do it with your sewing machine, it will be OK too!

7 – Time to Work On the Embroidery and Sew In The Buttons
It’s time to work on the embroidery of the face, I did this step by doing the applique of the nose and cheeks with small pieces of fabric with raw edge.
The embroidery stitches you will need are:
- Blanket stitch – For the nose, cheeks and all around of the snowman, scarf and star.
- Satin stitch – Eyes
- Back stitch – Mouth
Now you can sew in the buttons.
As a final touch, you can make some big stitches all around the 4 edges of the mini quilt and trim it with the help of a good pair of scissors (batting fabric and back fabric).

8 – Time To Work On The Back Of The Mini Quilt
This time I wanted to finish this mini quilt to be used in different ways, if you want to skip this step, you can sew on a bias on the four sides of the quilt and your mini quilt will be finished and ready to decorate a corner of your home.
But if you want to finish this mini quilt to give it multiple uses bear with me, when you finish your mini quilt this way it can be used as a table-top, to be hung on a wall or it can be used as a pillow case and it can be used by the young ones in your family to keep their pj’s in it.
Cut out the two pieces of fabric for the back and make a hem on one side on each piece, I did it by hand with small quilting stitches, but you can do it with your sewing machine.
You can add a zipper of one or two buttons to these pieces, this time I will leave it open.
Lay these two pieces on the table and over lay one on the other, just enough to be big enough to cover the mini quilt. Lay over this piece the quilted mini quilt and be sure you have one inch of the piece for the back on each side of the quilt. Pinch a few pins to hold the two pieces together while you work on the self biding.

9 – Make The Self Binding
its time to work on the self binding by folding each side of the fabric for the back to meet the edge of the mini quilt, fold it once again over the quilt, pinch a few pins to keep it on its place as you work by hand or with your sewing machine to sew to close the binding.

10 – Finish Your Mini Quilt
The self binding when its made by hand, it will be made with small stitches and each stitch should go to the back fabric, by doing this will help the mini quilt or the pillow case to have a better finish.

Your Snowman Mini Quilt is finished and it looks amazing!
How fun is to make a mini quilt with a cute snowman on it and ready on time to decorate any corner in your home during the Holidays!
Closing Thoughts
 Whether you place it over a table, hang in on a wall or use it as a pillow case or to keep the pj’s on it, it will look cute and it will make everyone happy every time you all see it!
Today I have a new mini quilt with a snowman on it to add on my collection, it has been growing good as I keep making one or two more every year?
Do you have a Snowman mini quilts collection too? Leave your answer on a comment, I love to read your comments!
Don’t forget to follow me on Facebook and also on YouTube!
You also can read:
- Christmas Gnome FREE Pattern – Make a pillow case with a cute Christmas Gnome with a Paper Piecing Pattern.
You can watch the video here,