The 3D Bow Tie Quilt Pattern is easy and fun to make, and today I’m sharing the easy steps to make it with a 3D trick.
3D Bow Tie Drawstring Bag is an easy tutorial to make the patchwork block first, and then you will be making the quilted bag.
There are plenty of Quilt block patterns to make, but when you can make one with just a few seams and with a 3D trick, it will add that extra plus that you always look for, when making a patchwork project.
On this tutorial, you will find first the easy steps to make a quilt block, with 4 Bow Tie small blocks, then you will use this patchwork block to make the drawstring bag.
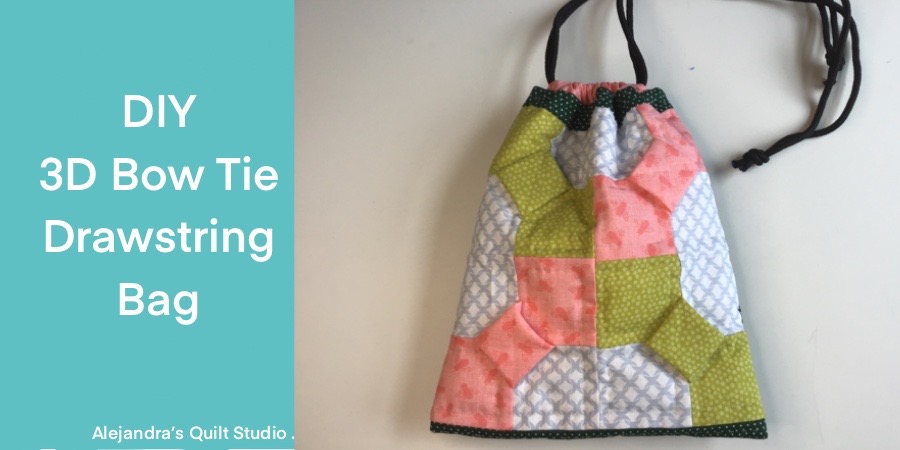
3D Bow Tie Drawstring Bag
How To Make A Bow Tie Drawstring Quilt Block

Cut your fabrics – I will list below the fabric pieces you will need to make one bow tie block, you will need 4 blocks to make the bag, you can cut the pieces of fabric you will need to make the other 3 blocks by cutting 3 times the pieces of fabric required to make one block later.
- 3 pieces of fabric A of 2 1/2 x 2 1/2 inches
- 2 pieces of fabric B of 2 1/2 x 2 1/2 inches
1. Take one piece of fabric A, and fold it, so the wrong sides are together, and the right side will be facing you.
2. Take one piece of fabric A, and lay it over the folded piece, right sides together, turn it over so you can see the folded piece on top, take one piece of fabric B, and lay that piece on top of the other two pieces, pinch two pins to hold the three pieces of fabric together, stitch on one side, 1/4 inch seam allowance, one side, where the folded piece is half-way between the two pieces of fabrics.
3. Open the piece, and you will have the folded piece in the middle, and one piece of fabric A on one side and a piece of fabric b on the other side, lay the piece on your work table, the two open pieces to one side, and the folded piece to the other side.
Lay one piece of fabric A on the folded piece, where the fabric B piece on the other side is, and lay one fabric B piece, on the other side where the fabric A is, pin two pins and stitch on a 1/4 inch seam.
4. Open the piece, to lay it on your work table flat, and open the folded piece in the middle to the sides, match the seams in the center, and pin two pins to hold the whole piece while you sew on a 1/4 inch seam.
Open the piece and you will see the 3D Bow Tie block is done, now you can make the other 3 pieces.
5. Lay on your work table the four 3D Bow tie blocks, and sew on two blocks together to make two strips, then sew on the two strips to make the quilt block.

How To Make A 3D Bow Tie Drawstring Bag
1. Cut your fabrics
- 1 piece of cotton fabric of 1 1/2 x 8 1/2 inches
- 1 piece of cotton fabric of 8 1/2 x 10 inches
- 1 piece of thin cotton fabric of 9 x 20 for the quilting sandwich back
- 1 piece of thin batting fabric of 9 x 20 inches
- 1 piece of any fabric you like for the lining, you will need to measure the quilted piece, after you made the running stitch all around and trim the batting fabric and the fabric for the back on the quilting sandwich, cut a piece of fabric for the lining the same size.
- 2 pieces of cotton fabric of 1 1/2 x 7 1/2 inches (drawstring channels)
- 2 Cotton cording or ribbons
2. Lay the 3D Bow Tie Block on your work table and sew on the small piece of fabric on one side, and sew on the big piece of fabric on the other side, press both seams.

3. Make the quilting sandwich by laying the piece of thin cotton on your table, pretty side down, the thin batting fabric in the middle, and the patchwork piece on top, pretty side up, pinch a few safety pins and do the quilting by hand or on your sewing machine.
When the quilting is done, run a basting stitching all around the edge, trim the batting fabric and the fabric on the back.
4. Take the two pieces of fabric for the drawstring channels, and fold twice each end each piece of fabric, and sew on.
Fold in the middle lengthwise each piece, and lay each piece on top and bottom on the quilted piece, pinch a few pins and sew on each piece on the quilting piece, 1/8 inch seam allowance.

5. Fold in the middle the quilted piece and the piece of fabric for the lining, stitch on both sides on your sewing machine.
Leave an open gap of 2 inches on one side on the piece for the lining.
6. Turn out the quilted piece.

7. Tuck in the quilted piece (pretty side out) into the lining piece (pretty side in), match the seams on both sides and match both pieces on the top, pinch a few pins all around, sew on all around both pieces together on your sewing machine.
Turn out the bag.
8. Tuck in the seams in the open gap on the lining, and sew on your sewing machine to close the open gap.
9. Tuck in the lining inside the bag, and top stitching all around the bag opening.
10. Thread the cordings through the cording channels. Thread each piece through both channels, so you can have both ends of each cord on each side, tie each cords ends together.

The 3D Bow Ties Drawstring Bag is finished, and it looks amazing!
You can find more tutoriales to make more pretty Patchwork bags here!
Thanks so much for reading my blog today!

Video Tutorial: