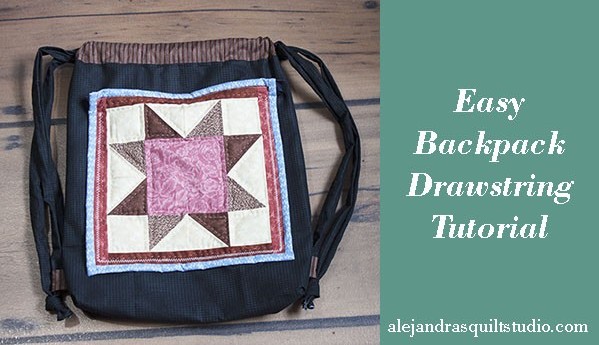
Sometimes when we finish a quilt, there’s a block that is a left over and we don’t know what to do with it.
A backpack with a patchwork block will be something new to sew and it’s something useful and nice to take with you all the time.
Puedes leer este tutorial en espanol en mi blog de patchwork en Ale Cose y Cose.com
Easy Backpack Drawstring Tutorial.
This time I would like to share with you a tutorial to make a backpack drawstring with a patchwork block.
It doesn’t matter if you have a smaller block or the same size as I used to make this backpack, if your block is smaller it will be perfect too.
You will need these materials to make the Drawstring Bag:
1 Patchwork block, quilted or not quilted.
1 zipper same length as your patchwork block.
2 pieces of fabric of 33 x 15.5 inches.
2 pieces of fabric of 7.5 x 9 inches (for the pockets in the inside of the backpack) you can decide whether to put these pockets or not.
1 zipper 8 inches (for one of the pockets)
2 pieces of fabric of 3 x 3 1/4 inches, for the small pieces to hold the cord on each side of the backpack.
2 pieces of fabric of 14.5 x 4 pulgadas.
3 pieces of fabric of 3 x
Tutorial step by step to make the drawstring Patchwork bag

1. Fold on the middle the two pieces of fabric for the backpack and cut 1 x 1 on each side of each fabric, after you do the cut your two pieces of fabric should look this way.

2. Sew the two pockets on the fabric for the inside of the backpack, one of the pockets should have a zipper.
I used to sew a zipper always in one of the pockets in the inside just to have a pocket to keep more valuable things in the backpack.

3. The piece of fabric you’ll use for the inside of the backpack should look like this after you sew the two pockets on it, one with zipper and one with no zipper.

4. Sew the patchwork on the fabric you’ll use for the backpack for the pocket, I used to sew a zipper to make this pocket safer.

5. On this picture you can see a close up of the patchwork pocket, I did a regular stitch first right next to the blue bias, then I did a second stitch on the three sides of the pocket.

6. Fold the two pieces of fabric in the middle as I show it on this picture and sew both sides of each fabric, don’t sew on the 1 x 1 inch.
In the fabric that you’ll use for the inside, on one side leave 4 inches with no sew to turn out the backpack when it’s finished.
Note: Before you sew both sides of the fabric for the backpack, you need to sew one side of each fabric of 3 x 3 1/4 inches, turn each piece out and fold them in the middle, place each piece on each side of the fabric for each backpack one inch up of the 1 x 1 inch cut.
Sew both sides of the fabric for the backpack, you can see on this picture how I placed these pieces of fabric on each side.

7. Take these two pieces of fabric and fold twice each end and sew.
Fold in two.

8. Place each piece on each side of the open side of the backpack, you can use pins to hold the pieces in its place and sew.

9. It’s time to sew to close the cut of 1×1, open it and place the fabric to sew. Sew each corner of the two fabrics.

10. Turn out the bag for the inside, you can see here how I did the inside pocket with no zipper. and you can also see in this picture I like to put a key’s ring to hold my keys and this way my keys don’t get lost in my bags.

11. Place the inside bag in the backpack, and sew both bags together.

12. Turn out the back pack by the open space you left when you sew the fabric for the inside.

13. You can use your sewing machine to close the interior bag.

14. This how your backpack will look.
You can use long shoe cord for the backpack or you can sew two long cords of fabric is how I did it.
You need to cut two, three or four strips for 3x for the wide of your fabric to make the fabric cords.
Just sew together the strips of fabric to make a strip as long as you need it. Fold it and sew all the long side, turn it out and place it in the back pack.
You can tie a knot to hold the cord or the fabric strips or you can sew the strips.

This is how your backpack will look like.

Your backpack is ready to be used!
Hope you like this tutorial, you can follow me on Facebook, Pinterest and Instagramand get the updates of my work!
If you make this backpack and you make a blog post on your blog about it, please share a link to my website and credit me!
If you have any questions about this tutorial, leave a comment and I will reply to you.
Si quieres leer esta misma tutorial en espanol, visita mi blog de patchwork en espanol Ale cose y cose.com
If you like this backpack with a patchwork block and you want to make it later, you can PIN IT so you can find it again.

