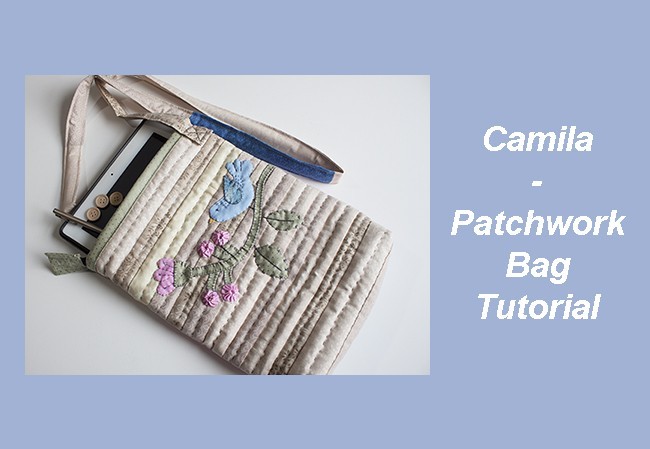
Camila – Patchwork Bag Tutorial, it’s made to give you the steps to make a bag to carry all those small things, from your smart phone, money, to your favorite make up and more!
Bags made with patchwork are always pretty and I’m sure you’ll fall in love with the “Camila” bag.
A few hours in the sewing room, and a few pieces of fabric and you will make a beautiful patchwork bag that I’m sure it will become a great topic of conversation with your friends.
From “did you make it?” to “will you make one for me?” – please come back later and let me know how many Camila patchwork bag you had to make, I will love to know.
Today’s tutorial is a little longer than the other tutorials I’ve shared in my blog before, so it’s better I keep the introduction short and let you go to read the tutorial.
As always, I made a video in Spanish, you can watch it and I’m sure it will help you to get the steps I followed to make the Camila patchwork bag, But you can find here a full tutorial in English so you can follow the steps in your language.
Puedes leer este mismo tutorial en espanol en mi blog Ale Cose y Cose.com
Materials:
This time you will find a full list of the different materials you will need for this tutorial in separated lists for each part of the bag.
Courthouse Block.
1 piece of cotton 100 % fabric of 2 x 2″ for the center of the Courthouse block.
3 strips of cotton 100 % fabric in pink, the strips should be in different pink tones or prints, 1 1/2″ wide, the length will depend on the size of the row.
2 strips of cotton 100 % fabric in blue, the strips should be in different blue tones or prints, 1 1/2″ wide and the length will depend on the size of the row.
1 piece of thin batting fabric of 10 x 10″
1 piece of cotton 100 % fabric for the back.
1 zipper 8″
1 piece of fabric for the bias of 10 x 1 3/4″ (G)
1 piece of cotton 100 % fabric of 10 x 6″ (A)
1 piece of cotton 100 % fabric of 10 x 10 (E) This piece is to make the inside bag.
Bag front.
You will need a few strips of different beige tones or prints of 9″ long and the width of each strip will be different, you will sew them to make a block of 9 x 11 3/3″
Batting fabric (thin) of 11 x 14″
Cotton fabric for the back of 11 x 14″
A few different cotton 100 % fabric on different color and prints to make the applique.
Inside Bag.
1 piece of cotton 100 % fabric of 11 x 10 1/2″ (B)
1 piece of cotton 100 % fabric of 7 x 7 1/2″ (C)
1 button of any color.
1 piece of cotton 100 % fabric of 1 x 1/2″ (H)
Keys Ring.
1 keys ring.
1 piece of fabric of 5 x 2″ (D)
To finish the bag.
1 zipper 12 ”
1 piece of fabric for the bias of 1 3/4″ x 21″ (E)
1 piece of fabric of 2 x 4″ (F)
2 buttons of different size and color.
Strap.
1 piece of fabric of 3″ wide, the long of this piece of fabric will depend on how long you need it, you need to measure yourself.
1 piece of thin batting fabric of 1 x the same long as the piece of fabric you will use to make the strap.
Patchwork tools you will need.
Needle, pins, safety pins, polyester 100 % thread, quilting thread and DMC embroidery floss.
I share some affiliate links on this post, so you can take a look to the same quilting and embroidery tools I used to make my quilts, when you purchase your quilting tools with the affiliate links, you get your tools on the regular price and I’ll get a small % of the price, this way you help me to keep working on my quilts and I can keep sharing the tutorials to you.
I thank you for your support.
Video:
Don’t forget to follow me on my YouTube channel and be the first one to watch my new tutorials!
I thank you for your likes, comments and shares!
Tutorial:
Step 1
In this step you will make the two blocks you will need to make the Camila patchwork bag.
To make the Courthouse block, you need to start working in the center with the piece of fabric of 2 x2″ and start sewing each piece of fabric as you keep sewing, blue fabric goes in one direction (both sides of the block) and pink fabrics go in the other direction, (up and down of the block). Press.

Step 2
To make the block for the front of the bag, all you need to do is to sew all the strips you have to make this block one by one until you get the right size for this block, press.

Step 3
It’s time to make the quilting sandwich, place the fabric for the back first, then place the batting and on the top place the block with the strips, put a few safety pins to hold the three layers of fabric while you work on the quilting.
I did the quilting by hand, but you can make it by machine.

You need to do the same steps to make the quilting sandwich for the Courthouse block.

Step 4
This is how the hand quilting looks after I finished it.

This is how this Courthouse block looks like when I finished the hand quilting, I also made a running stitches all around the block, by doing this, it will be easier to work on the next steps for this part of the bag.

Step 5
You can download the Camila patchwork bag templates here.
Camila patchwork bag template 1
Camila patchwork bag template 2
Camila patchwork bag template 3
When you get the templates, you can make a copy of them, this way you can always keep one copy just in case you want to make another bag later.

Get all the fabrics you will use to make the applique.

Step 6
Cut out all the templates for the applique, I use this step by cutting the templates with no seams on them, I use to place each template on the fabric and mark each template with the help of a pencil.
When I cut out each piece of fabric, I add the seams of 1/4″ to each piece.

Step 7
The first step is to cut the bias to make all the flowers stalks, I gave you a template for it, you will need to cut the lines with the help of a pair of scissors and place the paper sheet over your quilted block, trace the lines on the fabric with a pencil or a marker for fabrics.
These lines will help you to work to sew the bias to make the stalks.
You need to make the small stalks first and at the end, sew the bias to make the long stalk.

When you finish sewing the bias to make all the stalk for the flowers, you can work on the different pieces of the applique.
The four small flowers are made with the yo-yos technique.

When all the pieces of the applique are made, you can work on the applique.
You will need to work on the embroidery this way:
- Button hole stitch on all the stalks and wing. (use one strand of embroidery floss)
- Back stitch for the leaves (use two strands of embroidery floss)
- Back stitch for the petals and end each line with an X stitch (use two strands of embroidery floss)
- X stitches on the edge of each leaf. (use two strands of embroidery floss)
- Satin stitch on the bird eye
- Quilting small stitches in the bird. (use two strands of embroidery floss)

Step 8
Fold one side of the fabric (A) 1″, and sew one side of the zipper to it.
Sew the bias to one side of the Courthouse block (G) and sew the other side of the zipper to this block.

Step 9
To make the inside bag, you will need to make a double fold on top of the fabric and run your sewing machine on it. (B)
Take the fabric (C) and make a double fold on one side and run your sewing machine on it. Make a simple fold on the other three sides of this fabric, place this piece over the fabric (B) and run your sewing machine on the three sides.
Place the piece of fabric (H) on the top of the fabric (B) and run your sewing machine on the four sides of this piece, make a button home with your sewing machine.
Lay this piece on the back of the quilted block for the front of the bag, place some pins to keep it in its place while you work on the bag.

Step 10
This photo is to show you how the zipper looks like on the piece of the back of the bag,

Step 11
Place both parts of the bag together, right side to right side and run your sewing machine on the bottom side, you will need a piece of fabric to sew it at the same time you sew both parts of the bag, this fabric strip is not listed on the materials, 1 13/4 x 10″
Fold the fabric as a bias and close it with your sewing machine.
Run your sewing machine on both sides of the bag.

This is how your bag looks like when you have sewn both sides of the bag, you need to trim both side of the inside fabric and make a zigzag stitches with your sewing machine on both seams.
Trim both seams on both sides of the bag, and fold each side as a bias and sew to close each side.

Step 12
To make the keys ring, you will use the piece of fabric (D) and fold it as a bias and run your sewing machine, fold one end and place the keys ring on it, sew to close with your sewing machine.

Trim both seams on both sides of the bag, and fold each side as a bias and sew to close each side. Don’t forget to place the keys ring while you close the bias in one side of the bag.

Step 13
It’s time to make the box in the bag, you will need to pinch each side to get this way as I show you on the photo each corner of the bag,
With the help of the patchwork ruler, draw a line from one inch from the point, place a pin to hold the fabrics while you sew it on your sewing machine.
When you sew each boxed corner, you will need to add one piece of fabric each time, these pieces of fabric are not listed, you will need two pieces of fabric of 1 3/4 x 4″
After you sew each boxed corner, you can trip the corner with the help of a pair of scissor, and fold the fabric as a bias and close it by hand.

This is how both boxed corner should look like when you finish closing the bias.

Step 14
On the piece of fabric (E), you will need to make a simple fold on the four sides and run your sewing machine on the four of them, place this piece on the back of the bag and sew it with applique stitches.

This is how this piece should look like when you finish doing the applique.

Step 15
Trim the top of the bag, and sew the bias (I). You will need to sew it on the inside of the bag, and fold it to close it on the front outside of the bag. You can sew to close with your sewing machine.

You can sew the zipper to the bag. I did it by hand but you can do it with your sewing machine if you want to.
Step 16
You can cut the end of the zipper now, leave it 1 3/4″ long. You will need to make two simple folds on each end of the fabric (F) and sew both sides with your sewing machine, turn this piece out.
Place the zipper end inside of this piece and run your sewing machine on both sides.

Sew the two buttons on this piece to decorate it.

Step 16
It’s time to work on the last step to finish this patchwork bag, you can buy a strap for it and just sew it to the bag, or you can make your own strap as I did.
I cut the piece of fabric to make it, I like to sew together a few pieces using the same fabrics I used to make the bag, 3″ wide and the length will depend on how long you will need it, you need to measure yourself and cut the strip as long as you need it.
Fold both sides of this piece of fabric and you would do for a bias, place the batting fabric inside and fold the fabric in the middle, sew to close with your sewing machine.
Once the strap is ready, sew both ends to the bag, one end on each side of the bag.

Congratulations, your Camila Patchwork bag is finished and it looks awesome!!

Now your new patchwork bag is ready to help you to carry everything you need!
I know, this time the tutorial has many steps to work on but I think it is worth every step!
You have made a beautiful bag and I’m sure it will become a topic of conversation, and I’m sure you will get some questions about how did you made it, you can share this tutorial so your friends can make it too.
I will thank you if you help me to share this tutorial on your Social Media 🙂
Don’t forget you can follow me on Social Media and be the first one to know the moments I share about my work!
I thank you for your time to stop and read my blog, now I will let you go as I know you’re already thinking on what fabrics you will use to make this patchwork bag!
Thanks you for your visit and remember to leave me a comment!
You can find more Patchwork and quilting projects to make here
If you want to make the Camila Patchwork bag later, you can PIN IT so you can find it later.