Baltimore quilts are beautiful and easy to make, today I have a full tutorial for you to learn how to make patchwork – applique block 2, this block is part of the Baltimore mini quilt.
Last week I shared the post on my blog “How to make Patchwork – applique block 1”.
This post is part of a series of 6 and + post I will be sharing to make a mini quilt Baltimore with 6 blocks and a border at the same time as I work on my own mini quilt.
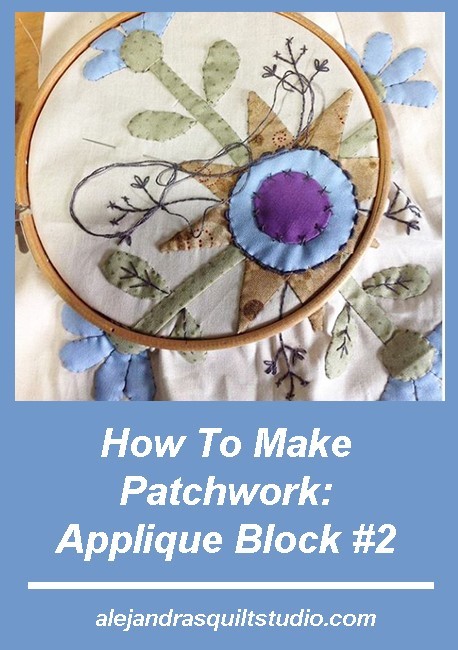
The block #2 is also made with four lines of flowers with a center, this time the center has 8 triangles to make a star with two circles.
Easy and fun to make, it won’t take long to finish it.
You will need these materials to make the block #2:
1 piece of white or light beige fabric of 10 x 10″
Some pieces of different color and prints of cotton 100 % fabric.
Polyester 100 % thread or cotton thread for quilting.
Pins.
Needle.
Scissors, you can check the brand and price of the scissors I use on the video on Amazon.
You can download the two FREE pattern pages here:
>>> Download FREE pattern Baltimore block 2A <<<
>>> Download FREE pattern Baltimore Block 2B <<<
Video.
I made the video in Spanish, but I think you will find it useful to watch it and take a look to the steps I follow to make the block #2 for the mini quilt Baltimore, I describe the steps in English with photos below.
How to make Patchwork – applique block #2
Step 1
As you did to make applique block #1, you need to fold the fabric square matching the corners and press with your fingers a line, and do the same with the other two corners to mark a line.
With the help of a pencil, mark the length of the lines where you need to applique the bias for the steams of the flowers.
The bias is 1″ wide.
Press lightly the bias by the middle, and sew it from mark to mark with a running stitch, then fold the bias and close it with applique stitches. Do the same with the second bias.

Step 2
Download and print the templates to make the applique of the eight points star, Cut the templates without seam and mark it on the fabric, when you cut each point from the fabric add 1/4″ of seam.
With the template of the big circle, trace it on the center of the block with a pencil or a pen to mark fabrics.
Fold the seam and press, place each point on its place and do the applique, each point at the time.

Step 3
Cut the templates for the two circles, and cut the fabric for each one, don’t forget to add the seam on each circle.
Make a running stitch at the edge of each circle and pull it out like you do when you make a yo-yo, place the template inside of the circle, and pull out the thread, press gently the fabric to take the shape of the circle with your fingers.

Step 4
Place the big circle on the center of the block and do the applique stitches to sew it on the block. Do the same with the smaller circle.

Step 5
This time you will need to trim the fabric on the back, as there are three layers of fabric in the center of the block, it would turn too thick to do the hand quilting.

Step 6
To applique the flowers at the end of each line, you will need to cut out the petals templates, and cut as many times as it’s marked.
Trace the template on the fabric and cut out each piece of fabric adding the seam of 1/4″, this time as each piece is small to work with the paper template inside, I used the olf fashion applique technique, I fold inside the seam as I go working on the applique.

Step 7
Follow the sames steps to applique the circles on each flower and the leaves as you did on step 6.

Step 8
This photo is just to show you how my work table looks like when I’m working on the block #2

Step 9
It’s time to do some embroidery on block #2.
With a pencil trace on the fabric the lines you will need to do the embroidery.
You will need to work on the embroidery with satin stitch, back stitch, daisy stitch, X stitches,

Step 10
Another photo of my work table while I work on the applique as I make a short video to share it on Instagram.

Congratulations you’ve finished the block #2!
I’m already currently working on the block #3 and it will be ready to be share on the next blog post, don’t forget to come back to make it.
We are almost half-way to make the Baltimore mini quilt, I hope you like my designs and you follow me to make it too.
If you have any questions about how to make patchwork – applique block 2, leave a comment below and I will answer it.
Don’t forget to follow me on Facebook, Instagram, Pinterest and YouTube.
I thank you for stopping by and read my blog.