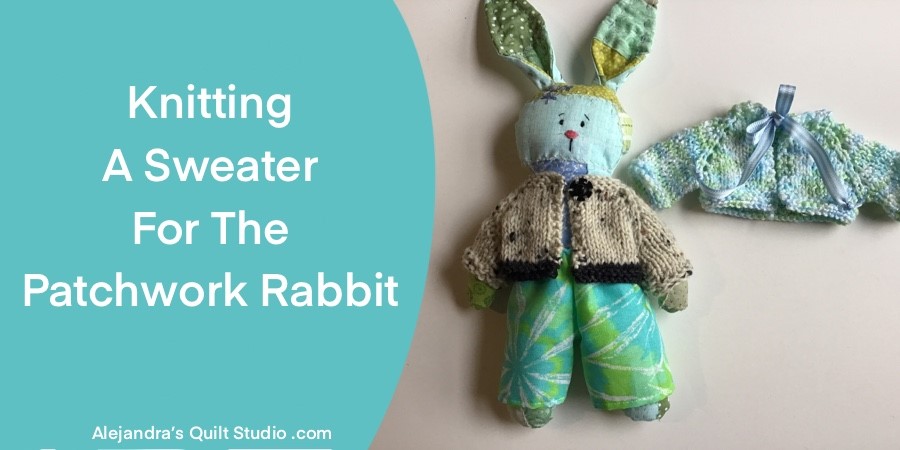
Whether you’re making the Patchwork Rabbit for yourself or to give it as a gift to a special person, like one of your kids or grand-kids, I’m sure they will have more fun if they have some clothing for the handmade doll.
Knitting Sweater For Patchwork Rabbit is a tutorial to make a small sweater for a handmade rag doll, this is a small project to knit and I’m sure when you see how easy it is to make it, you’ll be making more than one!
Before I start writing this tutorial, I want to apologize in advance, as I’m not a good knitter and I am a self taught knitter, besides this, my mother tongue is Spanish and writing a knitting tutorial in English is hard for me, so if you see that it doesn’t make any sense at all the instructions, you can watch the video to get a better idea of what are the steps to make the sweater.
Knitting Sweater For Patchwork Rabbit
For this tutorial I’m using 3.5 mm knitting needles.
- K : Knit
- P: Purl
- R: Row
Note: all the rows should be made with the first and the last two points always K
Knitting A Sweater For Patchwork Rabbit – Cast On 32 St
Cast on 32 st and make 3 rows with K
To start working on the sleeves, you will need to start knitting the row and follow the next instructions to divide the points to make the two fronts, the two sleeves and the back.
All the increases are made by “yarn over”
4R: 7k, M1R, 1k, M1L, 14k, M1R, 1k, M1L, 7k
5R: 8k, M1R,1k,M1L, 3k, M1R, 1k, M1L, 16k, M1R,1k,M1L, 3k, M1R, 8k
6R: 9k, M1R,1k,M1L, 5k, M1R, 1k, M1L, 18k, M1R,1k,M1L, 5k, M1R, 9k
7R: 10k, M1R,1k,M1L, 7k, M1R, 1k, M1L, 20k, M1R,1k,M1L, 7k, M1R, 10k
8R: 11k, M1R,1k,M1L, 9k, M1R, 1k, M1L, 22k, M1R,1k,M1L, 9k, M1R, 11k
9Ri: 12k, M1R,1k,M1L, 11k, M1R, 1k, M1L, 24k, M1R,1k,M1L, 11k, M1R, 12k
How To Knit The Sleeves
Sleeve 1
Knit the first 12k (front body) , sleeve:1k M1R, 12k M1L, 1k,
16st, make 4 rows.
To make the end of the sleeve, then knit the last 4 rows all in K, then cast off all the stitches on the last row., and leave a yarn tail so we can come back later to close the sleeve.
Sleeve 2
New yarn line to knit all the back body points, now knit the second sleeve, follow the same steps to stitch sleeve 1.
How To Knit The Sweater Body
With a new yarn line knit the rest of point for the front body, when making the purl row, make all the stitch together.
Knit 4 rows.
Knit the last 4 rows all in knitting stitches, on the last row cast off all the points.
How To Close The Sleeves
Thread the yarn tail on a tapestry needle, and sew the final points on the sleeve to join them, to close the sleeve, you will need to stitch both sides together by picking the points from each side all along the sleeve. Reinforce the last stitch and weave the yarn in the sweater, cut off the yarn.
Both sleeves should be done the same.
How To Finish The Sweater For the Patchwork Rabbit
As this is a sweater made for a doll, all you need to do is to sew on a snap button on the neck, it will be easier for any young kid to put on and take off the sweater from the doll.
To finish the sweater, thread your tapestry needle with each one of the yarn ends and weave those ends in the sweater.
You can read the tutorial to make the Patchwork Rabbit here!
Thanks so much for reading my blog today.

a
a
Video Tutorial:
a
a