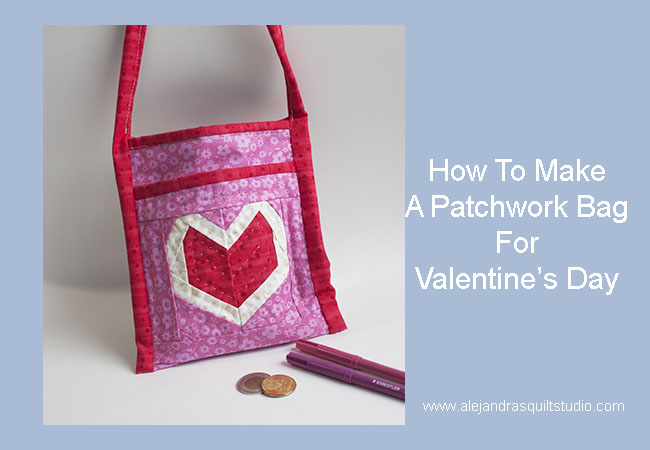
How to Make a Patchwork Bag for Valentine´s Day is an easy tutorial to follow to make a small shoulder bag to carry your cell phone and other important things!
If you love to carry a few things with you all the time but you also love to be light to do all on your daily to do list, this small shoulder bag made with a paper piecing hear will the small bag you were looking for!
As February is here, the idea of making something nice in pink and red might be on your list, nothing better that making something useful and cute.
Make A Patchwork Bag For Valentine’s Day
As you might know by now, there’re so many different techniques to work with while you do quilting or patchwork projects, Paper Piecing is one of them and it will help you to make amazing quilting designs with small and big pattern piecing.
I try Paper Piecing technique for the first time, many years ago, it took me a while to understand how it works and to love it.
It might not be my favorite quilting technique to use when I make my quilts, but I try it once in a while, and every time I use it, I love how the blocks turns out, as they come out perfect no matter how tiny or how big the pieces of each pattern are.
I will suggest you, in case you’re a beginner, to try it, you can start working on it with an easy template, nothing too complicate, and give yourself the chance to work with this technique.
Today, I will share a tutorial for you to try the paper piecing technique, you’ll make a small heart with two fabrics of different color and at the end of the tutorial you’ll have finished a small shoulder bag to carry your cell phone and another important things for you.
On this tutorial you will find the steps to follow to make the paper piecing heart and the steps to follow to make the bag.
To make the tumbling blocks block for the back of the bag, you can follow the same steps on the tutorial to make the tumbling blocks, the size for the tumbling’s blocks for the block to make this bag is 1 1/2″
Materials To Make To A Patchwork Bag For Valentine’s Day
Strap – 1 piece of cotton 100 % fabric in red of 2 x 64″
Strap – 1 piece of thin batting fabric of 1/2 x 44″
Heart paper piecing piece – 7 3/4 x 6 1/4″
Heart paper piecing piece borders:
2 pieces of cotton 100 % fabric in pink of 2 x 4 3/4″ (A)
2 pieces of cotton 100 % fabric in pink of 2 x 8″
Tumbling blocks piece.
1 piece of 7 x 7 3/4″ (D)
Bias
3 pieces of cotton 100 % fabric in red of 7 3/4 x 1 1/2″ (E)
…….
1 piece of cotton 100 % pink fabric of 7 3/4 x 9 1/2″ (F)
1 piece of cotton 100 % fabric for the inside of 18 x 8″ (G)
1 piece of cotton 100 % for the inside of the external pocke of 6 3/4 x 7 3/4″ (H)
1 piece of cotton 100 % fabric for the inside of the external pocket of 7 3/4 x 6 3/4″
Batting fabric.
1 piece of 7 3/4 x 6 3/4″ for the external pocket
1 piece of 9 x 7 3/4″
1 zipper of 8″
Download the free Paper Piecing pattern to make the heart here
Video
Tutorial To Make To A Patchwork Bag
Download and print out the free pattern
Step 1 -The first step to make the patchwork bag with a heart is to download the free paper piecing pattern here.
Once you printed out, you can decide whether to work on it on paper or as I did on the video to trace the pattern on a thin cotton fabric, when you work with a pattern made on paper you will need to remove the paper from the piece after you finish to sew all the pieces of fabric on it.
When you work on a pattern made on fabric, you won’t need to remove the fabric of the pattern when you finish to work on it, that is why I use a thin cotton fabric to trace the pattern on it.
By using a thin cotton fabric will allow me to work on the hand quilting with no problem at all and the final hand quilting look great always.
When you have your pattern traced on paper or on a fabric, you can work on the making of the heart following the numbers to sew the different parts of each half of the heart.
On the video you can watch how I work on the paper piecing to sew the different fabric pieces to make this pattern.
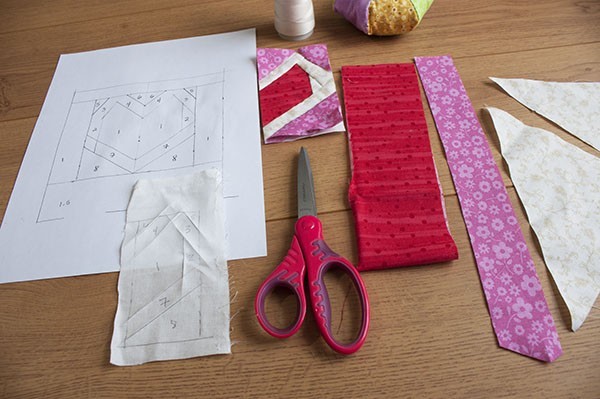
Work on the Paper Piecing Pattern To Make The Heart
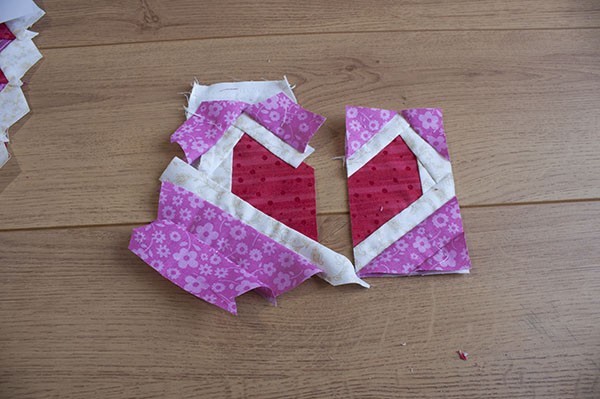
Step 2 -Once you finish to work on the two parts of the heart, you will need to trim the four sides of each half heart. On the photo below you can take a look on the half heart on the left, it looks as it is when you finish to sew all the parts of it.
On the half heart on the right, you can take a look at it as it looks like when you trimmed the four sides of this pieces with the help of the patchwork ruler, the rotary cutter and the cutting mat.
When both parts are trimmed, you can lay one half over the other (right side to right side) and sew by machine to sew both parts to make one piece, open the piece and press.
Sew On The Four Borders
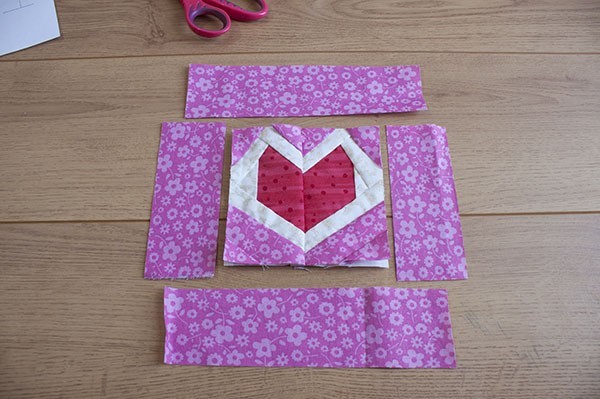
Step 3 – On this step, you will sew the four borders to the heart piece. Sew first both borders on the sides, open and press both borders. (A) and (B)
Sew on the top and on the bottom one border, open and press.
Make the Patchwork Block For the Back Of The Bag
Step 4 – For this step, you will need a piece made with the tumbling blocks (D), you can read the full tutorial to make the tumbling blocks here, and follow this picture to make this picture.
You need to cut strips of fabric of 1 1/2″ to cut the pieces with the 60 degree line on the patchwork ruler. (F)
Onec you finish to make this piece, press and trim the four sides of it.
If you don’t want to make the tumbling blocks, you can make a log cabin block to use instead of this piece, the log cabin piece should have the same size as this block of :
On this step, you will need to sew this block to the piece of fabric. Open and press.
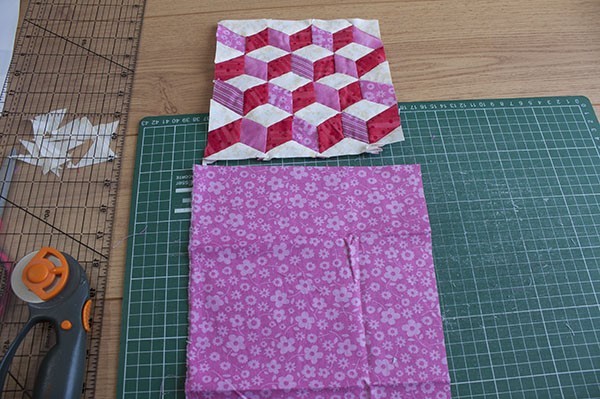
Make the Quilting Sandwich
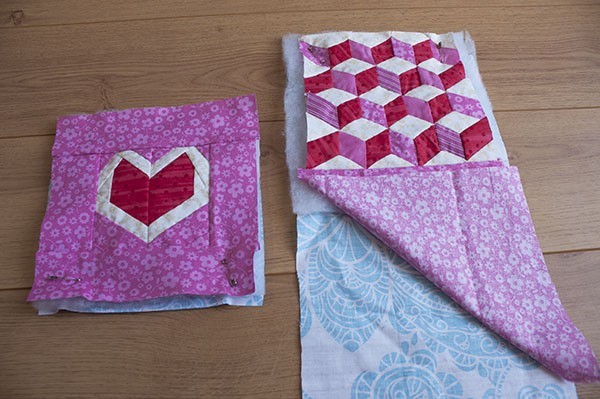
Step 5 – Make the quilting sandwich for both pieces for the bag this way.
Make the sandwich for the block with the heart with the fabric (H) and the bathing fabric the same size as the block, hold the there layers of fabric with four safety pins.
For the larger piece, make the sandwich this way, place the long fabric (G) for the inside of the bag first, facing down, lay over it the piece of batting fabric and lay over the batting fabric the top.
Note: this piece will have no batting fabric in the half of it, as you will use the piece with the fabric to make a external pocket in the bag, there’s no need to have double batting fabric in the half of this piece.
Place a few safety pins to hold the three layers of fabric on this piece.
You can make the quilting by hand as I did, or you can make it by machine, it will look great too.
How To Make The Quilting On The Bag
Step 6 – On this picture below, you can take a look how the two pieces look like when the quilting is finished.
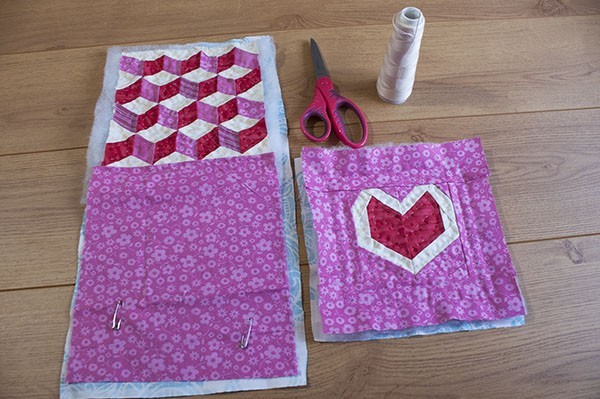
How To Do The Hand Quilting
Step 7 – A close up to take a look to the hand quilting.
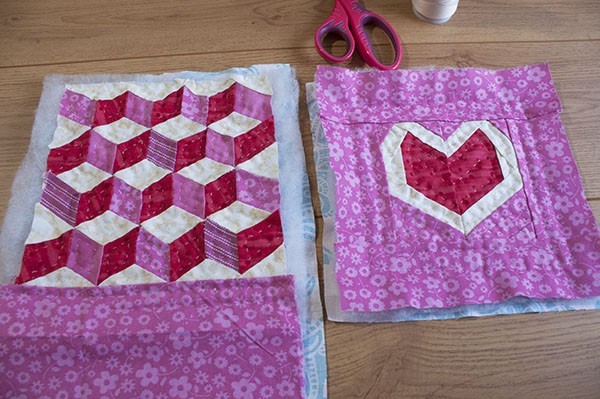
How To Sew The Bias On The Patchwork Pocket
Step 8 – Mark down a line on the quilted piece with a heart on the top of 1″ and sew one piece for the bias. (E)
On the bottom side of this piece, trace a line of : and trim.
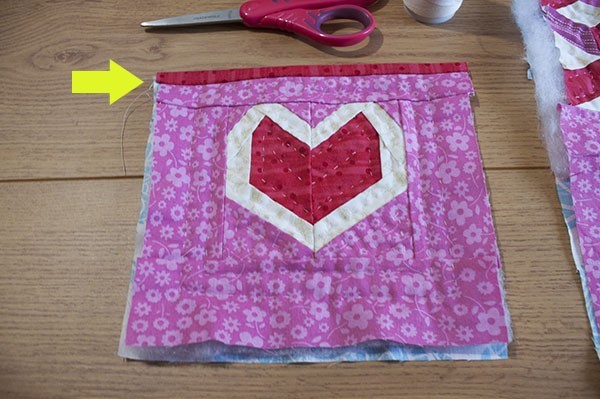
Sew On The Patchwork Bag
Step 9 – Lay the quilted piece with the heart over the larger piece, right side to right size, and sew the small piece to the larger piece by machine.
Once both pieces are sewn together, you can make a second sew with zig-zag stitches with your sewing machine, this way, the external pocket will be sewn strong enough to hold your cell phone and other important things with no problems for you.
Open this piece.
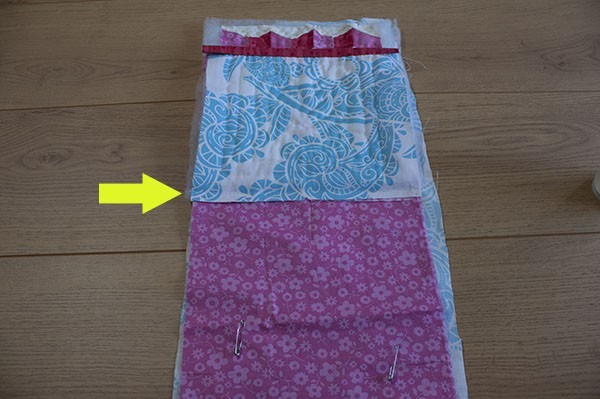
How To Trim A Patchwork Bag
Step 10 – With the help of the patchwork ruler, the rotary cutter and the cutting math, trim both side of the piece, you can follow the patchwork block as a guide as I did on the video.
Pinch two pins on the pocket to keep it on its place as you keep working to make the bag.
Trim the top and the bottom of this piece with the help of the patchwork rule, the rotary cutter and the cutting mat.
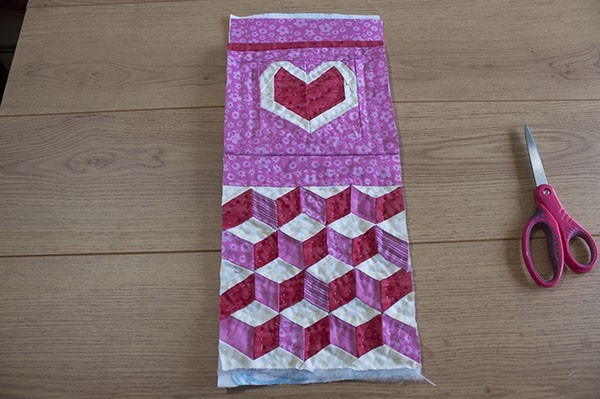
How To Sew A Zipper
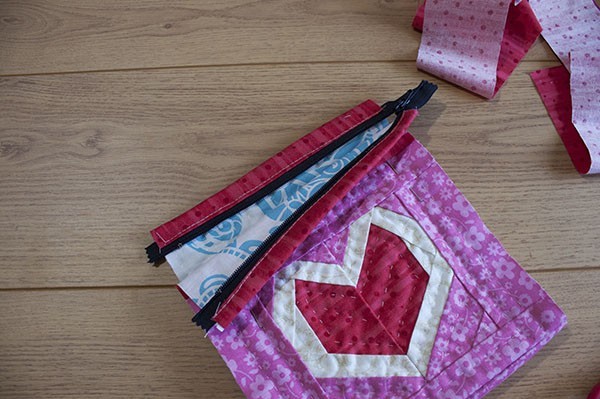
Step 11 – Sew one piece of fabric for the bias on the top and on the bottom on the right side of the bag. (E)
As you sew to close the bias, place the zipper and sew the zipper as the same time as you sew to close the bias.
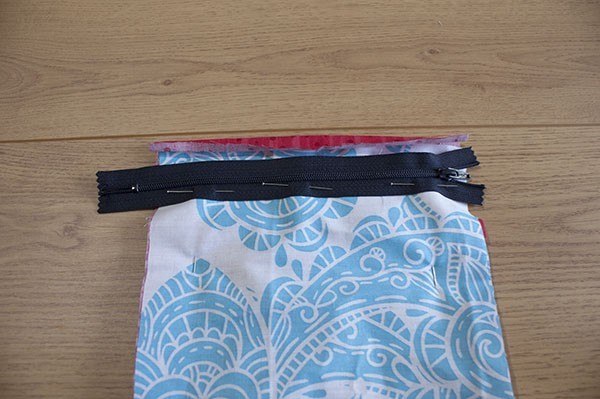
How to Add A Zipper To A Patchwork Bag
Step 12 – The zipper will look like this once you finish to sew to close the bias and the zipper.
Sew the Strap To The Bag
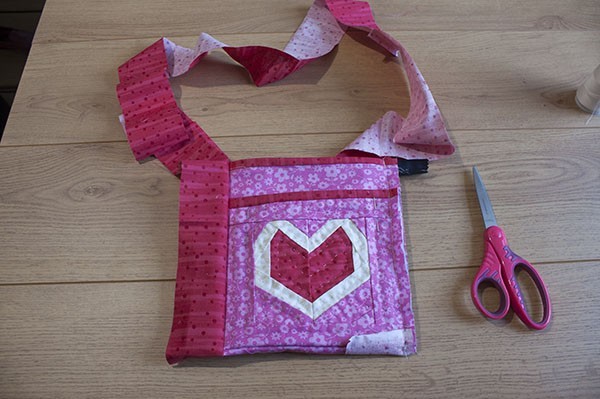
Step 13 – It’s time to sew the fabric strip to make the strap for the bag.
You need to sew this fabric strip on both sides of the bag as this fabric strip was a bias, make a fold in the fabric strip on each bottom end of the bag.
How To Sew To Close The Bag Strap
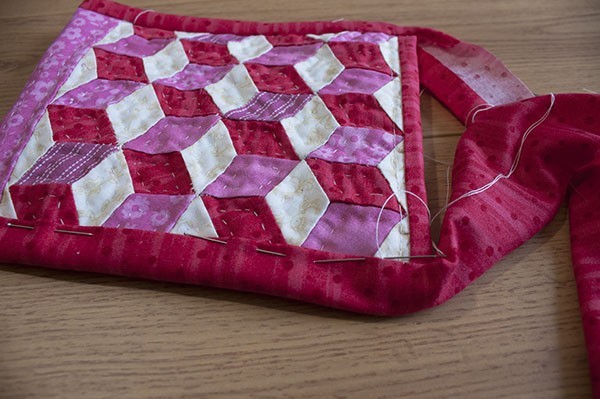
Step 14 – Fold the fabric strip on each side to close as it was a bias, I did this step by hand, you can decide to do this step by machine, both ways will look great.
To sew to close the strap, you need to continue to fold the fabric strip as it was a bias, and just sew it by machine.
As you sew to close this piece, you can put a thin strip of batting fabric is you want to have a quilted strap for your bag.
Congratulations your patchwork bag with a heart is finished and it looks fantastic!
A few steps to follow and you have a beautiful patchwork bag to carry with you your cell phone and other important things for you as your money, keys and maybe a small notebook.
Don’t forget, if you love to make patchwork and quilting, to follow me on my Social Media, where you can see the updates of my quilting adventures in Quebec.
If you have any question about this tutorial, write your question on a comment and I will reply to you.
If this tutorial isn’t what you have in mind to make today, you can take a look to the FREE patchwork patterns and I’m sure you will find a patchwork project to make today.
You might want to come back to make this patchwork bag with a heart later, PIN IT, it will be easier to find this tutorial later.

