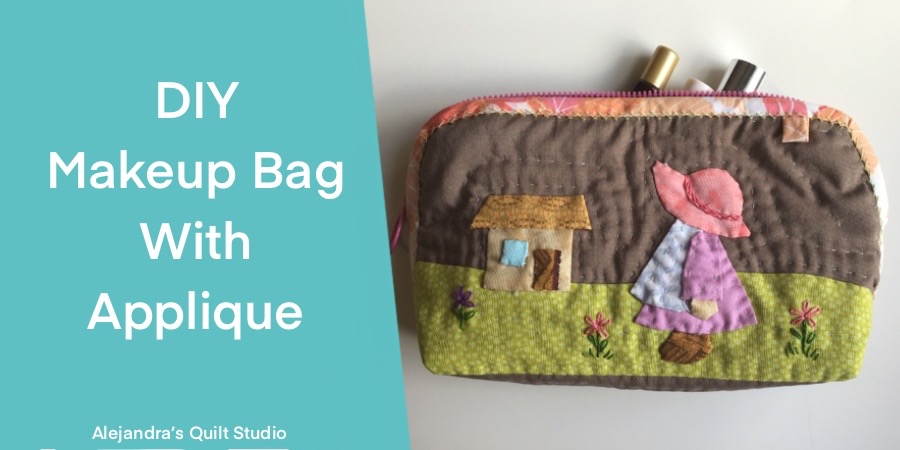
DIY Makeup Bag With Applique is an easy tutorial step by step, to make a bag to keep all your makeup, creams and brushes in one place.
When you love to make patchwork, you can make many different things, making a bag with an easy to make applique in the front side and with an easy to make hand quilting in the back side, is a great way to make a bag to keep all your make up and face creams in one place.
Whether you make it for yourself, or for a family member, don’t forget you can also make one to give it as a gift to your friends, you can make as many makeup cases as you need, as this bag is easy and fun to make.
Makeup Bag With Applique
Let’s jump into the step by step tutorial.
1. Cut Your Fabrics
- 2 pieces of cotton 100% fabric, any color, of 10 x 13 inches
- 1 piece of thin batting fabric 0f 9 x 12 inches
- 1 zipper 12 inches
- Cotton fabrics in assorted colors and patterns for the applique pieces.
- Bias Tate
- Embroidery floss
2. How To Make The Quilting Sandwich
When making a quilt with applique and some embroidery, many quilters might do the applique and the quilting on a piece of fabric before making the quilting sandwich, I like to make the quilting sandwich first, as I found when I do the applique this way, as I work on the applique, the batting fabric give it a quilted look, and I also find it’s easier for me to work this way.
Lay on your work table one piece of cotton fabric, pretty side down, lay over it the batting fabric, and lay on top the second piece of fabric, pinch a few safety pins, to hold the three layers of fabric together.
3. How To Do The Quilting On The Makeup Bag

With the help of a ruler, mark a line in the middle of the top piece of fabric, mark one line on both sides 1/4 inch, you will do the quilting on these three lines.
On one side of the piece, with the help of a ruler and a pencil to mark fabrics, trace horizontal lines 1 1/4 inch apart, then you can trace vertical lines 1 1/2 inch apart.
You can do the quilting on the lines you traced, when the quilting is finished, then you can do the diagonal quilting lines.
4. How To Do The Applique On The Makeup Bag

You can download the Makeup Bag FREE Pattern here.
On the free pattern you will get all the paper templates, you will need to cut out each paper template without adding any seam, lay over the fabric each paper template and trace each piece on the fabric with a pencil for fabrics.
Cut out each piece of fabric adding 1/4 inch for the seam allowance, the applique of each piece should be done with the needle turn applique method.
When you get all the fabric pieces cut, lay all the pieces on the front piece of the make up bag, pinch each piece to the bag with a pin, when you have all the applique pieces pinned to the front of the bag, you can do the applique of each piece.
5. How To Do The Embroidery On The Makeup Bag

The embroidery work on this bag is easy and fun to make.
- Stem stitch – flower stems, with two strands of embroidery floss.
- Daisy stitch – leaves and flowers, two strands of embroidery floss / Hat line, three strands of embroidery floss
6. How To Sew On The Bias Tape

With the make up bag paper template, trace the bag shape on both sides of the bag with the help of a pencil for marking fabric.
Fold the piece, with the help of a ruler, trace a square of 5/8 x 5/8 inch on both bottom corners, cut the squares on both sides with the help of a pair of scissors.
Sew on a bias tape on the front side of the make up bag on the pencil mark you did with the bag paper template. Trim the fabric all around and turn to the back the bias tape, it should be stitched to the back by hand.
When you finish stitching to the back the bias tape, you can do a herring bone stitch on the front of the bias with a single thread of embroidery floss, on both sides of the makeup bag.
7. How To Sew On The Zipper On The Makeup Bag

Mark the center point on one side of the bag, by folding the bag in the middle, you can mark this point with a pencil, or just pinch a pin, fold the zipper in the middle and mark the middle point on both sides of the zipper.
Place the zipper on one side of the bag, on the inside, match middle points, pinch a pin to hold the zipper in it’s place, keep pinning one side of the zipper on the bag, when one side is all pinned, you can stitch it on the bag, this step can be done by hand with small stitches, or on your sewing machine.
When one side of the zipper is stitched on the bag, you can follow the same steps to stitch on the other side of the zipper to the bag.
If you stitched on the zipper on the bag by hand, you can do a herringbone stitching on the edge of both sides of the zipper, it will look more professional made.
8. How To Finish The Make Up Bag

When the zipper is all stitched on the bag, test it, if it works good, then you can do the next step.
Lay the bag flat on your work table, and you might need to cut out both squares on the bottom of the bag, if you need to do it, just measure both squares again, and trim the excess of fabric on each bottom side of the bag.
Turn the inside of the bag out, keep the bag flat, and sew on each side on the bias by hand with ladder stitches, reinforce the stitching at the beginning and at the end on each side of the bag.
Turn the bag out and do a herringbone stitching to cover the union of both bias tapes on each side of the bag.
Turn the bag inside out, and open each bottom corner, sew on each corner on your sewing machine, and sew on a bias tape piece to cover the seam on each corner.
The Makeup Bag is finished and it looks amazing!
I hope you like the Makeup Bag With Applique Tutorial, and hope you will be making more than one!
Related posts:
Thanks so much for reading my blog today and don’t forget to share this DIY on all your Social Media!

Video tutorial: