Matilda a quilted soft doll is here now.
I had a few free hours yesterday morning, before I had to go to work, I had the idea for a few weeks to work on a new doll, as Christmas will be here in a few weeks, I always thought a rag doll will be a great present for any young girl, and you might have one or more young girls on your list of to do presents for Christmas.
To give you an idea of how easy is to make one rag doll I have a full free tutorial today for you.
You might have all you need to make Matilda already, as she is just 16 inches long and only 6 inches wide, and not heavy, as I stuffed lightly so she is so huggable!.
I did on Matilda a few embroidery stitches, I had fun while I was doing it, she came up so nicely that now I will consider as an art doll, I will add it to my doll collections, you can work on the embroidery as much as you want or you can also draw her face, both ways will look nice, when you work on the face with embroidery takes more time.
I won’t talk too much about this and that about Matilda, I better write about how I made it so you can also make your own Matilda.
How to make Matilda, full tutorial
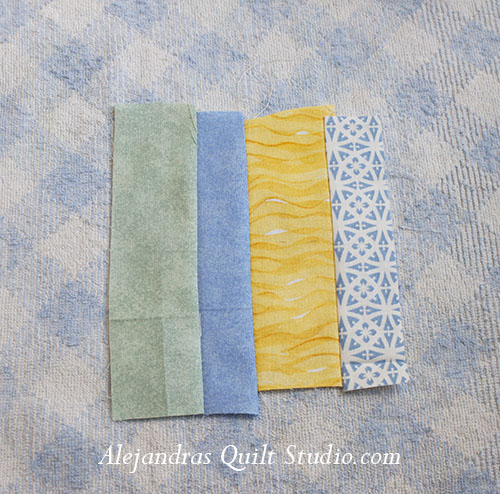
- 1. This time I won’t give you any measure to cut the stripes to make this first step, you may have already some left overs from your last quilt, you will need to sew them together to make a 7 x 7 ” square, it doesn’t matter if you have three or five or more stripes on it, it will look great. Iron gently.
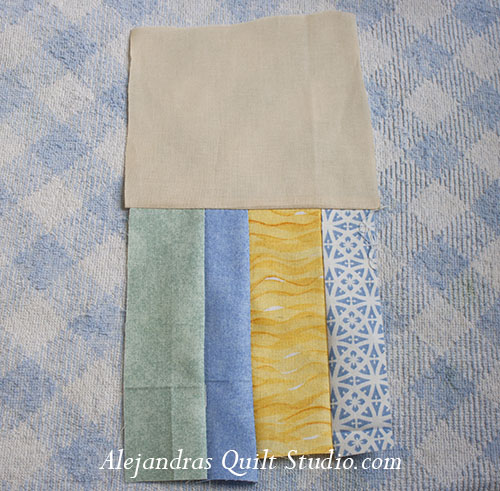
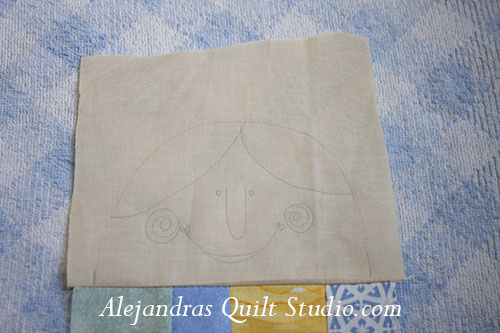
2. Sew on the top a 7 x 6 ” square of light beige fabric, iron gently.
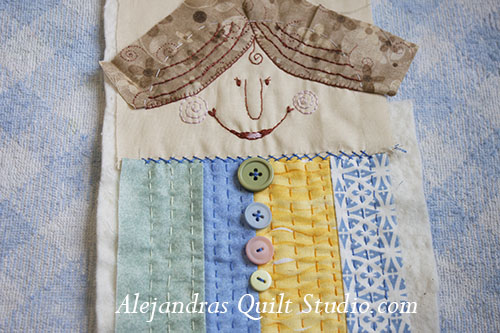
3. With a pencil, draw Matilda’s face.
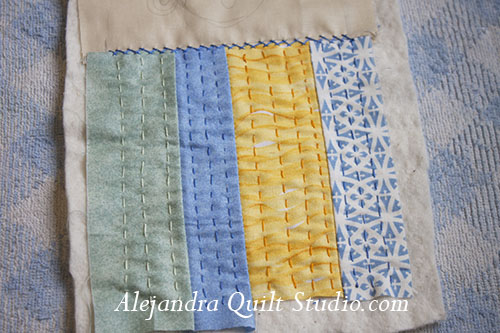
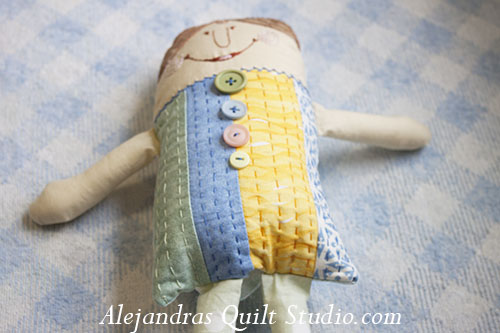
4. Place Matilda’s top on a thin batting fabric and cut it half inch bigger on each side, do some quilting and some embroidery.
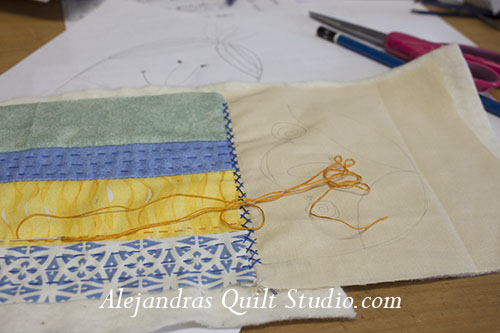
5. Here is a picture of how I did the quilting with big stitches and 100 % cotton DMC floss, I did a little embroidery stitch on the top.
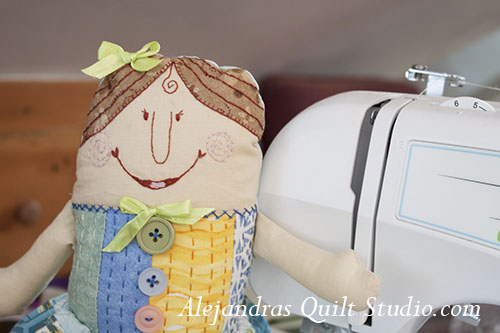
6. Cut two 5 x 3 ” fabric on the color you want to make the hair, mark down the curves on one of the sides of each piece and applique to Matilda.
With 100 % cotton DMC floss do the embroidery of Matilda’s Face, I did it with back stitch, eyes with satin stitch.
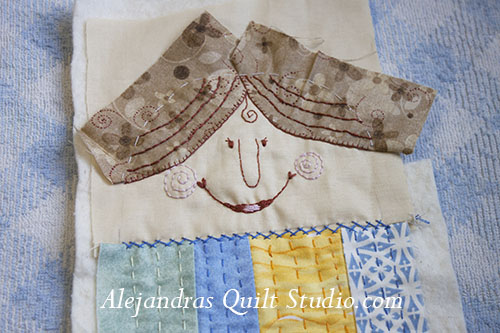
7. Add some colored buttons.
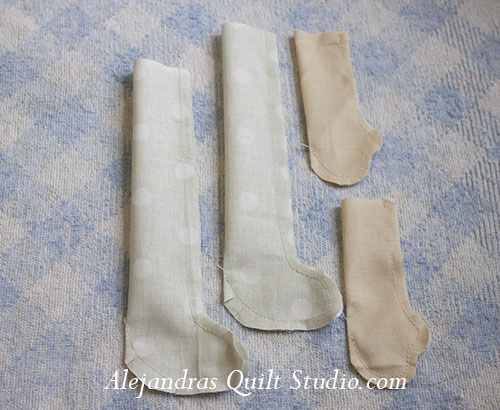
8. Trace with pencil legs and arms on the fabric, and sew, trim, make some little cuts with your scissor on the curved parts of each leg and arm.
Turn each piece out and stuff each one.
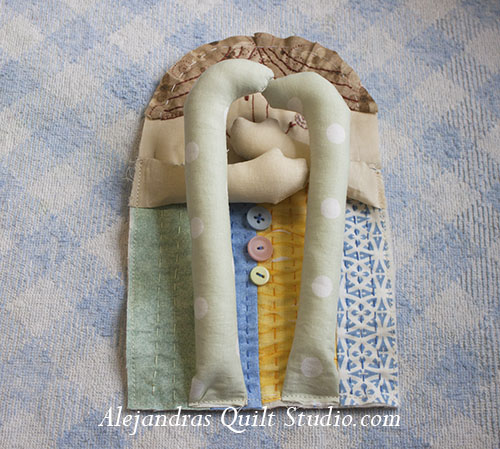
9. I like to place each piece on its place and run the sewing machine all around the piece, this way each piece will stay in its place, I cut one fabric piece for the back a little bigger than Matilda, place Matilda upside down facing the fabric, and with your sewing machine, sew the two parts together, leave 2 inches open where the legs are.
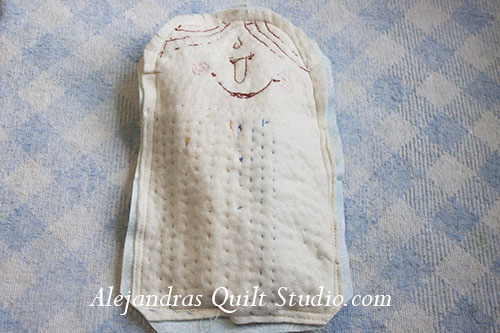
10. On this picture you can see how Matilda looks like on the batting fabric, you can see how the quilting and the embroidery looks.
Trim all sides and make little cuts with your scissor on the head, and on each corner cut the fabric diagonally,
11. Turn Matilda out and stuff her. With a needle and white thread sew to close.
12. You can add some ribbon bows to Matilda, with a strip of 4 x 24 ” of a nice fabric, you can make Matilda’s skirt,
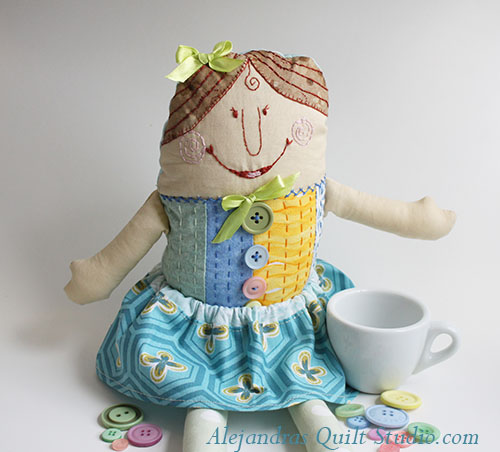
Matilda is ready now, it didn’t take too long to make her, and she is ready to make any young girl happy!
You might want to make one or maybe more and maybe you might want to make one Matilda for yourself, I will be happy to see your work, let me know when you finish your own Matilda!
[bctt tweet=”Matilda is a fun #ragdoll to make, full tutorial here” username=””]
If you have any question about how to make your own Matilda, just leave a comment.
If you love Matilda and you want to make her, PIN IT so you can find it later easily!
You can follow Alejandra’s Quilt Studio Facebook Page or now you can sign up to my News Letter so you the first one to get my latest work updates!
I thank you for making the time to stop and read my blog!
Alejandra
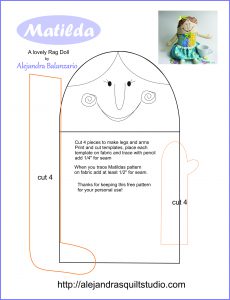
Matilda’s free pattern
Thanks for keeping it for your personal use only. If you blog about Matilda, I thank you for linking to my blog and give me credits.