Making a patchwork pouch is a great small project to make for beginners and more advanced quilters and sewists, and you can use all those scraps of fabric you saved after you finished your last quilt!
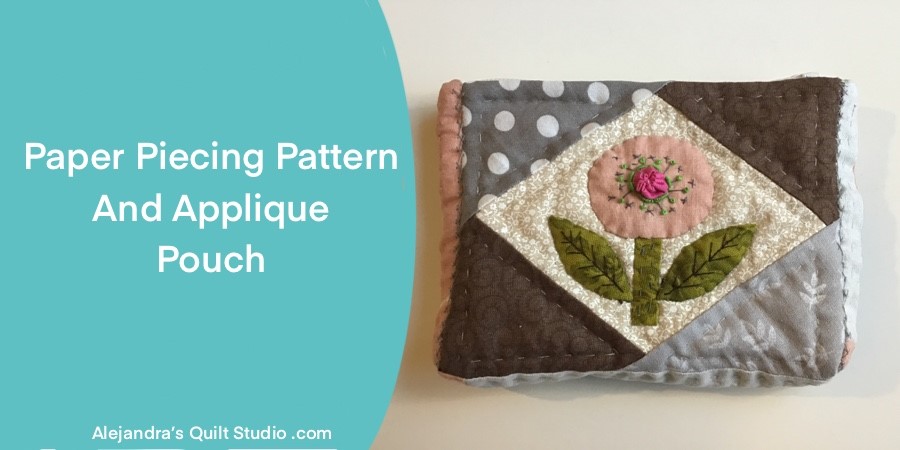
Paper Piecing Pattern And Applique Pouch is an easy project to make with two quilting methods and some embroidery stitches for beginners and more advanced quilters.
When you love to make quilts, making a small project can be done with one or more different quilting methods, on this tutorial I will share the steps to make the background with a Paper Piecing Pattern and then you will be working on the applique of a small flower.
The pouch will be finished by hand sewing to give it a handmade finish.
Paper Piecing Pattern And Applique Pouch – The Tutorial
Download The Paper Piecing Pattern
On this first step, you can download the Paper Piecing Pattern here, print it out and with the help of a pair of scissors to cut paper, cut it out.
How To Make The Two Quilting Blocks
With the free Paper Piecing Patterns, make the block for the front of the pouch, you will need to follow the numbers and it can be made with any color fabrics you like.
For the block that goes on the back of the pouch, you will need to make a block with the Crumb Quilt Pattern, or any pattern you like, or you can use an orphan quilt block you might have already done. This block should be 6 1/2 X 10 inches.
Sew on both quilt blocks, press.

Mark The Pouch Pattern
Lay the piece made with the patchwork on your work table with its pretty side down, on the back with the help of a ruler and a pencil, mark the pouch pattern, mark a gap on one side that should be left open to turn the piece out later.

How To Make The Quilting Sandwich
Lay on your work table the batting fabric and lay over it the fabric for the inside of the pouch, pretty side up, both pieces should be —- inches.
Lay on top the piece made with patchwork, pretty side down. Pinch a few pins to hold the pieces together.
Sew on the piece on your sewing machine, sew on the line you marked with pencil, leave an open gap.
Trim with a pair of scissors to cut fabric the piece, leave a 1/4 inch for the seam allowance all around the piece.
Cut the corners diagonally and make some cut in the —-
Turn the piece out, and push the corners out from the inside with your fingers or with a round point pair of scissors.
Tuck the seams in the opened gap and stitch on to close.

How To Do The Quilting
The quilting can be done by hand or with your sewing machine, it can be done simple or as elaborated as you want to make it.
Do The Applique
On the Paper Piecing block, you can do now the applique, cut the paper templates and cut your fabric pieces and add the 1/4 inch for the seam allowance and do the applique with the needle turn method.

How To Do The Embroidery
When the applique is done, cut a fabric (1 1/2 inch) make and applique the yo-yo on the center of the flower, now you can do the embroidery.
- Buillon stitch, around the mini yo-yo
- French knot, around the center of the flower
- Long Straight Stitches – To connect the french knots with the yo-yo

How To Make The Pouch
Lay the piece for the pouch on your work table, pretty side up, and take the two corners on one side of the pouch together, pinch two pins, and stitch on by hand all the side and the bottom.
As the pouch is made by hand, when working on the hand stitching on both sides, work with small stitches and you can reinforce the stitching every two or three stitches.
Use a strong thread to give the pouch the strength that it needs. Work both sides of the pouch the same.
How To Sew On The Zipper
The zipper should be sewn onto the pouch by hand to keep it all handmade.
Pinch the zipper on one side on the pouch opening, and stitch it to the pouch with small stitches made by hand, I like to work one stitch forward and one back stitch all the way.
When one side of the zipper is done, do the other side of the zipper the same way, test the zipper, if it works good, make a stitching on both sides of the zipper on the edge, this stitching will give to your pouch a professional finish.
At the end you can do some stitching to hold both ends of the zipper to both sides of the pouch.
The zipper should be sewn on the pouch inside.
The Final Finish
As a final finish on this pouch, you can do a herringbone stitch on both sides of the pouch on the pretty side, this stitching will give a better look to the pouch and it will also give it more strength.
The Inside Pocket.
If you need an inside pocket, all you need to do is to turn the pouch inside out and stitch on a pocket by hand, the stitching should be done by hand and reach only to the batting fabric.
The Paper Piecing And Applique Pouch is finished and it looks amazing!
Whether you make it for yourself, or to give it as a gift for a friend, when you see how easy it is to make, I’m sure you’ll be making more than one!
Thanks so much for reading and sharing my Blog on your Social Media!

Puedes leer el tutorial para hacer el Bolso Paper Piecing Con Applique, en español aquí!
How to make Patchwork Bags, more tutorials to read, here:
Video tutorial
a