Hi,
For the first time this summer I had to close all the windows in the house last night, weather is starting to change, this morning it was only 10 C outside.
It wasn’t a great year for our garden, too dry, just a few tomatoes and a few other vegetables, every year, we plant some Pumpkin seeds to grow a few, with the hope to grow the biggest Pumpkin in our area, well this year it didn’t happen again.
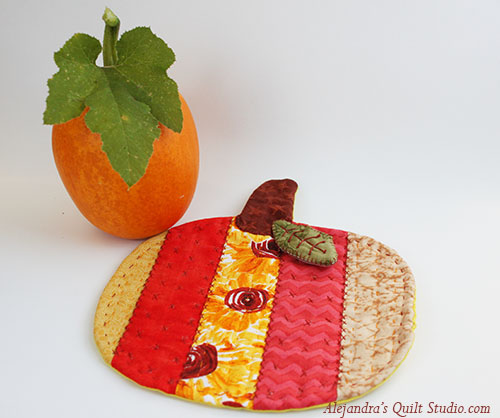
This morning I got from the garden the smallest Pumpkin you could ever think on of this kind, I can put it on my hand, and it looks small in my hand. – Oh well, I might grow one big Pumpkin one day!
One thing if for sure, if you want to make a Pumpkin mug rug with this pattern, you will make it just the size it is on the pattern, and it won’t take too long to finish it.
This Pumpkin Mug Rug is easy to make, I made it thinking on all people interested to start making some quilts, I think, if a beginner starts making something small, and it won’t take too long to finish, then you can see all about it is on making a quilt, making a small quilted project can show you everything you need to know to make a quilt.
For regular size quilts, work is the same, it’s just bigger and it will take you longer to finish it.
So, let’s start with the tutorial.
Pumpkin Mug Rug
You need:
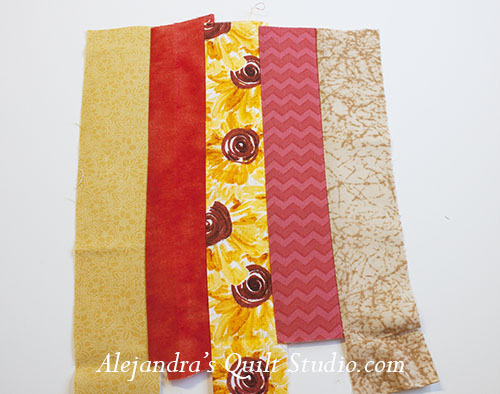
- 5 strips of fabric of 2 x 9″ in different colors of cotton fabrics
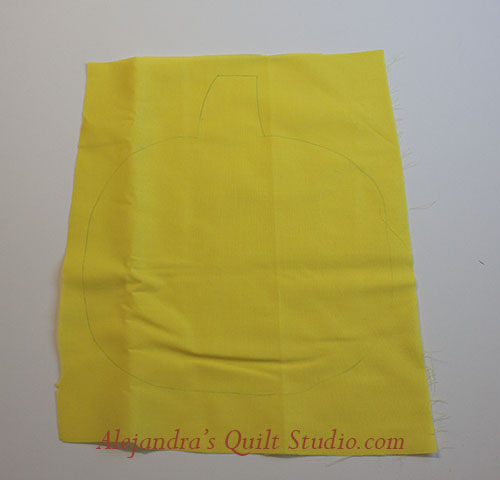
- one 10 x 12″ yellow fabric for the back and one batting fabric same size.
- two little pieces of green fabric
- one 2 x 4 ” brown fabric for the stem
- 1. Sew together the 5 strips of fabric, iron gently.
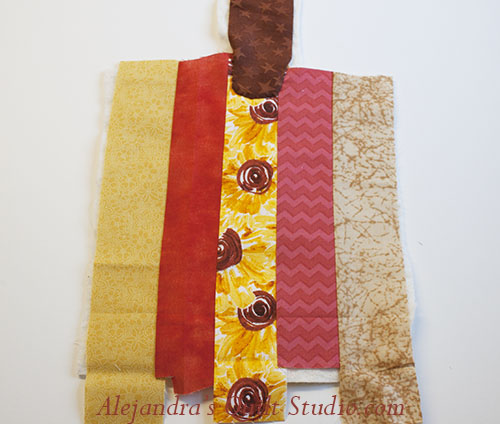
2. Place the top on the batting fabric and sew by hand the brown fabric for the stem.
3. Draw with the help of a pencil the shape of a pumpkin on the fabric for the back
4. Place the fabric for the back on the top with the batting fabric under the top, sew on the drawing with your sewing machine, leave 2 ” open.
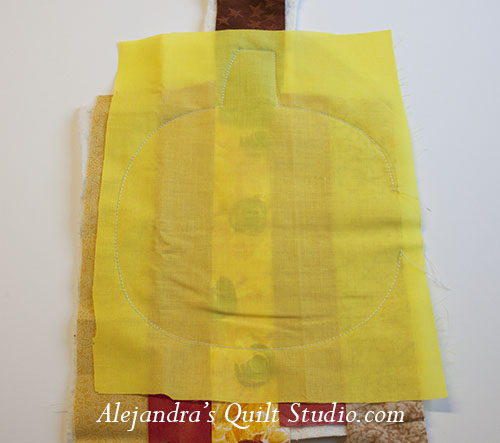
5. Trim the three fabrics, make little cuts all along with your scissors, don’t cut the sewing stitches.
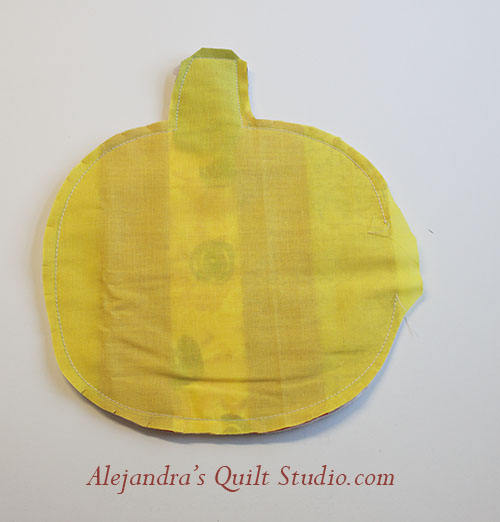
6. Turn it out, with the help of your scissors from the inside, push to take out all the edge.
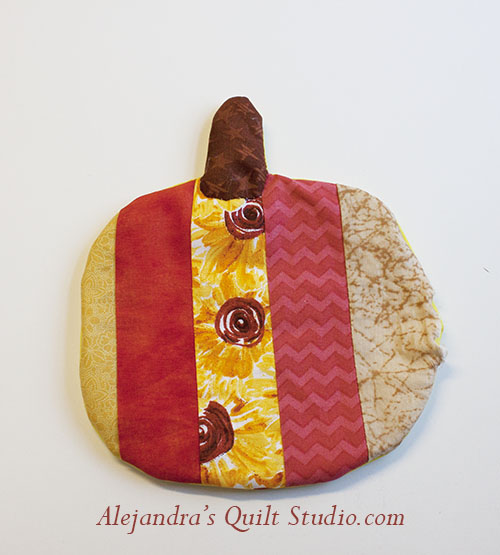
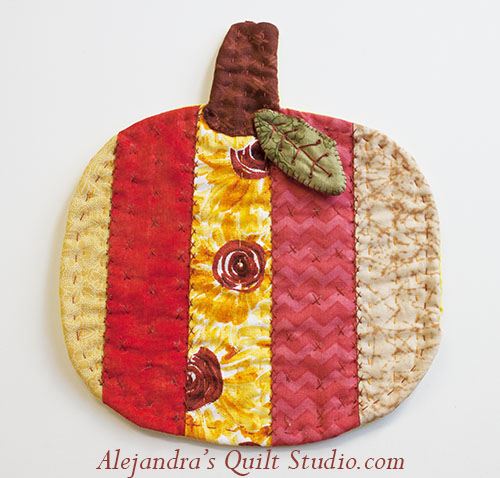
7. Close the open with little stitches, now you can make some quilting on your Mug Rug, I did some long stitches, and some X stitches to add some texture to the Mug Rug.
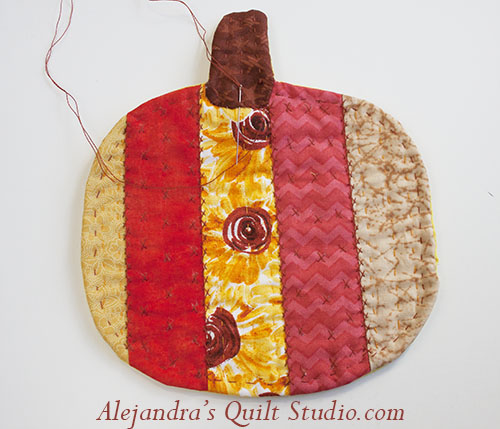
8. I did some blanket stitches on the edge of the stem.
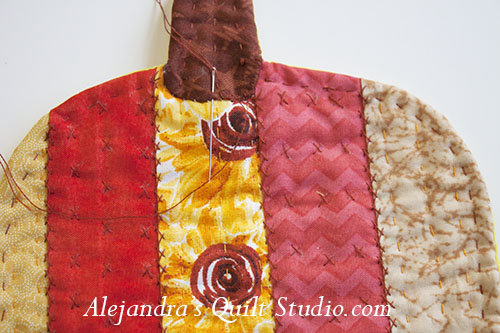
9. Following the same instructions for the pumpkin from step 3 to 6, draw a leave shape on one of the fabrics for the leave, once you finish it, place on the stem and make a few long stitches to sew it on it’s place on the pumpkin
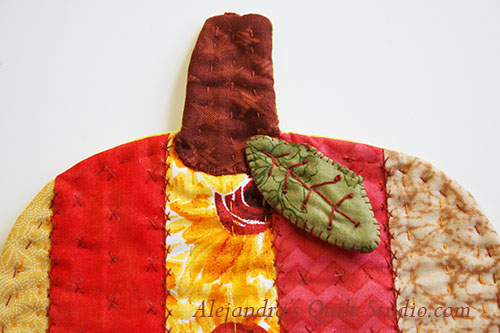
It wasn’t difficult to make this cute Pumpkin Mug Rug, isn’t it?
Easy to make, and in a few hours you will have this Mug Rug ready.
When I was thinking on what to do for the next project to share here on my blog for you, I thought of making a pot holder, but when I saw it finished, it looks so pretty, I hardly use it as a pot holder, I might use it as a mini quilt and I’m going to hang it on a wall to welcome Autumn.
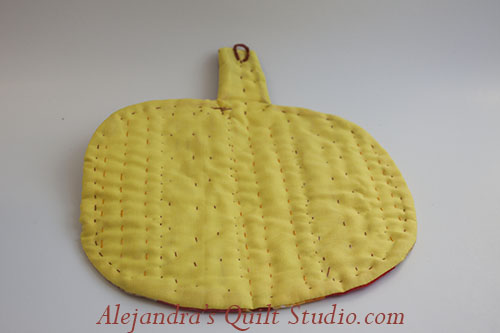
11. On the next picture you can take a look on the Mug Rug’s back, it is quilted and also looks neat, you can take a look on how I made a button hole to hang it on a nail on the wall.
Well, now you have another idea to make a Mug Rug or a Pot holder, whether you make it for yourself or to give it as a present I’m sure you will make not just one, you might make a few of them.
If you have any question about how to make it, just leave a comment and I will answer to your question.
If you make it, you can share your work on a comment on Alejandra’s Quilt Studio Facebook Fan Page, everyone will love to see your work.
If you find this tutorial cute to make it, you can Pin It so you can find it later.
I thank you for your time to visit and read my blog.
Alejandra.
