At the begining of every year, January always brings new projects to work on, I began to make my first journal quilt 5 years ago, as a way to learn new quilting techniques.
Five years later and I think this year I will be making my best journal quilt 2018!, and so you too.
As I work on my quilt day after day, every week and every month, I will be sharing my progress and my work here on my blog, so you can take a look at it, and if you want to quilt along with me, you’re more than welcome.
Materials you will need:
12 pieces of fabric 7 x 9 inches (each one) on 100 % cotton fabric, different colors.
1 – thin quilting fabric or batting 30 x 35 inches.
1 – Cotton fabric 35 x 40 inches on any color for the back
1 –polyester thread, I use light beige color.
1 – Thimble
Somesafety pins.
DMC embroidery floss.
Some different color and size of cotton 100 % on different color and prints for the applique.
Why I’m making this year my new Journal Quilt.
After being working on three different journal quilts on the last 3 years, I found working on a journal quilt allows me to express about me and my life as the time goes by on a quilt.
Sewing, quilting and embroidery have become a way to work with different emotions while I do some journaling work about what is going on in life around me and around the world.
As you know, the world is changing so fast and we’re now conected almost 100 % to everything and everyone thanks to the internet.
Even I keep working on my quilts on the traditional technique, most of it is made by hand, I found making a journal quilt allow me to find the way to transforms what is going on at this moment in art (allow me to call my journal quilts “art”)
What my Best journal quilt 2018 will be about?
My first J. quilt was made just to learn new techniques, and try some new color into my quilt, it was a quilt that began great but then it became an UFO and stayed in a box for a couple of years until I finished it las year.
On my second J. quilt. I work on my emotions, every month I did some quilting, applique and embroidery based on what I was feeling during that month, I think it went well and I love that quilt.
My third J. quilt was made to try something new: new techniques, new colors, new embroidery stitches.
I think I got at this point a break, one year and a half with no Journal quilt at all.
This will be my fourth journal quilt, and I want to work on a project that has been in my mind for some time, this year I would like to work about “women”
So this year will be a little less about “me” and it will be more about “WE”, yes about women around this beautiful planet, just because I see you and I listen to you. There’s so much going on around everywhere about this topic.
But i want to work on it on my own way, I see you and I listen to you, but I also see more from my point of view, I also see strong women who are doing good and great, I see strong women who with so many problems face every day with a smile on their faces, and I see strong and happy women who day by day wants to do good for others.
So day by day I’ll be working on my new quilt, and sharing the progress with you, I don’t promiss anything as one main goal of this kind of quilts is they can change from day to the next one and I will be working a whole year on it, maybe less, and maybe more.
I want to make it too!
You’re more than welcome to quilt along with me, this time I will share with you my first steps to make this quilt.
You can follow exactly my tutorials here, or you can get inspired and make your own Journal Quilt. Everything is allowed here and I’m sure your quilt be amazing by the end of this year.
1 – Fist step to make your quilt.
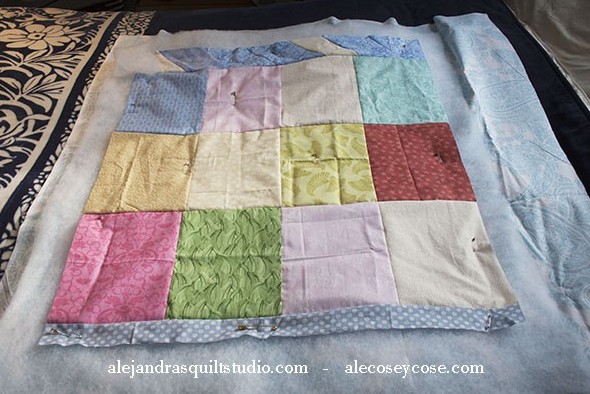
You need to cut all the pieces for the months and sew them together as you can see them on the picture.
I only give you the messurments for the 12 blocks, for the top and bottom border you can use any fabric strip you already have at home.
Iron the top, and place it on the quilting fabric or batting and place these two layers on the fabric for the back to make the sandwich.
Place some safety pins to hold the three layers together.
2 – Drawing the design on paper.
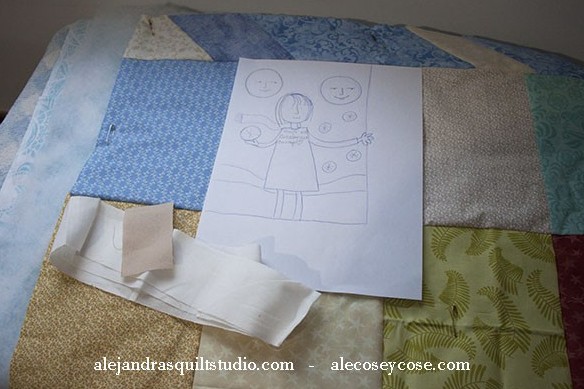
As the next step, I use to make a sketch of the subject I want to work on, so I did a drawing of a woman, with an easy shape to work with applique and keeping on my own style.
You don’t need to do this step, as I will provide you with a template.
3 – Cut the different pieces on fabric.
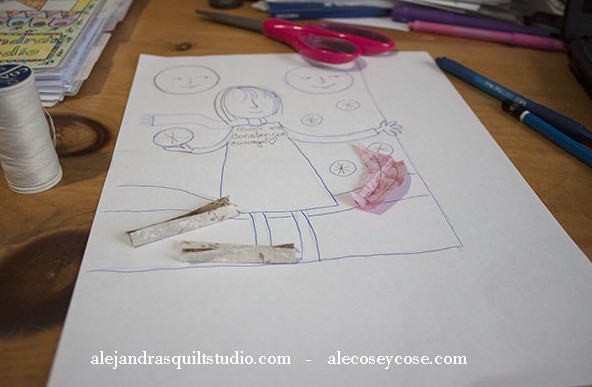
This step might look like a time consuming step, but it worth to spend your time picking your favorite fabrics and cut out each piece.
You can make two copies of the template, keep one as a guide and cut all the pieces, this time I don’t added any seam to the pieces, if you cut them out, you can place each piece on the fabric and mark each piece shape with a pencil or with a pen for fabric.
By doing this, you wil get a guide to work on while you work on the applique.
Cut out every piece you will need for every block.
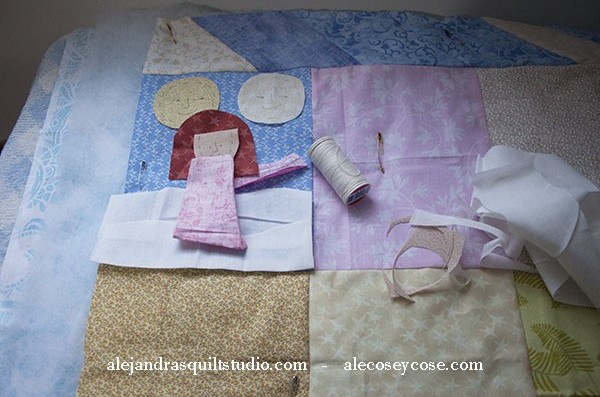
4 – Place all the pieces on the quilt.
When you finish to cut out all the pieces for each block, you can place them on it,
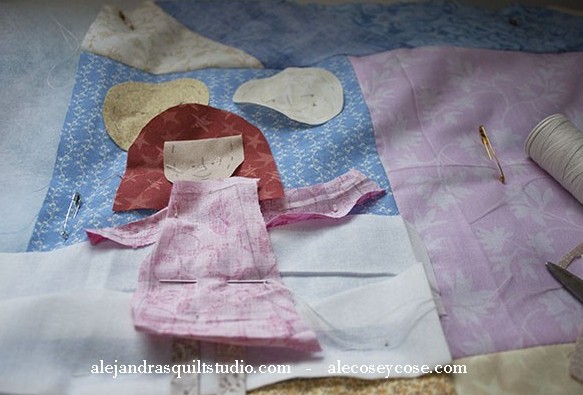
5 – Do some big running stitches on each piece of fabric.
You might be used to hold all your pieces with pins, you can do it, but I like to make some big running stitches on every piece of fabric, just one or two, this way each piece stays on its place better, and I don’t get hurt with pins while I work.
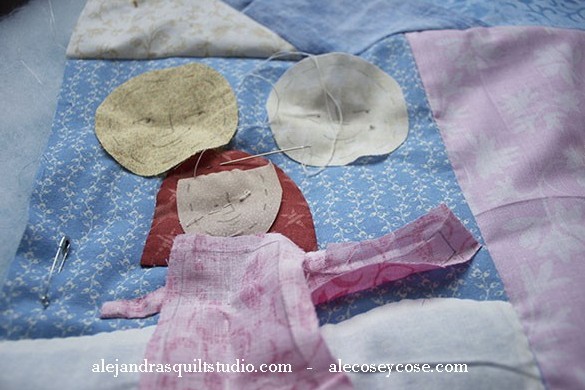
6- Applique.
I love to work with applique technique, I use to do it by hand, I work like old timers used to do it, I fold the seam inside and do some little stitches, you can follow this technique or work with your own applique technique.
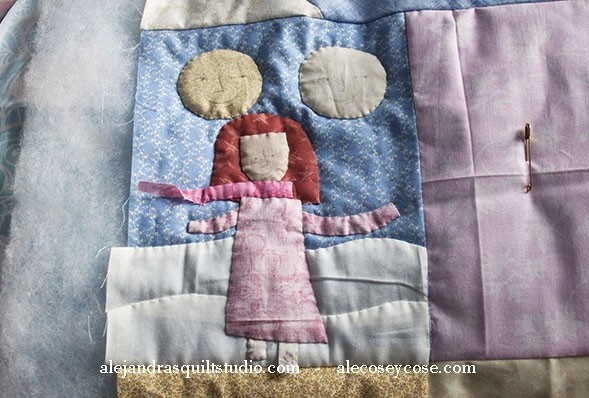
7. Finish all the applique.
This is the way I use to do it, I work with the lower layers of fabric first, and I keep working on the upper layers until I finish with the last piece of fabric.
I like the quilting texture I get on my quilts while I do the applique.
NOTE: As I was working on this piece, I realized it might be harder for you to work this way, if you want to work on an easier way, you can do all the applique before you sew together every block to make the top.
Right now and thinking on it, I’m working ahead of time, I mean, I will be doing the applique of every month, just the girls, and I will be adding more on every month later.
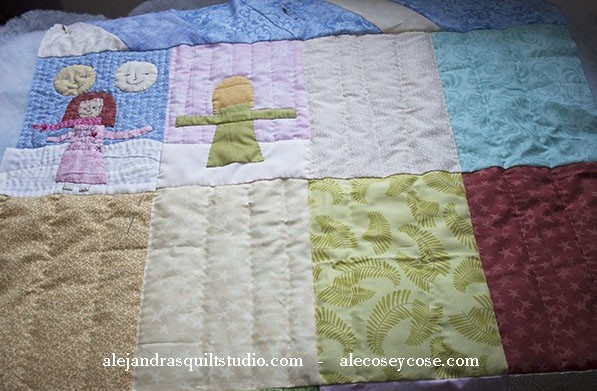
8. Applique on next month.
I did some embroidery on January, and I work on the applique for February, as the sandwich was giving me some problems while I was working on the quilt, I did some quilting to hold the three layers together, after doing this, I could work better on the applique and on the embroidery.
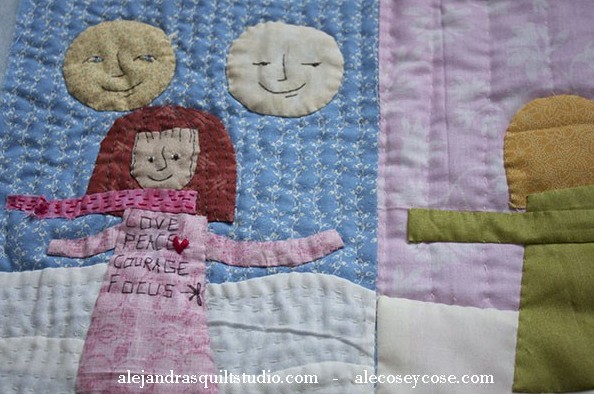
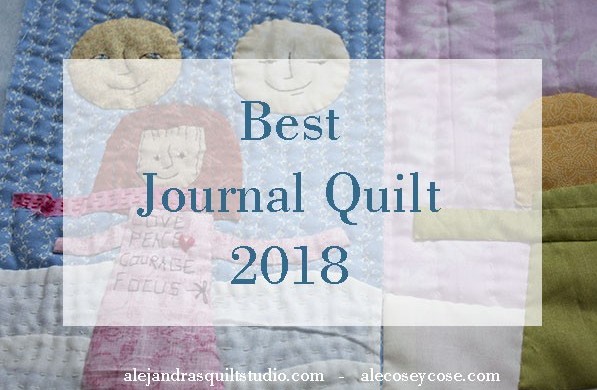
9. January 2018 has two moons.
I will share with you here now something about my January 2018.
it has been a cold month, with low temperatures as even -30 C and lots of snow, that is why you can see some white fabric behind the girl. A long scarf to keep her warm and a big embroidered little heart.
I already applique the two moons, but I will be working on some embroidery later on them.
Love, peace, courage, focus and a dragonfly as a symbol of change on her dress.
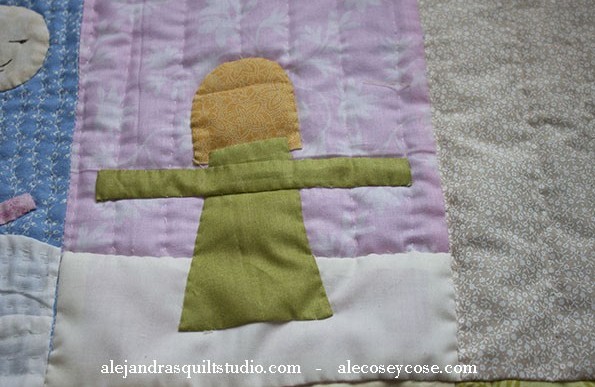
10 – working on February now. More to come.
I think I will stop here today, there’s much to keep working on this quilt, but it will take its time.
I will be sharing my progress on this quilt here on the blog, you can allways follow me on my Fans page on Facebook and on Instagram to get the latest of my work.
If you have any question about how to make this quilt, you can write a comment and i will reply to it.
I’ll be working to get some videos so you can see me working on this quilt, as soon as I get them ready I will let you know.
Si quieres leer este articulo en espanol, puedes visitar mi blog de colchas de patchwork Ale cose y cose.com
I thank you for your visit and time to read me.
