When you love to do embroidery and to make your own quilts, you might look for some easy to make stitches to add more color and texture to your projects, and the herringbone stitch is easy to do for beginners or more advanced needlework artists.
Herringbone Stitch is done with a back stitch that looks more like a cross stitch on top and bottom of the stitch, and isa decorative stitch used on embroidery and quilting projects as well.
When looking for a decorative stitch to make on your project to do in borders and in accents, you can’t go wrong with this stitch, as it’s easy to do and it will always look pretty on your projects.
The Herringbone Stitch can be done small or big, with a single thread, or with two, three and even more threads on your needle, and it will always look pretty.
How To Get Started
If you’re a beginner needlework enthusiast, I suggest making a sample on a piece of fabric, before you start doing this hand embroidery stitch on any project, it won’t take long to understand how it’s done and it will help you to get some practice.
Before you start, you will need to decide if you want to make big or small stitches, the length of the stitches will help you to know how many threads of floss you need to have on your needle, when working with small stitches, one or two threads will be good, but when working on long stitches, you can use three, four, five or the six threads that comes on the floss.
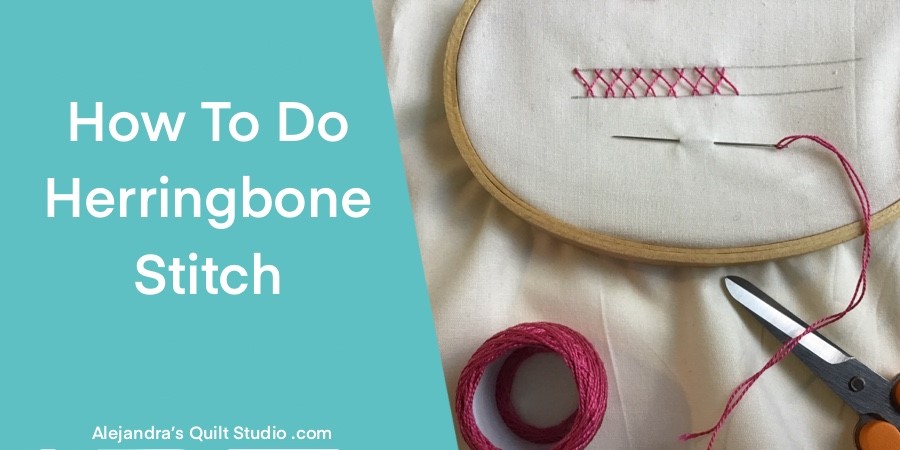
If you’re just starting to learn how to do embroidery, you can mark two lines on your fabric with the help of a ruler and a pencil for marking fabrics.
I recommend the use of an embroidery hoop to help you to work with ease as you work to do this decorative stitch on your project, when working on a quilted quilt, you won’t need the hoop.
Step 1
Start on one point, either on top or bottom line, you can watch the video, to see how I do the first stitch without the need to have a knot on at the end of the thread.
Make one long stitch diagonally, going right to left, from the top marked line to the bottom marked line on the fabric,
Step 2
To bring the needle up just to the left where you close the first stitch, making a small horizontal stitch under the fabric.
Step 3
Close the stitch at the bottom with a long stitch up to the right.
Now you can see your first Herringbone Stitch done, now you will need to keep doing more stitches up and down to see just how the Herringbone stitch shows up on your fabric.
How To Do A Whole Line Of Herringbone Stitches
As you learn how to do your first Herringbone stitch, you will need to continue making the same steps to make a whole line of this decorative stitches.
How To Finish The Herringbone Stitch
When you complete the herringbone stitch line on your project, get the needle on the back of the fabric and tie off your final stitch and cut the thread with the help of a pair of scissors.
Can The Herringbone Stitch Be Done On A Quilt?
The Herringbone Stitch has been done on Crazy Quilts for many years, as this is one of the decorative stitches that beginners and professional needlework artists love to do on their projects to make them pretty.
When working on an already quilted quilt, you won’t need to use a hoop, and you can do the stitch on the top and hide your back stitches on the batting fabric (middle layer of the quilt), this way the back of your quilt will look clean and pretty.
Thanks so much for reading and sharing my blog on your Social Media

Puedes leer Como Hacer La Puntada Pata De Gallo en español, aquí!
Related Posts:
Video Tutorial