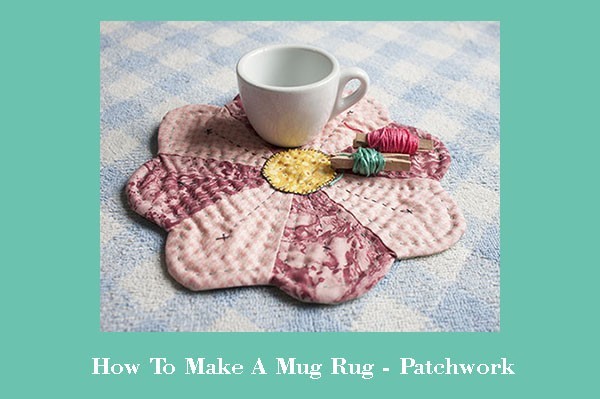
Learning how to make a Mug Rug with Patchwork is something fun to learn, with this tutorial you’ll learn how to make it in no time.
Mug Rugs have been becoming the favorites for many quilters to make as small gifts to give away, they are perfect to use those small pieces of fabric we all used to keep sewing something nice!
Have a cup of coffee or tea, and will not be the same when you have a cute mug rug to place your cup on it!
If you’re looking for a small project to do to give it as a gift on that special occasion, as your best friends birthday, or to your daughter, or for Mother’s Day, making a mug rug will be your favorite project.
How to make a Dresden Plate.
This is one of the favorites patterns to many quilters to use when making a quilt, but it can be used to make more projects like a mug rug.
This time this is the pattern I will use to make a cute mug rug.
Materials you will need:
You can download the free pattern here.
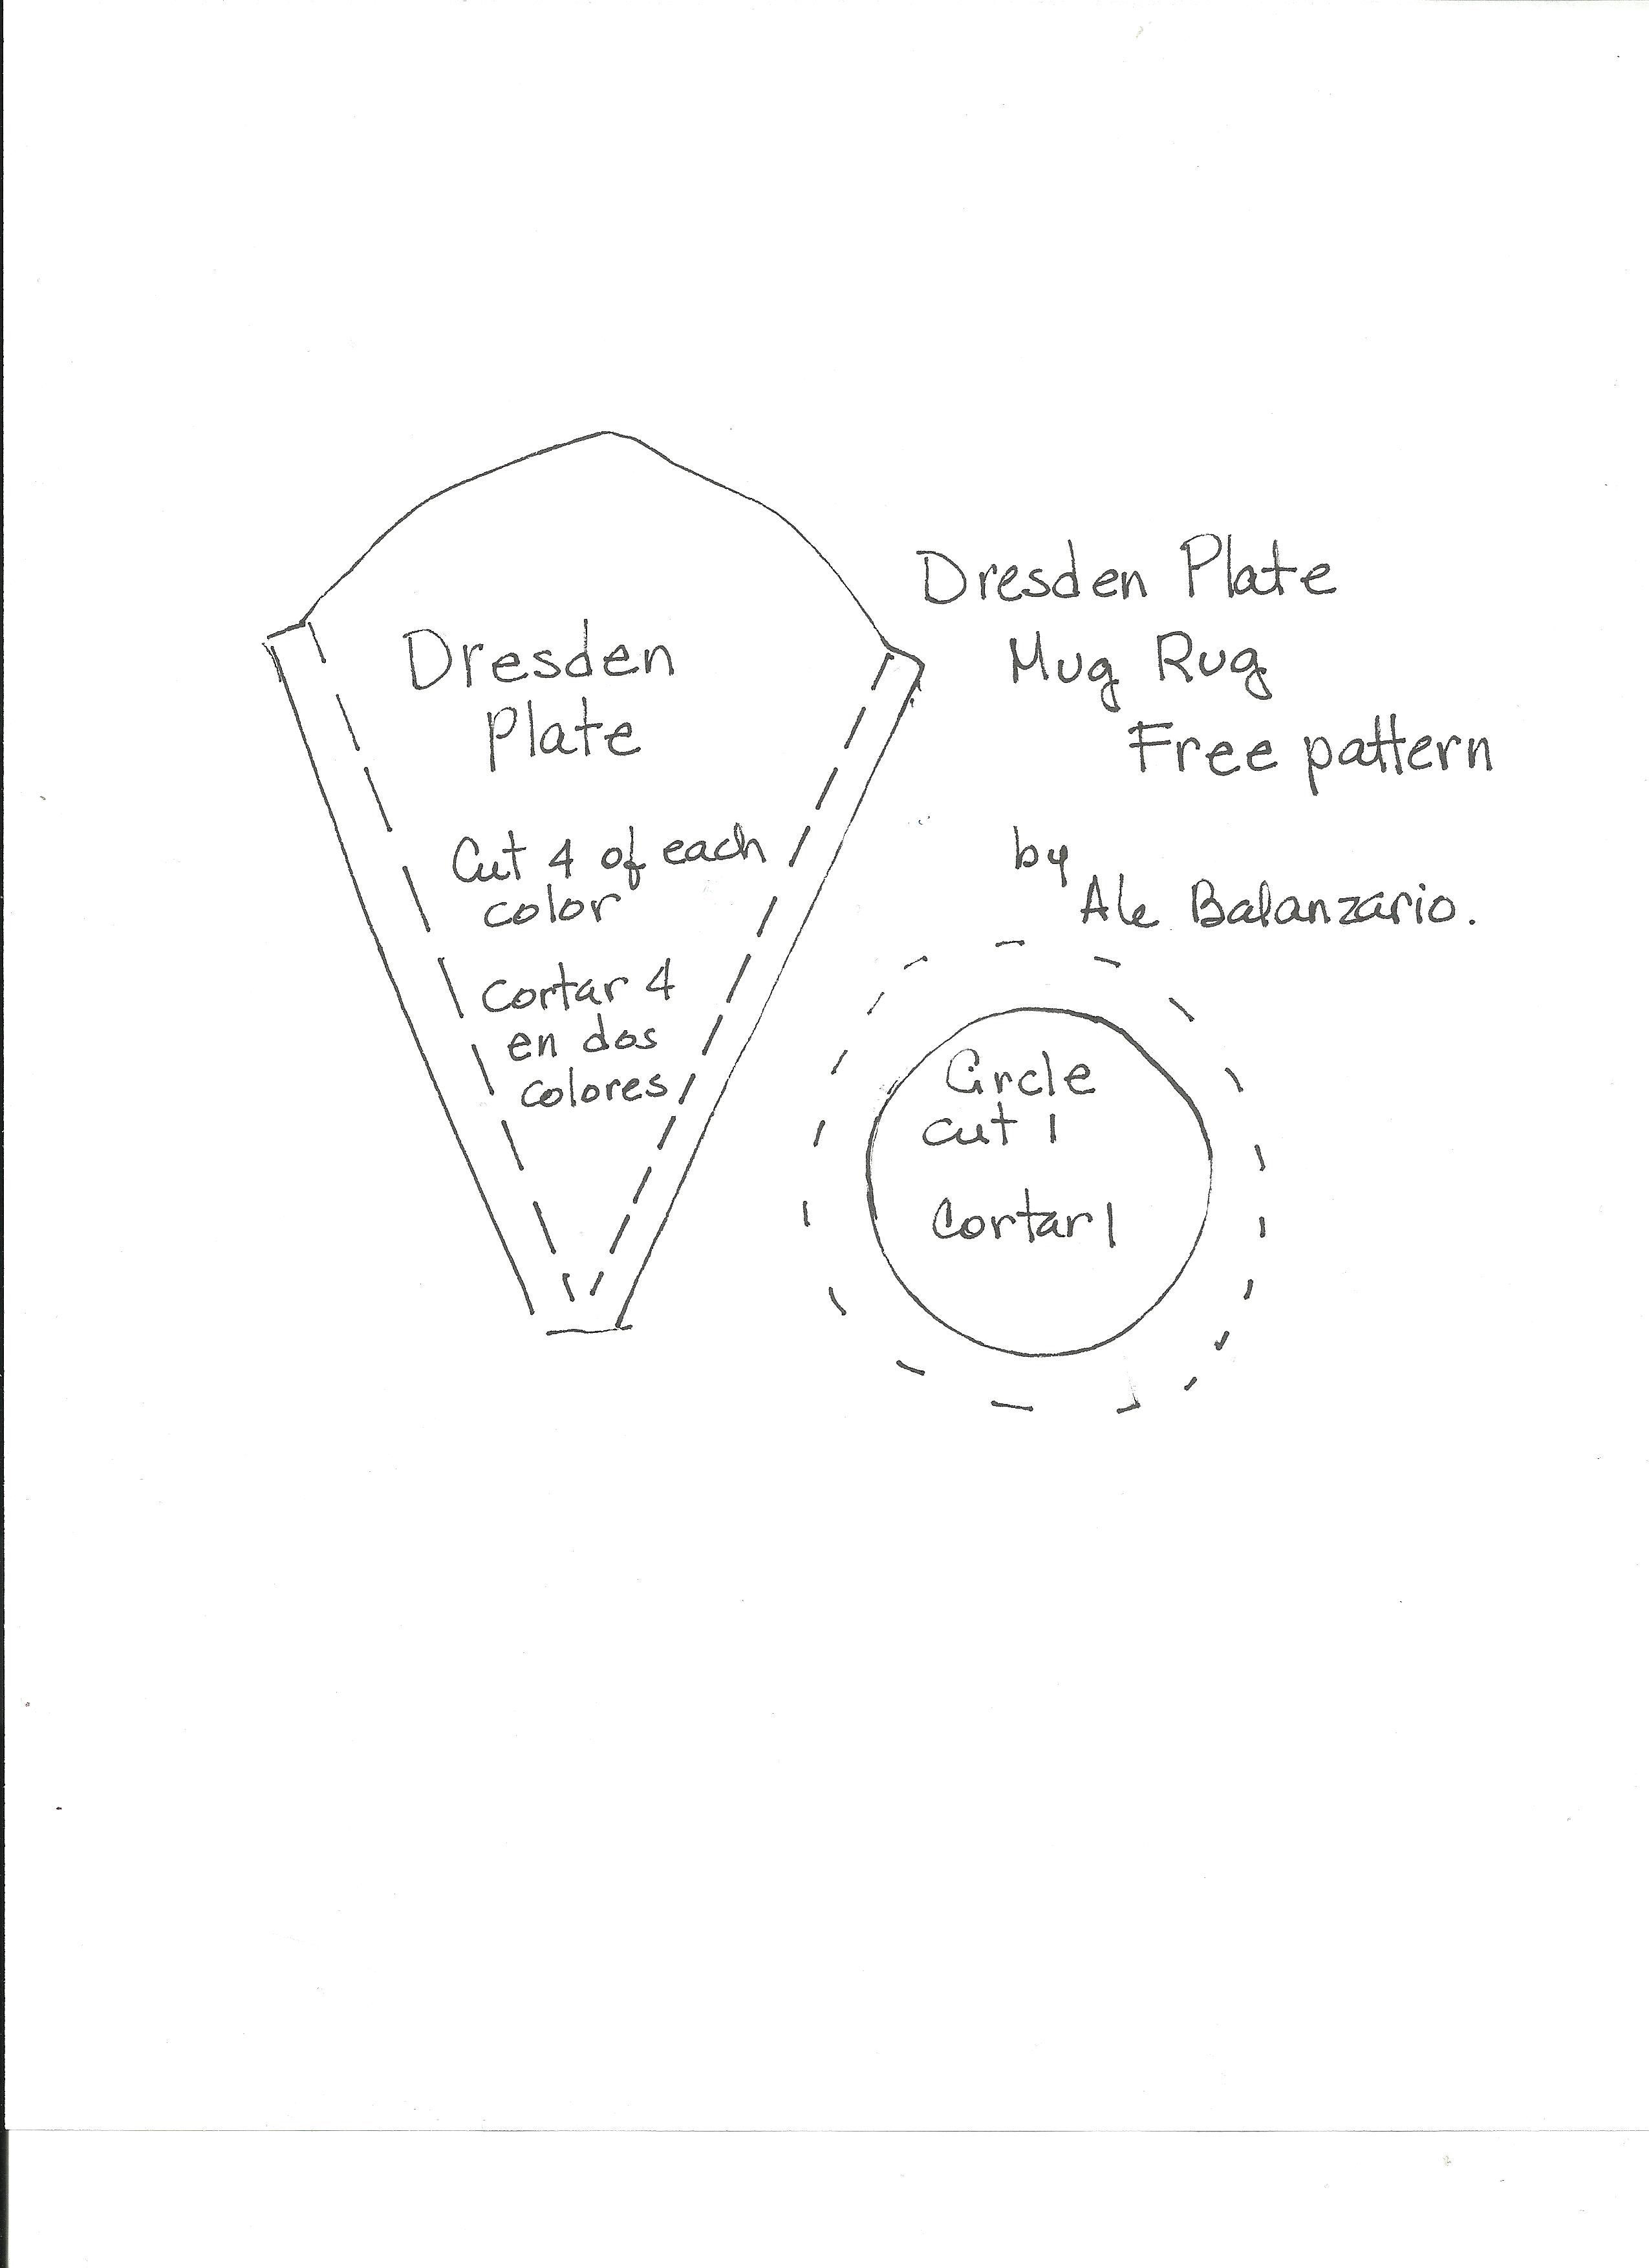
Once you download it, you can print it twice, I always do that, I can keep one copy in case I want to make another one later, and one copy to cut out the templates.
Two different fabrics with different color or prints, cotton 100 %
One piece of 10 x 10″ of fabric cotton 100 % for the back of the mug rug
One piece of 10 x 10″ of thin batting fabric
One piece of fabric in a different color 3 x 3″ for the center.
Quilting thread in beige
Embroidery floss in green and grey DMC
Scissors, needle, (you can check price on Amazon) sewing machine, (to check what sewing machine I use to do my quilting projects you can read this post) thimble.
You can watch the video here (sorry it’s in Spanish) but I will write down the steps to follow in English below.
Tutorial:

1 Download and print the pattern and cut out the templates.
2 – Mark down the templates on the fabric with a pencil or a marker for the fabric.
3 – Cut out the pieces for the mug rug.
4 – Sew two pieces together, one from fabric A and the one of the fabric B, place one fabric on the other, facing right side of the fabric, sew one side.
Do the same to make four pairs.
Open each pair and iron gently.
5. Sew two pairs together to make two half of the Dresden plate, open and iron gently.
6. Place one half over the other half, facing right side.
Sew together both half, open and iron gently.
7. Make the sandwich for the quilting.
Place the batting fabric on the bottom, place on it the fabric for the back right side up, place the Dresden Plate on the top right side facing down.
Unsew one of the sews on the Dresden Plate, just about 2″
8. Sew around on the edge the three layers of fabric together.
9. Trim the three fabrics, follow the Dresden Plate edge, leave a 1/4″ for the seam.
Make little cuts all around the seam with your scissors.

10. Turn out the mug rug. With the help of your fingers or your scissors push out the edge from the inside.
11. Sew to close the open on the Dresden Plate.
13. Do some quilting on the Dresden Plate.

14. Cut the circle on the fabric, and applique it on the center of the Dresden plate.
15. Do some embroidery stitches on the mug rug.
Voila, the mug rug is ready!
Easy and fun to make, I’m sure you’ll make not just one, but you’ll be making a few of them to get them ready and to give them as a gift to your friends, your daughter or to your mom on Mother’s Day!!
If you have any question about this tutorial, leave a comment and I will reply to you shortly.
If you like it, share it!!
You can Pin it so you can find it later.

Puedes leer este mismo articulo en espanol en mi blog Ale Cose y Cose.com
Follow me on Facebook, Pinterest, Instagram and now on YouTube.
You can read also:
How to make a pouch with hexies
How to make an easy patchwork pouch
Very cute. I did not see the link to the template though?
Hi Cynthia,
Thanks so much for your visit and for your comment.
I just added a button to download the pattern 🙂
Alejandra.
Muito lindo!
Thanks Alcione, don’t forget to show me your Mug Rug when you finish it!
Gracias Ale, por compartir tu experiencia, la explicación objetiva y precisa.
Dios bendiga esas manos maravillosas.
Muchas gracias a ti Lucia Gomez, que gusto tenerte en mi blog y poder compartir los proyectos de patchwork que tanto me gusta hacer contigo y con muchas mas quilters.
Un abrazo y no dejes de volver a visitarme!