Hello everyone!
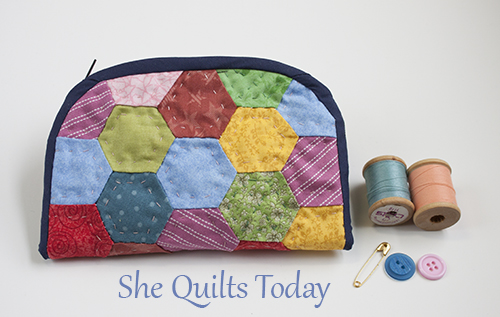
This time I will share with you all how to make a quilted pouch with hexagons tutorial part 2, I worked to finish this little pouch with the Japanese method.
Japanese Method.
I often see many beautiful well made little bags and pouches on the internet, from the color Japanese quilters work with, to the hand made stitches to the finishing touches they always do, their work is like an art work every time.
I also notice their work is always well done from the beginning to the end, so I wanted to try it this time, the finishing of this pouch is by hand, it takes a little more time to finish it, when the pouch is finished, it is strong enough to hold in the weight of a few coins on it, and the finish is very clean. I would recommend to work with this method to finish little bags or pouches.
Tutorial Part 2
- Once I finished the hand quilting, (you can make it by hand or by machine, it will look great too), I trimmed to round the four corners, I did this step with regular scissor, I just round one corner first, then I fold the mini quilt to one corner face the opposite side corner, I use the first rounded corner as a template, and I trim the second corner, then I fold the mini quilt to face the other side of the mini quilt, I use then the two rounded corners to trim the other two corners. This way, the four corners will be the same rounded shape.

2. I cut the bias for this pouch 1 1/4 inch wide, when I begin to sew it to the pouch, I fold 1/2 inch to start sewing with a folded end, I sew the bias all around to end on the same started point, I keep sewing the bias a little bit more than the 1/2 folded inch. I can cut the bias here. I do this step on the right side of the mini quilt. Right side of the mini quilt facing the right side of the bias.

3. I fold twice the bias, on the inside of the pouch I sew by hand little stitches with a thread of the same color to close the bias.

On this both pictures you can see how the bias look on both side of your mini quilt, perfect and clean.

4. On this step, it’s time to sew the zipper on the mini quilt, I always fold in the middle the zipper and the side of the pouch where I’m sewing the zipper in, I match these two points I use to make just one stitch to hold both on its place, you can use a pin to do this step
I start to sew the zipper from the right end of it, with matching color of the tread, and little stitches, once I finish this step, I go back to the right end of the zipper and I make little over cast stitches to hold all the edge of the zipper.

On this picture below you can take a better look to this step.

5. Once I finished one side of the zipper I do the same on the other side of the zipper with the opposite side of the mini quilt.

6. Once I finished adding the zipper on both sides of the pouch, I folded it so the pouch sides can get together, then with little over cast stitches I sew together both sides of the pouch, I started from the bottom to the top, where the zipper end is, I did a few stitches to hold the zipper end on its place.
I did the same with the other pouch side.

Now I turned the little pouch out, and it’s finished.

I can say, this quilted pouch made with hexagons is really cute and useful to carry little things, will help me to keep well organized.
Do you like to work with hexagons on your quilts projects?
If you have any questions about this tutorial, leave a comment, I will replay to you shortly.
If you find this tutorial good to make it, you can pin it so you can find it later.
I thank you for making the time to stop by and read my blog.
Alejandra

