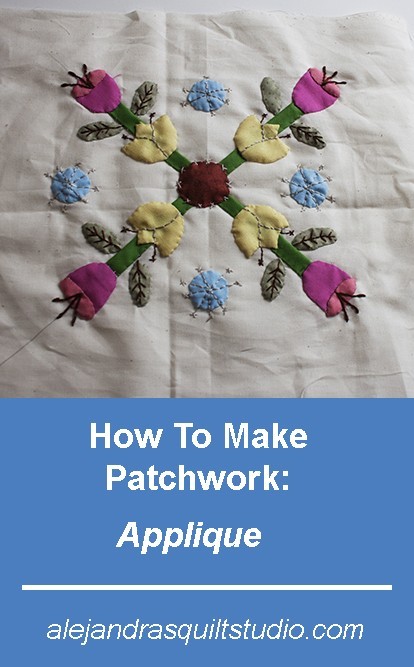
To make a quilt you can use different techniques, today I will show you how to make patchwork – applique block #1
What is a Baltimore Quilt
were first made in Baltimore, Maryland; and they were made up of a number of squares called blocks with the applique technique. This type of quilts have become one of the best pick to make for many quilters around the world.
I’ve always wanted to make a Baltimore quilt, in fact this is part of my Bucket List, and it doesn’t matter if it is a big quilt, full or king-size or a small quilt, I’ll make at least one.
And today it’s the day I will start working to make one small Baltimore quilt.
More about my Baltimore small quilt.
As you might know if you’ve been following me and my blog, I was working on my Journal quilt 2018 lately, but today this quilt is part of a collective art expo in Huntington, Quebec; this art quilt will last until middle of October, and I can’t be without a quilt to work on.
To make a Baltimore quilt is not a hard job if you like to work with hand applique or hand embroidery, and it won’t require a trip to the fabric store, most of the pieces of fabric you’ll need to make your Baltimore quilt, you might have them at home, and so do I .
Maybe you might just need to buy the fabric to make the blocks, white or light beige cotton 100 % small prints or solid fabric. I will use a solid light beige fabric.
I will cut out the six blocks I will use to make this quilt as the first step to do, I will use each block as I keep working to make them, but when I cut all the blocks I will use to make a quilt of this type, all the blocks will have the same size than if I cut one block today and next month I cut the second block.
Why to make a small Baltimore quilt?
Right now I don’t want to make a big quilt, as I’m currently working on a bigger quilt, but it has turned into an UFO and it’s already calling me to keep working on it.
But this Baltimore small quilt will be the right size to work on during an evening while I watch some TV, as you know living in Southern Quebec, weather is changing now and temperatures have turned fresher or cooler, and days will be shorter every day, I will stay more indoors than outdoors and I need a new quilt to work on and to keep me busy these long Fall and Winter days.
Winter is not much fun here but a good quilt to work on, makes always life better!
How big your quilt will be?
If you want to quilt along with me, you’ll get the six FREE patterns here to make the six blocks I will make for my small quilt, I will make the six videos (in Spanish) so you can follow the same steps I follow while I make each block.
If you want to make a bigger quilt, you can make two or three blocks of each block and your quilt will be bigger, I will share the measure and fabric requirement for my quilt. But I think it won’t be difficult to finish your quilt if you follow my method of making quilts,
I think this quilt will turn into a nice quilt to make, so please feel free to follow me and download the free patterns to make your own small Baltimore quilt.
You will need to make the Baltimore small quilt block 1:
6 pieces of white or light beige cotton fabric of 10 x 10″
A few pieces of cotton fabrics of different colors, solid color or small prints.
Scissors, needles, pins, pencil for fabrics,
I add some affiliate links on this post so you can take a look to the same tools I use to make this quilt, by adding the affiliate links you can purchase the quilting tools at their regular price and I can get a % of your purchase, this way you help me to keep working to make more tutorials to share with you.
I thank you for your support.
>> Download Free pattern Baltimore Mini Quilt 1a <<<
>> Download Free pattern Baltimore Mini Quilt 1b<<<
Video.
How to make the Baltimore small quilt Block #1
Step 1
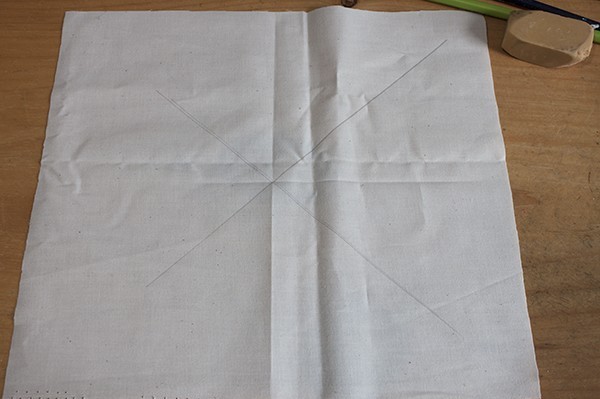
Fold the piece of fabric in four and press in the center to mark it, then with a quilters rule, mark a line with pencil from one corner to the other.
Step 2
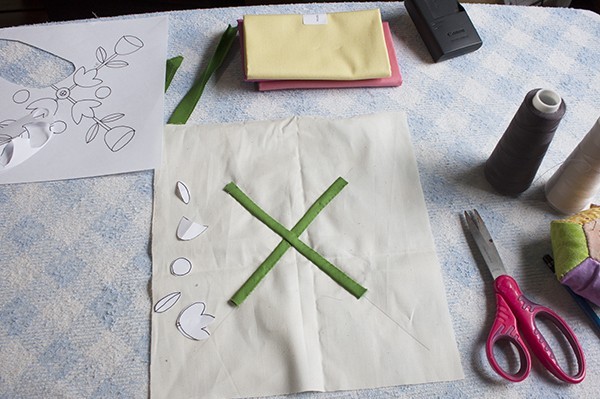
Cut the bias to make the stems of the flowers, I mark the point to start the stems from measuring them on the pattern, you need to mark from the center 3 1/4″ to each line.
After you cut the bias 1 1/4″, fold it in the middle and press, this time I didn’t use the bias folded as bias, just one fold in the middle.
Place the bias along the pencil mark and make a running stitch all the way from one point of the line to the other point.
Fold the bias and close it with applique stitches.
Step 3
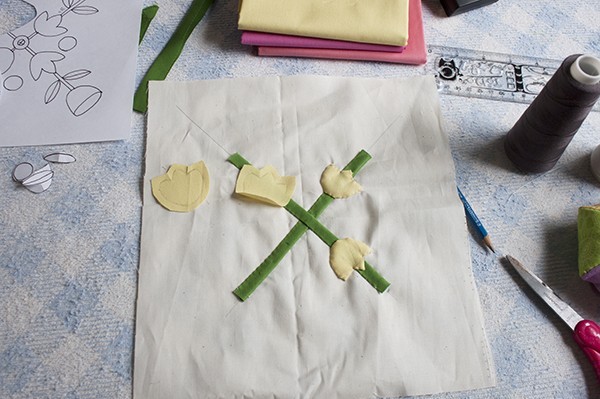
Once again, with a small ruler, measure the distance from the center to the point where the tulips are, just take one tulip distance from the template and mark the same distance on the four lines.
Applique the tulips, one on each line.
Step 4
Continue the applique of the rest of the pieces, the same way you did with the tulips, measure the distance of one pink flower on the template and mark it down on the four lines (stems) on the applique block.
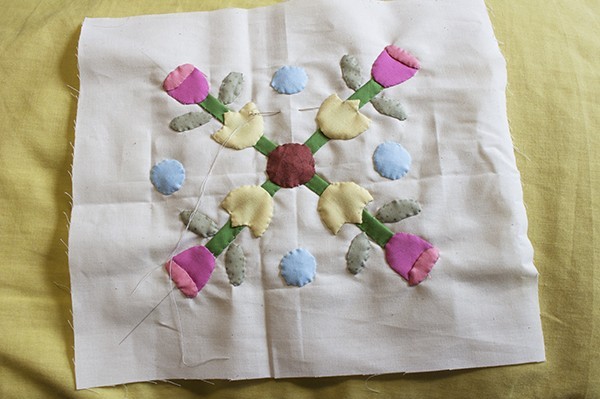
Step 5
Once you finish appliqueing all the flowers, leaves and dots on the block #1, it’s time to work on the embroidery.
You will use the back stitch, satin stitch and I also did a few longer stitch to make the X stitches.
This block #1 it’s a very good example of applique and embroidery stitches and techniques for beginners.
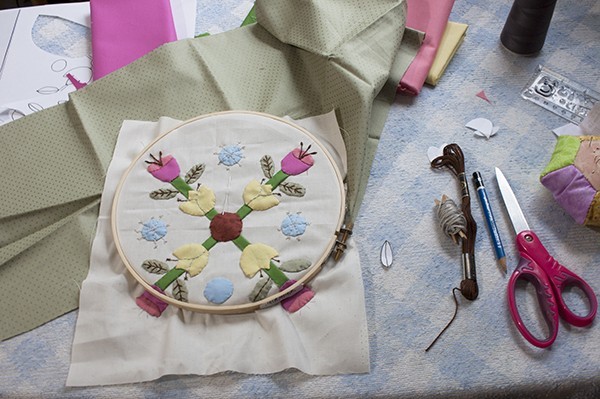
Step 6
Here is a close up photo so you can use it as a guide for the embroidery.
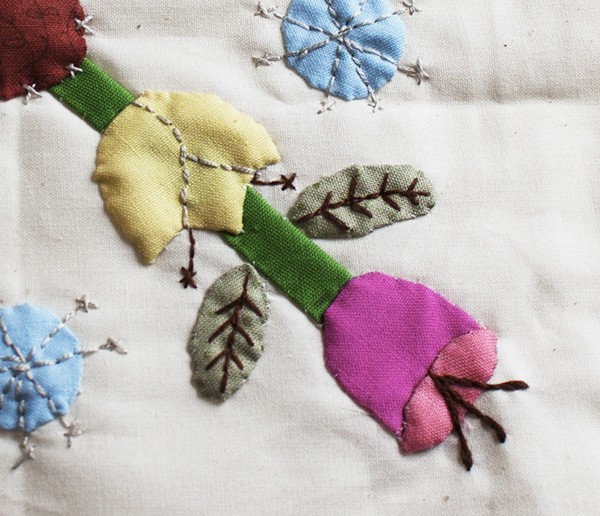
Once you finish making the block #1 for the Baltimore mini quilt, don’t press it, just keep it like this and I will work again with it when I get the six blocks finished.
I hope you like this tutorial to learn more about how to make patchwork – applique. There are so many beautiful quilts made with this technique.
If you liked this tutorial, PIN IT so you can find it later.
I thank you for making time to visit my blog and to share this post on your Social Media.
If you have any question, leave me a comment asking your question and I will reply to it briefly.
You can follow me on Facebook at Alejandra’s Quilt Studio and on Instagram to take a look to the sneak peek photos I share there from the new block I’m currently working on.
