If you love to make quilts, how to make patchwork – applique 4 is a post where I show you how to make a new block for the mini quilt Baltimore.
The block 4 is part of a series of 6 different blocks where you can make 6 different blocks to make a mini quilt Baltimore where you can learn the basic steps to make applique blocks for your quilts
Applique is a sewing technique where you can add pieces of fabric with different shapes to a bigger piece of fabric, you can work the applica with simple applique stitches but the results of a finished block can be amazing.
There’s no doubt at all some quilts can look so difficult to do, but when you work one piece at the time, you will see how easy and fun it is to make each one of these 6 blocks.
Sometimes a fold or some running stitches here and there, will help us to add some different textures on the applique, which it will give to your quilt amazing look!
You might be a beginner quilter and you might be afraid of making some elaborated blocks, but don’t be, I’ll walk you step by step on what you do to make your first Baltimore quilt.
Para hacer esta mini quilt Baltimore en espanol, visita mi blog www.alecoseycose.com
If you’re visiting my blog for the first time, you can take a look to the rest of the blog post to make this quilt here:
To make this block 4 you will need:
1 piece of cotton 100 % white or light beige fabric of 10 x 10″
A few pieces of different color and small prints of cotton 100 % fabric to make the applique.
DMC embroidery floss.
Needle, pins.
I share some affiliate links on this post, so you can take a look to the same quilting and embroidery tools I used to make my quilts, when you purchase your quilting tools with the affiliate links, you get your tools on the regular price and I’ll get a small % of the price, this way you help me to keep working on my quilts and I can keep sharing the tutorials to you.
I thank you for your support.
Video.
You can watch the video I made, it is in Spanish but below there is a full tutorial where I explain every step I made to make the block 4 in English for you.
If you’re interested to follow my YouTube channel and be the first one to watch my new videos, you can subscribe today!
You can download and pint the FREE pattern and templates to make the Baltimore mini quilt block 4 here:
>>> Baltimore mini quilt 4 A <<<
>>> Baltimore mini quilt 4 B <<<
How to make patchwork – applique 4, tutorial.
Step 1
As I did on the previous blocks, before I started to work on them, I will fold this block to match the corners to press the diagonal lines. You can press the lines with your finger tips or with a tool to fold and press paper.
I showed you also on the previous blocks for the Baltimore mini quilt, how to make the bias and how to fold it for the applique on the middle and press it with a warm iron, your finger tips or using the bone folder tool.
This time I will work on a circle, to trace the circle on the fabric, you can use the inside ring of the 6″ hoop, just place it on the fabric on the center, and with a pencil or marker for fabrics, trace the circle on the inside of the hoop.
I didn’t mark the circle where the marked lines are, as I will applique the flowers there, there’s no need to applique the bias there.
Place the folded bias to match by the inside of the circle line and make a running stitches. Fold the bias and close it with small stitches to do the applique of the bias.

Step 2
I show you how to make the flowers in the video, but I will describe for you the steps I did to make them.
Cut the 4 pieces of fabric you need to make the flowers, don’t forget to add the seam to each piece. Make running stitches all around the edge of each circle, pull out the thread and place the paper pattern inside, make two little stitches to prevent the running stitch get loose.
Turn down each flower and place it on its place and do the applique of each piece.
To make the center of each flower, cut out the template for the big yo-yos and cut out the four pieces of fabric you will need to make them.
This time you need to make each yo-yo folding inside the edge of each piece, do the running stitches and pull out the thread to make the yo-yo, place each yo-yo on each flower and do the applique of each piece with small stitches.

Step 3
When you have the four flowers already done, you can start doing the applique of the leaves, 5 leaves between the flowers, to make the leaves, you can trace the template for the leaves on the fabric and you can applique one leaf at the time, folding inside the edge of each piece as you do the applique stitches, just like I did on the video.
If you want to use the paper template inside of each piece as you work on the applique when you applique the leaves on this block, will work good too.
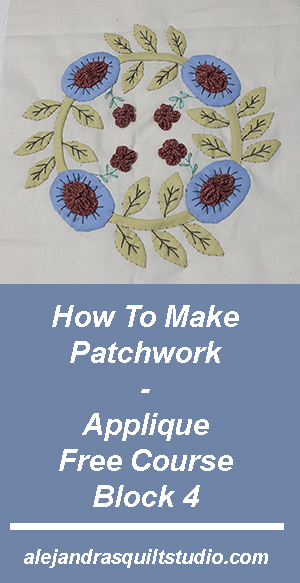
On this photo below, I show you how the block looks like when I finished the applique.

Step 4
It’s time to get the block 4 on the hoop and work the embroidery with two strands of embroidery floss in the needle, I use gray embroidery floss this time.

Step 5
The stitches I used to work the embroidery on the block 4 are simple and easy to make, simple back stitch and on the flowers just long stitches around the center, they don’t need to be perfect and the same, feel free to make some mistakes here and there, they will look more natural.

Step 6
When I thought the block was finished, I thought to add some small flowers in the center.
To make these four small flowers in the center, you’ll find a small yo-yo template in the FREE pattern to download, you can cut out the template and cut out the fabric to make them.
This time you will work the yo-yo as normal, folding the edge of the fabric inside and make a running stitch all around, pull out the thread to make the yo-yo.
Make two little stitches to avoid the thread to get loose. Don’t cut out the thread.
To make the four petals, you will just take the needle to the back of the yo-yo and place it on the center and take the needle to the front side of the yo-yo and pull it out tight, make this step twice on each petal.
When you finish making the four petals, place the flower on its place on the block and make two stitches in the center to hold the flower there, make also two little stitches on each petal, and finish the applique on the back of the block and cut out the thread.
Trace the steam and leaves for these flowers with pencil or a fabric marker, and do the embroidery of the steam with back stitches and the leaves with daisy stitches.

Step 7
Here you have a close up of the block 4, so you can take a better took to the embroidery.

Congratulations, your block 4 for the Baltimore mini quilt is done!
It wasn’t as hard to make it as it looks, right?
This is something I love about making applique, when you learn the steps and the tricks, the applique is so easy to make and it always looks great!
Don’t forget you can follow me on Facebook, Pinterest, Instagram and YouTube.
Be the first one to take a sneak peek of my work while I work on it before I publish the next blog post!
Thank you for visiting my blog, if you want to make the mini quilt Baltimore later, you can PIN IT so you can find it later.