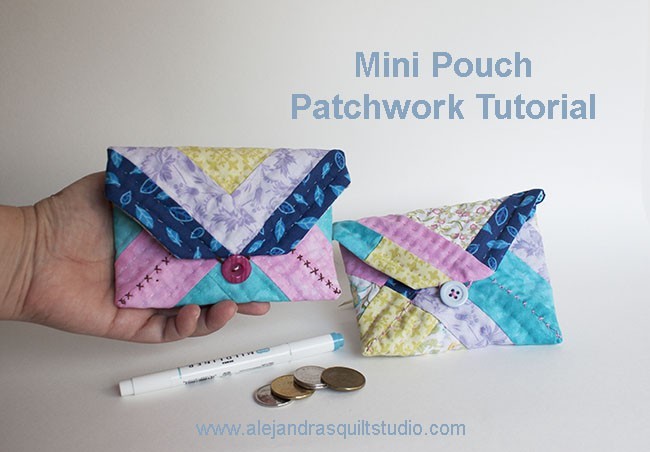
When you’re looking for a small project to make to give it as a gift, you can’t go wrong with the Mini Pouch Patchwork Tutorial, it’s so easy to make and you’ll be making more than one!
Whether it is for yourself or for a friend, every quilter loves to make small projects as we often get some orphan blocks after finishing a quilt.
This tutorial will give you the easy steps to make a cute mini pouch that will help you to get everything organized in your purse, the size is perfect to keep in it your makeup essentials.
But if you’re looking for a small project to make with patchwork to get ready a few small handmade gifts before the Holidays, you can’t go wrong with the Mini Pouch, everyone will be happy to get one and made by you will give it a plus!
Mini Pouch Patchwork Tutorial
Materials
1 Orphan block of 8.5 x 8.5 ” or a block same size made by you.
1 piece of 9 x 9 of any cotton fabric for the inside of the pouch.
1 piece of 9 x 9 ” of thin batting fabric.
Sewing machine
Scissors
Needle, pins, safety pins, thread. DMC embroidery floss.
1 Button.
Visit the Best Patchwork Tools to take a look to the tools I use every day to make Patchwork, Quilting and some Embroidery.
Take a look to the quilting tools I use everyday to make the patchwork and sewing projects.
* This post may contain Affiliate Links, you can read the full disclosure here.
Video
Mini Pouch Patchwork Tutorial
1 – Press the orphan block.
You can use any orphan block that was left after you finished a quilt, it can have the same size as I mentioned on the materials list or it can be one or 2 inches bigger.

2 – Make the Sandwich.
Lay on a table the batting fabric, and lay over it the fabric for the inside of the bag, right side up.
Lay over the fabric for the inside the orphan block, right side down, pinch a few pins in the sandwich.

3 – Run your sewing machine.
Run your sewing machine on the four sides of the block, don’t forget to leave open one space of 2 inches on one side to turn out the mini quilt.
With the help of your scissors trim the four sides and trim diagonally the four corners of the block.

4 – Turn out the mini quilt.
Pinch a few safety pins (one on each corner ) and close the open with invisible stitches. You can watch a short video I shared on Instagram here.
It’s time to work on the quilting, as always I did it by hand but if you want to do it on your sewing machine, it will look great too.

5 – The Quilting is done!

6 – Make the mini pouch.
Turn the mini quilt, back side up and take two corners, fold the corners to the center to meet each other as shown on the photo below and sew the two sides together with small stitches on the inside side of the pouch.
When you finish sewing one side, do the same step with the other two sides of the mini quilt.

7 – Do some handmade embroidery.
Well, you can use your sewing machine to do some embroidery stitch on this step, but I think it will be hard to reach the corner of each side.
Do a handmade embroidery to hide the open of each side on the front of the pouch and by doing it, the mini pouch will be sturdy.

8 – Once you finished the hand embroidery.
The mini pouch will look like this.

9 – Make a fold on the corner.
And make a few stitches to sew the fold to the mini quilt. Make a button hole, I show you how to do it on the video and sew a button on the mini pouch.

10 – Voila, the mini pouch is finished!

Congratulations the mini pouch made with a patchwork block is finished and it looks amazing, you did a great job!
How fantastic is that Patchwork is always there to help us to make quick and easy projects to make our lives better!
From an orphan block or from some fabric strips that were left after you finish a quilt, you can make this cute mini pouch in no time!
I’m sure after you see how easy it is to make it, you’ll be making more that one!
Will you make a few to give them as a gift to your family or to your friends? Leave a comment and tell me how many you will be making!
Don’t forget to follow me on Social Media to get the updates of my quilting adventures!
If you’re looking for something else to make with Patchwork and Quilting, take a look to the Free Patterns Page, I’m sure you’ll find a project to make today.
You can read also:
Best Scissors for Quilting, on this post I tell you which are the scissors I use when I work on my projects and why I keep buying this brand.
Summer Bag – Easy Patchwork, get the free pattern to make a bag with soft pastel color fabrics.
Enjoyed this post, share it on your Social Media!

