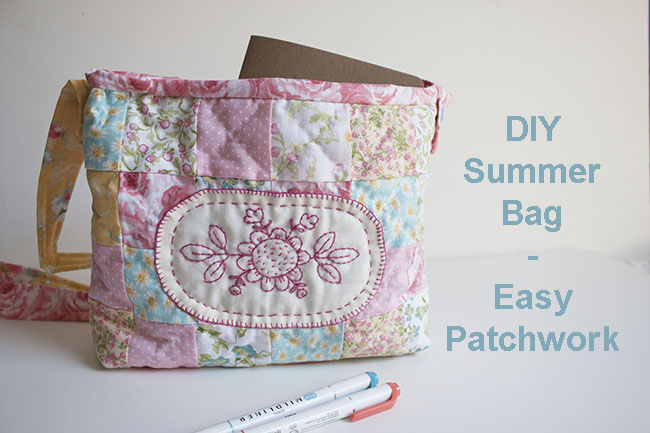
Soft pastel color fabrics will be the perfect option for the Summer Bag made with easy patchwork, the right complement for your outfit this Summer.
Easy to make, beginners – medium level, you’ll start making a mini quilt made with squares and a strip of fabric, as second step the quilting.
Making a patchwork bag out of a mini quilt is a smart idea that will give this bag a quilted texture everyone will love.
Carry with you the important things like your smart phone, keys, money and maybe a small notebook and a pencil or some makeup stuff.
Everything will go on this practical and beautiful patchwork bag!
Materials To Make The Summer Bag – Easy Patchwork

Video
Summer Bag – Easy Patchwork
Step 1
You need to start from the beginning, if you have followed me for some time or if you already know how to make patchwork, you know how to sew together the fabric squares to make lines.
Once you get the lines done, you need to sew the lines together to make a block, as a final step you need to sew the strip of fabric to the block. Press.

Step 2
Download the embroidery FREE pattern and transfer it to a piece of white or light beige fabric with the help of a pencil or a marker for fabric. (pattern will be here soon for you to download)
You can place the pattern under the fabric and pinch a few pins to hold the fabric in its place while you do the applique.
When the applique is done, you need to turn the piece to the back and trim out with the scissors the piece made with the squares of fabric under the piece you did the applique, as you do this step, the white fabric will be on the batting fabric.

Step 3
Make the quilting sandwich with a thin battin fabric and the fabric for the back, pinch a few safety pins and do the applique.
As you can see here on the picture below, I did the quilting by hand, it will be fine if you decide to do the quilting with your sewing machine.
Once the quilting is finished, do a running stitch all around the edge of the mini quilt and trim the batting fabric and the fabric for the inside of the bag.

Step 4
Now you can do the embroidery.
I did all the embroidery with the back stitch with a single thread of DMC perle embroidery thread.

Step 5
On this step, you need to sew the bias on the side of the mini quilt where the strip of fabric is, sew the bias on the front side of the mini quilt and sew to close the bias on the back of the mini quilt.
To make the exterior pocket of the bag, you need to sew 6 squares of fabric first, press.
Sew the strip of squares to the fabric you will use to make the exterior pocket. On the bottom of this piece of fabric make and mark a fold on the front side of the fabric 1/2″

Step 6
Place the piece of fabric with the strip made with the 6 squares of fabric on the back of the mini quilt and sew the pocket on the inside of the bag, this pocket is on the right side of the picture below.
To make the interior pocket with the zipper, sew one side of the zipper to one side of the fabric you’re using to make this pocket.
Then sew the other side of the zipper to the back of the mini quilt.
To finish this inside pocket, fold 1/2″ on the bottom inside and sew to applique this pocket to the mini quilt.

Step 7
Now you need to fold the bag on the middle and make a cut on each side on the middle of 1″, when you open the bag it will look bigger.

Step 8
Fold the bag in the middle, inside out, and pinch a few pins on each side of the bag.
Sew one strip of fabric on each side with your sewing machine, trim the fabric and the batting fabric, fold the strip of fabric like bias and sew to close, you can do this step with your sewing machine,

Step 10
Do the previous step on both sides of the bag, when you’re working on the side where the zipper is, open the zipper so you can work better and you don’t break the sewing machine needle when you work on this step.

Step 11
Your bag should look like this when you finish sewing to close the fabric strip on both sides of the bag.
It’s time now to make the box shape in the bag, open each side on the bottom to make the box, and sew a piece of fabric at the same time you sew with your sewing machine to make the box.
Trim the fabric and fold the piece of fabric like a bias to sew to close.

Step 12
On this picture below, you can take a look on how the box should look once you finish sewing it to close on each side.

Step 13
On this step you need to attach first the zipper to the bag, start on one side, and attach the zipper with running stitches all the way on one side, then do the same steps to attach the other side of the zipper starting on the same point where you start the first side of the zipper.
Once you finish attaching the zipper both sides to the bag with running stitches, you can trip the rest of the zipper with the help of a pair of scissors.
You can attach the bias with running stitches all the way on the bag, then you can sew the zipper with the bias with your sewing machine at the same time.
Don’t forget to make a fold on the bias when you start to attach it on the bag.

Step 14
This how the bias will look once you finish sewing it to the bag.
Fold the strip of fabric as a bias and sew by hand to close it.

Step 15
On this step you need to make the strap for the bag, make a fold of 1/4″ on one side of the strap and place the batting fabric strip on the inside of the strap, fold the fabric to cover the batting fabric strip and sew to close all the way of the strap, once you finish sewing to close the strip, do the same on the other side of the strap.
If you don’t want to make the strap with the fabric, you can buy one strap for your bag.

Step 16
To sew the strap to the bag, you can do it the same way I did, I sew two buttons on each side of the bag to hold the strap.
As a final touch to sew to the bag, I sew two snap fasteners on the exterior pocket and three buttons on the fabric strip.

Congratulations your Summer Patchwork bag is finished and it looks amazing.

Making the Summer bag was fun, isn’t it? I’m sure you’ll be making more than one!
Enjoyed this article, help me to spread the word, share it on your Social Media!
If you’re looking for something else to make with the Patchwork, visit the FREE patchwork projects page, I’m sure you’ll find something you want to make.
Find over 10 more tutorials to make Patchwork Bags Here!
You want to make this bag later, PIN this blog to your Pinterest, this way you can find my blog again.
