When you start making patchwork, there will be many projects to make, you won’t need to worry about finding something new to make, today I share a quilted heart mug rug tutorial.
With a new patchwork technique, easy and fun to make.
Any time you want to try a new patchwork technique, a good tip is to make something small to see if you like it or not, before you do something big with it.
You can find so many patchwork techniques to make, but you need to try them before you decide if you love that technique or not, not all quilting and patchwork are for everyone.
For example, I fall in love with hand quilting and hand applique.
But I like to try other techniques once in a while, sometimes I really like to try new techniques to know how they are made and how they look in a quilt.
My mission with this blog, it’s to share with you a few different patchwork and quilting techniques, so you can also get to know about them and you can also try them on your quilts.
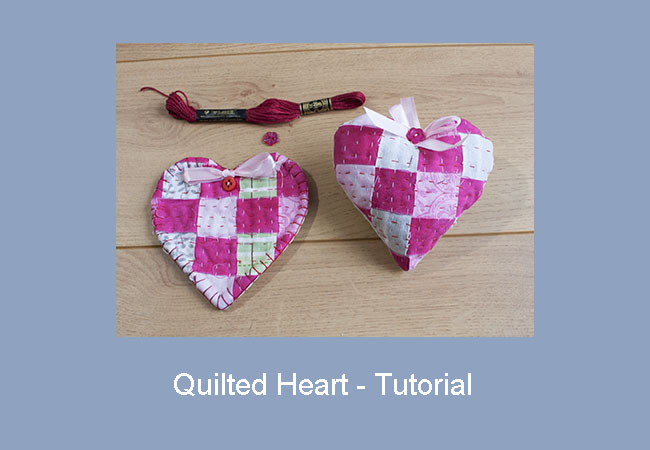
Quilted Heart Mug Rug Tutorial
Today I’m sharing two small quilted projects to make, both are made using the same quilted top.
Today’s tutorial is about how to make a quilted top with a few strips of fabric, no need to sew them by hand or with your sewing machine to make the top, it’s about how to weave them as you would be working on a loom, it’s the technique used to make a basket.
I know this basket wave technique is not for everyone, as the strips of fabric will be used with raw ends, as you work with them, fabric strips will leave some threads, and you might like it and you might not.
But when the quilted top is finished, it becomes nice and the raw ends give it a nice texture, and the most important is that you will learn about one different technique to try in your quilting projects.
On my Journal Quilt 2018, I used this raw ends technique in some blocks, as I kept working on the applique and the hand quilting, those raw ends fabric became part of the quilt, at the end, those raw ends give texture to the finished quilt.
As you keep working on the quilting by hand or by machine, your work will be well-made and the quilt will be good to be used for many years.
Making a quilted heart for Saint Valentin.
Many quilters love to have friends who also do quilting, I’m sure you might have some friends who love to get together to spend a morning or an afternoon to do some quilting.
If you have a group to make your quilts projects together, you might want to find something to make for them on those special days during the year, and one of those days is February the 14.
By making a small quilted project for your friends, it’s a way to let them know how much you love them and how much you love the time you get together to work together on what you love to do.
A small gift made by you, it’s something your friends will love to get!
It doesn’t matter why you make a small present for your friends, no matter if you make it for Christmas, for Saint Valentines or for their birthdays, something made by you will become a little treasure for your friends.
Material And Quilting Supplies
- 1 piece of cotton 100 % fabric in red or pink of 6 1/2 x 10″
- 1 piece of thin batting fabric 6 1/2 x 10″
- 1 piece of cotton 100 % fabric, any color and any print, this fabric will be on the back.
- 8 strips of fabric of 1 x 10 “
- Stuffing for pillows.
- Polyester 100 % thread, needle, pins, DMC embroidery floss in red, scissors, sewing machine.
You will need to make this quilted heart a patchwork ruler, rotary cutter, (affiliate), cutting mat too. You can find these patchwork tools on Amazon, you can try the same links I use to get the patchwork tools I have at home to help me to do all my quilting projects.
You can download the free pattern to make the quilted heart here, just click on the blue button.

Video
Tutorial
Step 1
On this step, you will need to get all the pieces of fabric you will need to make the quilted heart.
On the piece of fabric 6 1/2 x 10″ you will need to trace 1″ lines with a pencil for fabric and cut the strips with your scissors, but don’t cut one end of the fabric, by doing this, it will help you to work with the basket wave easier, as all the strips will be part of one piece.
You can also use the rotary cutter and a patchwork ruler to do this step.

Step 2
You will need to make the basket weave with the different strips of fabric.
Lay over the thin batting fabric the piece of fabric with the strips cut. Lift three strips and place one of the strips of fabric, return the strips of fabric you lifted to their place and lift the other strips of fabric you didn’t lift before, place a second strip of fabric.
Continue to work this way, until you finish the basket weave.
Pinch as many pins as you need to keep all the pieces of fabric in their places, by doing this, it will be easier for you to work on the next step.

Step 3
Once you have all the strips weaved, your quilted top is ready to be quilted.
Note: this time, the quilting sandwich has no fabric for the lower layer, the quilting sandwich is made only with two layers, the top and the batting fabric.
You can work on the quilting by hand as I did, or you can make it by machine, both ways are good, and quilting will look good.

Step 4
On this step, you will need to trace the heart template on the back of the fabric for the back of the pincushion and the mug rug, you can do this step by laying the template on the fabric and trace it with a pencil or pen for fabric.
Make a mark to not sew a 2 ” peace to turn each heart out.
Once you have both hearts traced on the back of the fabric, lay this fabric on top of the quilted top, right side to right side, pinch a couple of pins, and run your sewing machine on the pencil mark.

Step 5
On this photo, you can take a look on the batting fabric and how the hand quilting looks like, but you also can see the heart shape made by the sewing machine.

Step 6
Cut out each heart with the help of the scissors, don’t forget to add the 1/4″ of seam.
Make a little cut all around the edge of each heart. Turn out each heart.

Step 7
Stuff up one heart with the pillow filling, sew to close this heart.
Sew to close the heart for the mug rug, it will be closed with no stuffing.

Step 8
To make the mug rug looks better, do a buttonhole stitch with 2 strands of embroidery floss all around the edge of this heart.
To finish both hearts, sew a ribbon bow and a button on each heart.

Congratulations, your quilted hearts look so pretty!
You have made a great job!

A quilted heart mug rug!
It’s not big, but it’s big enough so you can place a cup or a mug on it, it will make the time to have a cup of coffee even better, when you use it to keep your coffee hot longer!

I’m sure, after you finished the first two quilted hearts, you will be making a few more to have them ready for a nice surprise for your friends on this Saint Valentine’s Day!
Your friends will love their hearts and the mug rug have the right size to carry it on your bag!
If you have any question about this tutorial, you can leave it on a comment, I will reply to you.
If you’re looking for a quilting project to make today, but this tutorial wasn’t what you were looking for, you can visit the FREE patterns page, I’m sure you will find the quilting project you want to make today!
Don’t forget to follow me on my Social Media, so you can take a look to the updates I share from my quilting adventures.
If you want to make the quilted hearts later, you can PIN it to your Pinterest, so you can find it later.
