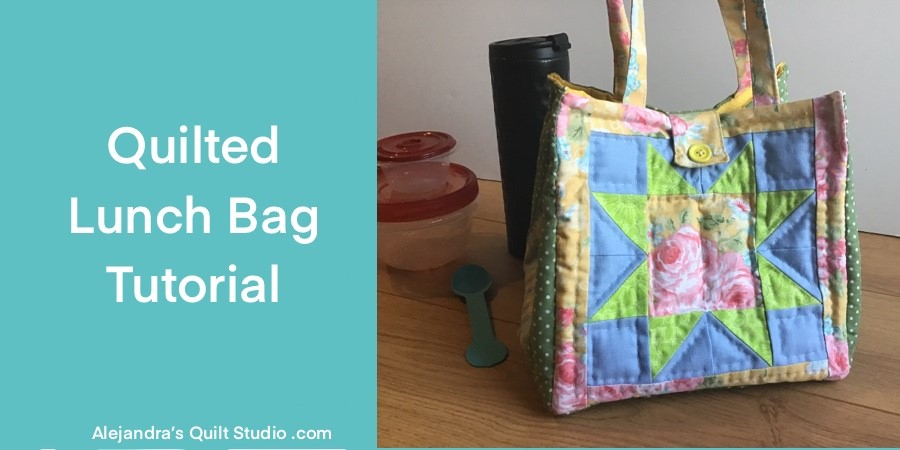
Quilted Lunch Bag Tutorial will give you the easy steps to make a unique and pretty bag to carry your lunch to your workplace, school or to a picnic day!
Tired of seeing at your workplace everyone having the same lunch bag? And this makes it hard for you to find yours at lunchtime!
When you love to sew and make quilts, you might have wondering why not to make a quilted lunch bag, with those pretty fabrics you have at home!
Today I will share a step by step tutorial to make a lunch bag with 4 patchwork blocks you might have already done after you finished one quilt, in case you don’t have any, it won’t take long to make one patchwork start block and then 3 more log cabin blocks same size as the star block.
Quilted Lunch Bag Tutorial
What Is A Lunch Bag?
It’s a bag where you can carry a meal for lunch, and this bag can be used many times, it can be purchased or it can be made by you at home.
Materials and Supplies
- 4 Patchwork blocks of 9 x 9 inches
- 1 piece of cotton 100% fabric of 9 x 9 inches
- 5 pieces of cotton 100 % fabric of 10 x 10 inches
- 5 pieces of thin batting fabric 10 x 10 inches
- 2 pieces of cotton 100 % fabric of 12 x 2 inches
- 1 piece of cotton 100 % fabric of 5 x 2.5 inches
- 1 Button
- Pins
- Patchwork ruler, rotary cutter, cutting mat
- Scissors
- Safety pins
- Sewing Machine
- Needle
- Thread
- Thimble
* You can read how the Sawtooth Star is made on this tutorial, for the lunch bag I used squares of 2 1/4 x 2 1/4 inches and triangles of 2 1/2 x 2 1/2 inches.
Step 1 – Make 4 Patchwork Blocks
For this tutorial, you will need to make 4 patchwork blocks, any pattern, you might have some orphan blocks after you finished a quilt, this is the time to use them to make this bag.
I had a patchwork star block at home, so I had to make 3 more blocks, I made them just by sewing fabric strips 4 sides on a square of fabric. If you want to make the four blocks like mine, all you need to do is to cut one 2 x 2 inches squares and strips will be 1 3/4 inches.
Press all blocks.
You will need to cut one piece of fabric for the bottom of the bag same size as the blocks you made from one of the fabrics you used to make the four blocks.

Step 2 – Cut Out Fabric
When you finish making the 4 patchwork blocks, cut the piece of fabric for the bottom of the lunch bag, same size as patchwork blocks.
Cut out the rest of the pieces of fabric you need for this tutorial.

Step 3 – Make The 5 Mini Quilts
This time making the quilting sandwich for the 5 mini quilts will be different, as every piece of the lunch bag will be quilted separately.
The steps to make the mini quilts ready to be quilted is the same for the 5 mini quilts.
Lay the batting fabric on your work table, lay over it the piece of fabric for the back (right side up), lay over this piece of fabric the patchwork block (right side down), pinch a few pins all around, and sew on all around on your sewing machine, don’t forget to leave a gap to turn the mini quilt out.
Trim the fabric for the back with the help of a pair of scissors, trim the four corners and turn out each mini quilt.
Note: on this step, you need to add the handles and the closure for the lunch bag on two of the mini quilts, instructions are on step 5

Step 4 – Quilting The Mini Quilts
Close by hand the gap and pinch a few safety pins on each mini quilt, now you can work on the quilting by hand like I did, or with your sewing machine.
On the mini quilt for the bottom of the bag, you can get creative and do a nice quilting design.

Step 5 – How To make The Handles and The Closure For The Bag
You have two pieces of fabric for the handles, fold both edges lengthwise 1/4″ to the back and then fold in the middle lengthwise the piece of fabric and top stitching on both sides of each piece.
To make the closure, take the piece of fabric and fold it in the middle, right side to right side, and sew on three sides, trim the two corners and turn the piece out.
Top stitching three sides and make a buttonhole on this piece.
You will need to place one handle in one mini quilt and one handle and the closure in one mini quilt, do this step when you are making the three layers of fabric to make the mini quilt on step 3

Step 6 -Quilting the 5 Mini Quilts
When you finished working on the quilting, the 5 mini quilts should look like this, picture below.

Step 7 – Stitch On 4 Mini Quilts
On this step you will need to stitch on four mini quilts to make a line, be sure to place the mini quilt for the front, then one side, then the mini quilt for the back and at the end another mini quilt for one side.
Place one mini quilt to a second mini quilt, right side to right side, and pin both, stitch on with the stitching you use to stitch on hexies. Open and stitch on the next mini quilt, open and stitch on the last mini quilt, open.

Step 8 – Stitch On The Mini Quilt For The Bottom of The Bag
On this step you can stitch on the mini quilt for the bottom to any of the four mini quilts, just one side, then you can keep stitching on the rest of the mini quilts to the mini quilt for the bottom.
When you finish stitching on the four mini quilts to the bottom mini quilt, you can stitch on the mini quilts to close the bag.
Turn the lunch bag out.

Step 9 – How To Finish The Lunch Bag
You need to make a few stitches by hand on each side of the bag on the right side on the top, pinch with your fingers each side and make 4 or 5 stitches, don’t forget to reinforce the stitches.
Sew on the button and open with a sharp pair of scissors the button hole and the lunch bag is ready to be used.

The Lunch Bag is ready and it looks amazing!
You can use this bag as a lunch bag or to carry your supplies for your knitting or other crafts.
How To Wash The Lunch Bag?
To wash the lunch bag, all you need is to add it to the laundry machine with the rest of the laundry and use the laundry soap you use, in case you use other type of fabric, you can wash the lunch bag by hand with a neutral soap and with cold water.
To dry the lunch bag, it’s better to let it dry in a shady place.
How to Make An Insulated Lunch Bag?
If you want to make an insulated lunch bag with this tutorial, I will suggest you to make the lunch bag following the full tutorial here.
When you get it done, make a lunch bag following the same step to cut 5 pieces of insulated fabric same size as the patchwork blocks you used on this tutorial, and make the insulated lining by sewing on four pieces and then one on the bottom.
Fold 1/4″ to the back on the top, and place the insulated lining inside the lunch bag, you can sew on both bags on your sewing machine.
I thank you for reading my blog and your interest for learning to make small patchwork and quilting projects.

You can also read:
- 12 Easy Patchwork Gifts For Mom – Moms love bags, and she loves to have more than one, you can make one for her this year!
Puedes leer el mismo tutorial en espanol para hacer la Bolsa Para Almuerzo aqui!
You can watch the video here: