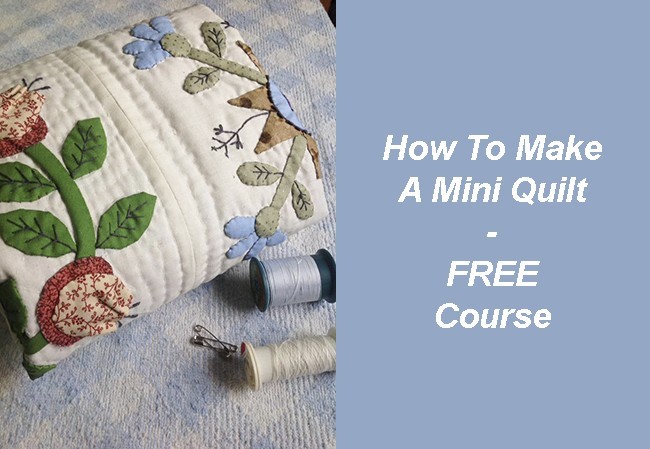
Today I will share with you how to make a mini quilt Baltimore, and how to do the hand quilting, easy and fun to do!
I have been working on this mini quilt for the last 6 weeks by making the applique of one block every week, today I’m happy to be busy working to sew all the 6 blocks together to make the top for this mini quilt.
If you haven’t made any block yet, you can visit the 6 previous post on my blog to get the FREE pattern to make each one of them.
How to make patchwork – applique 1
How to make patchwork – applique 2
How to make patchwork – applique 3
How to make patchwork – applique 4
How to make patchwork – applique 5
How to make patchwork – applique 6
Once you make the 6 blocks, you can continue and sew them together to make the quilt top for the mini quilt Baltimore, and today I will show you also how to make the sandwich for the quilt so you can also do the hand quilting.
If you don’t want to make the quilting by hand, and you want to make it by machine, I’m sure you will make a great job and the mini quilt look amazing.
I’m mostly a hand quilting quilter, I love to make the hand quilting on my quilts and I will give you the steps I follow when I work on my quilts, you never know, you might want to give it a try and you might love the results.
You will need to make this mini quilt:
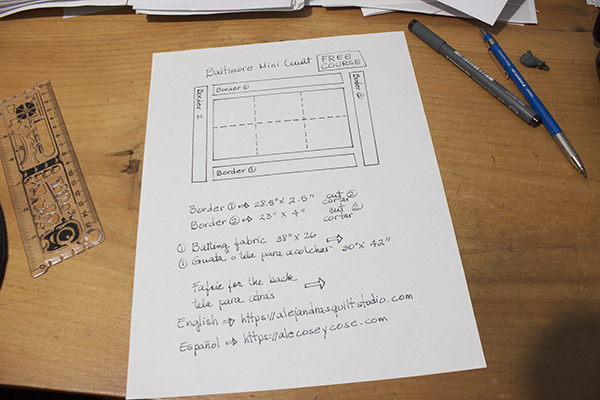
6 blocks 10 x 10 ” with the applique already done.
2 pieces of cotton 100 % fabric of 28.5 x 2.5″
2 pieces of cotton 100 % white or light beige fabric of 23 x 4″
1 piece of batting fabric of 38 x 26″
1 piece of cotton 100 % fabric for the back of the quilt of 30 x 42″
1 hoop for quilting (just in case you use it when you do the hand quilting on your quilts)
1 Needle
Pins
I share some affiliate links on this post, so you can take a look to the same quilting and embroidery tools I used to make my quilts, when you purchase your quilting tools with the affiliate links, you get your tools on the regular price and I’ll get a small % of the price, this way you help me to keep working on my quilts and I can keep sharing the tutorials to you.
I thank you for your support.
Video
Step 1
Once you finish making the 6 blocks for the Baltimore mini quilt, the next step to do is to press them with a warm iron and trim each block with the help of the quilters rule and the rotary cutter.

Step 2
On this step, you will arrange the six blocks the way you like them to be in your quilt, you can follow the same order I placed the six blocks on my quilt or you can place them as you like them more.

On this step, you will sew lines of two blocks first, this time once when you finish sewing the three lines of two blocks, press with warm iron to open the seams.
Then you can sew the three lines together to have the six blocks all sewn together.
It’s time now to sew the borders, first one border at a time all the way on the sides with three blocks, press and open the seams.
The last step to do on this point is to sew both borders at the two ends of the mini quilt, press and open the seams.
Now your mini quilt top is finished.
You can take the measures here to know the wide and the long of your mini quilt, these numbers will help you to cut the batting fabric and the fabric for the back.

Step 3
To cut the batting fabric you will need to add 3 inches to the wide and to the long of your mini quilt top.
To cut the fabric for the back, add 5 inches to the width and to the length of your mini quilt top, this fabric needs to be previous washed and ironed.

Step 4
On this photo, I show you how I do when I cut the fabric for the back, I place the mini quilt on the top and I will be sure their’s enough fabric on the four sides. I use to do the same with the batting fabric, by doing this it helps me to know if both fabrics are big enough to work on the hand quilting with no size problem while I work on the hand quilting.

Step 5
Once I have both fabrics, the fabric for the back and the batting fabric at the right size for the mini quilt, I make the sandwich by placing the fabric for the back first right side down, over this fabric I place the batting fabric and over it I place the mini quilt top.
Once the three layers are placed on this order, I double check their’s enough room on the four sides of the batting fabric and on the fabric for the back, then I place some safety pins to hold the three layers of fabric together.

Step 6
On this photo I show you how I check each corner to have enough fabric.

Step 7
It’s time to start working on the quilting, I love to make the quilting by hand, I always start in the center of the quilt, it doesn’t matter how big or small the quilt is. This time I did the quilting of the center line on both sides, then I worked one of the two center blocks.
You can do the quilting by machine if you want to, I’m sure you will do a great quilting job!

Step 8
This is how the Baltimore mini quilt looks like when I finished the hand quilting.
On this step, I always do a running stitch at the edge of the mini quilt border, this way I keep the three layers of fabric on the right point before I trim the batting fabric.

Step 9
You can take a look on this picture how I make the running stitches all the way on the edge of the mini quilt.

Well, the mini quilt is ready to work on the last step to make the self bidding by trimming the batting fabric and trim the fabric of the back the right size to be folded as a bias and sew to close.
Don’t forget you can follow me on my Social Media here:
I keep sharing moments of my quilting work daily so you can take a sneak peek on what it’s coming!
Thank you for making the time to stop to visit my blog and for your interest to make this mini quilt.
If you want to make the Baltimore mini quilt later, you can PIN it so you can find it later.
I thank you for sharing this blog on your Social Media.

