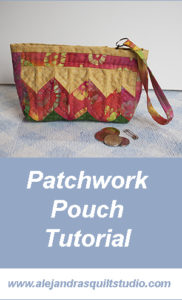
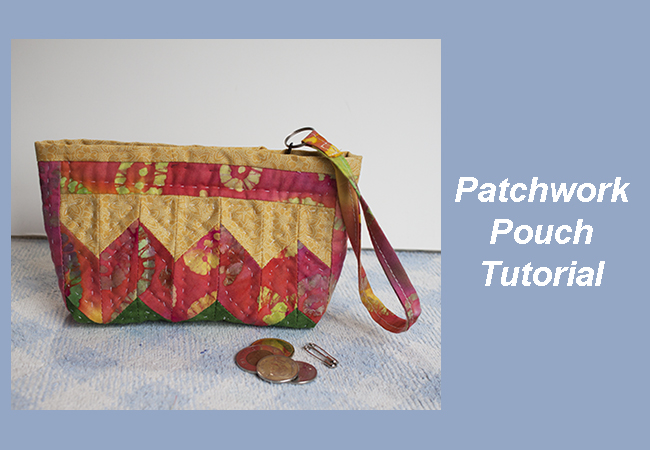
In this patchwork pouch tutorial I’m going to share the steps you need to follow to make a clouch, cute and easy to carry anywhere!
I’m a big fan of making all kind of bags made with patchwork, but my favorites are clouches, easy and fun to make and you can make them with many different patchwork patterns.
Making a clouch for you or to give it as a present, it’s always a good idea to make, you can carry all those important small things with you in one place, your smart phone, your keys and money will be always in one place.
You can always make a clouch in one or two hours of sewing and quilting, and you can make them with just one or two pieces of fabric.
If you have saved a favorite piece of fabric to make something special with it, this clouch might be the perfect idea to make!
This time you’ll get not just one tutorial but two, as I made two clouches following the same steps but one is with one front design and the second clouch is made with the same technique but with a different design.
You will need to make both clouches following the same steps, but at the end of the tutorial you’ll get the instructions to make on the step 1 for the clouch 2.
Puedes leer este misma entrada pero en espanol para hacer una linda bolsita patchwork en Ale Cose y Cose.com
Materials
3 strips of cotton 100 % fabric of 1 1/2 x 24 ” (each strip of fabric should be in a different color or print)
1 strip of cotton 100 % fabric of 1 1/2 x 24 ” (any fabric as this strip will be used to do the bias for the sewings)
1 Strip of cotton 100 % fabric of 1 1/2 x 24 ” (this strip is for the bias)
1 Thin batting fabric of 10 x 12″
1 Cotton 100 % fabric of 10 x 12″ (for the inside of the clouch)
1 Cotton 100 % fabric of 5 x 9″ for the inside pocket.
1 zipper 8″
1 key ring
Needle, thread, pins and safety pins.
I share some affiliate links on this post, so you can take a look to the same quilting and embroidery tools I used to make my quilts, when you purchase your quilting tools with the affiliate links, you get your tools on the regular price and I’ll get a small % of the price, this way you help me to keep working on my quilts and I can keep sharing the tutorials to you.
I thank you for your support.
Video
Tutorial To Make an Easy Patchwork Pouch
Step 1
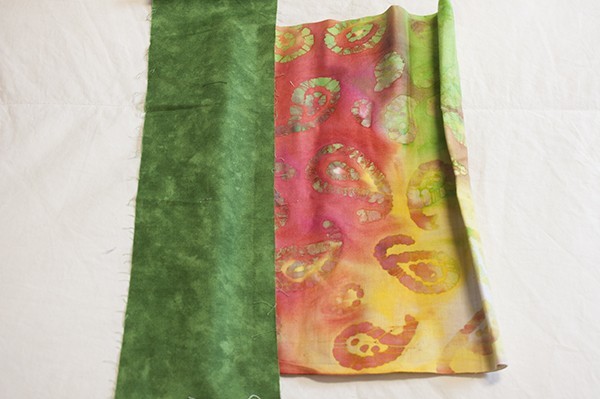
The first step to make this pouch is to pick the fabrics you will use to make it, you will need to pick three different cotton 100 % fabrics that you like, different colors for the three of them or different prints in one color.
Wash and iron the fabrics before you use them to make a patchwork project.
This time I use the Seminole patchwork technique to make the front of this clouch. It might look difficult to make but it’s easy and fun to make when you know the steps to follow to make it. Then it will be easy to make not one clouch but I’m sure you’ll be making a few of them.
The first step to do is to cut the three fabric strips you will need, one from each fabric, same size the three of them and sew them one to the other, open seams when ironing.
Place this piece made of the three pieces of fabric on the cutting mat, and fold it the middle to match the two ends, make the sew lines match at the end.
This time the first cut will be in a diagonal using the 45 degrees line on the patchwork ruler, place the ruler over the fabric and match the 45 degrees on the ruler with one of the sew lines on the piece to cut, make the first cut with the rotatory cutter. Remove the piece you just cut from the mat, and the fabric will have now an edge with the 45 degrees.
Place your patchwork ruler aligned at the end of the piece to 1 1/2″ and check the 45 degrees line should match with one of the sewing lines, make the second cut.
You will need to do this step two more times to get 6 pieces, at this point you will get three pieces in one direction and three pieces pointing to the other direction.
Unfold the remaining piece on the cutting mat, and make one last cut the same way you did, you will get 7 pieces in total, 4 in one direction and 3 pointing to the other direction.
Step 2
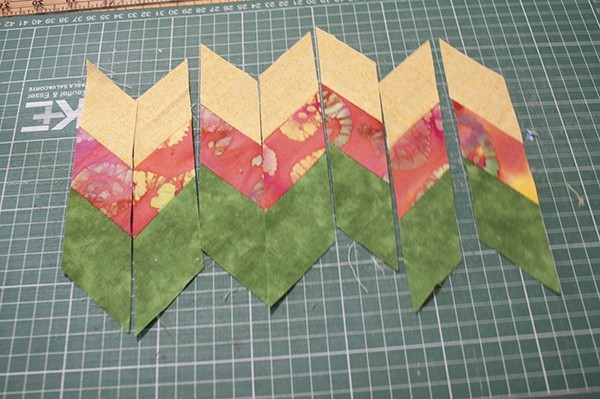
This is the way you need to place the 7 pieces before you sew them together.
To make this step, I will recommend to keep the 7 pieces this way, so you can take a tool to what pieces are next to sew.
To sew the two first pieces, take the second one from left to right, and place it over the first one, you can mark with a pencil a line of 1/4″ for the seam, place a couple of pins, pointing to the side you need to sew.
Sew these two pieces and open, iron.
Now, take the third piece and place it over the second piece, right side to right side, mark with a pencil the 1/4″ line for the seam and sew this piece on your sewing machine, open and sew.
Time to take the fourth piece and place it over the third one, repeat the steps to sew it like you did on the last step, and keep working the same way until you finish sewing all the seven pieces. Iron to open the seams.
Step 3
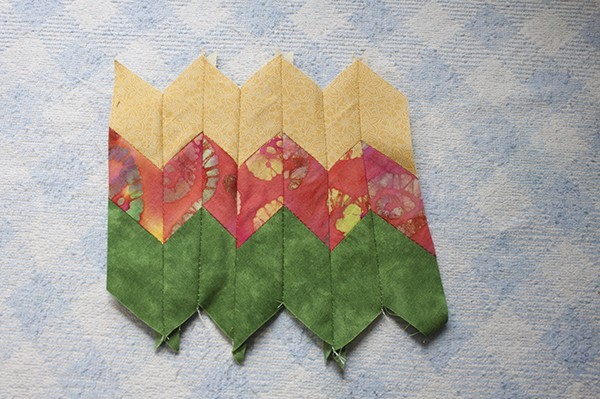
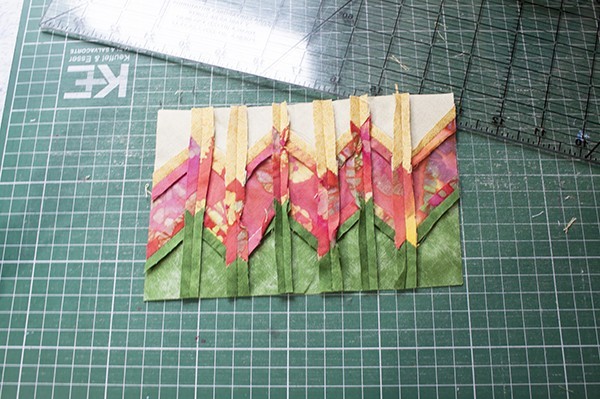
Once you finished sewing all the seven pieces together, the patchwork piece should look like this.
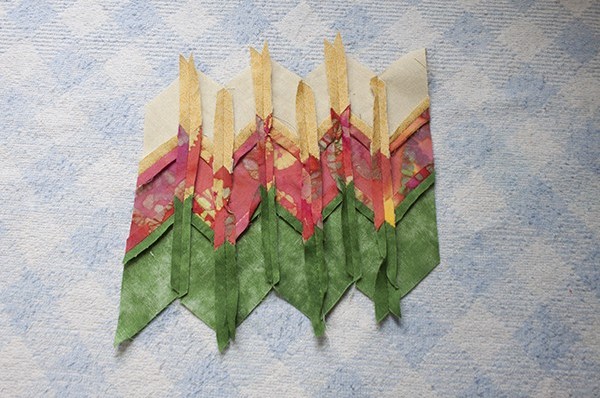
The back side should look like this with all the seams open and ironed.
Step 4
On this step you will trip the piece, place it on the cutting mat, and place any vertical line on the ruler to match one sewing, trim the piece with the rotatory cutter.
Do the same with the second edge of the patchwork piece.
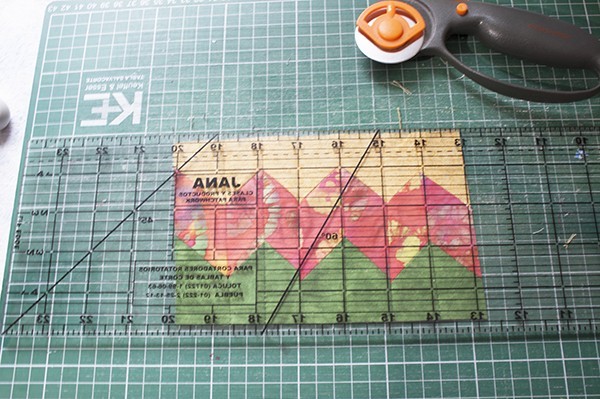
After you trimmed both sides, the patchwork piece should look like this.
Step 5
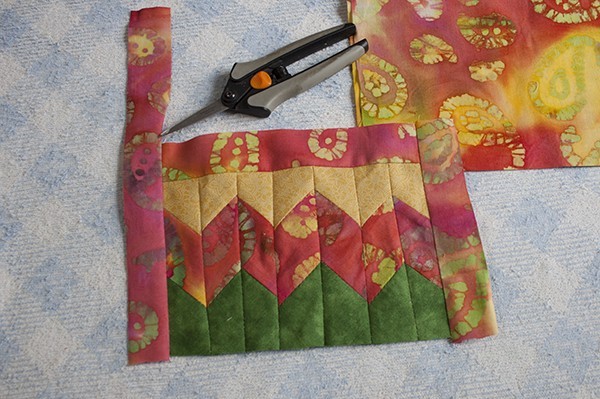
On this step you need to sew the three borders, do first the top side and then both sides.
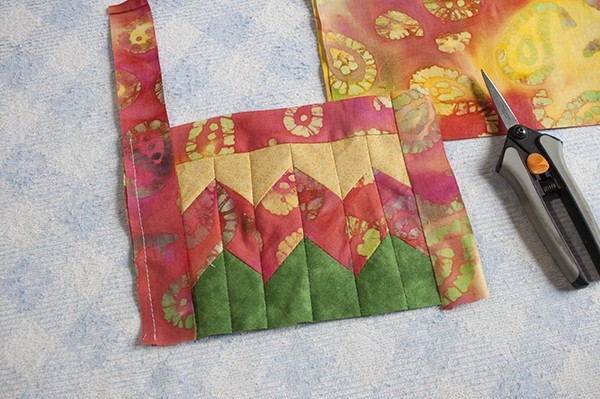
I like to work this step by cutting a long fabric strip, I like to sew the strip to the piece and then I cut the piece, you can do it this way or you can cut each piece the size you will need each piece. Both ways will work great.
Step 6
Cut a piece of fabric the same size as the front of the clouch, sew both pieces together and iron.
Cut the batting piece and the fabric for the inside of the clouch. Make the quilting sandwich by placing first the fabric for the inside right side down, then place the batting fabric and on the top, place the top of the mini quilt right side up.
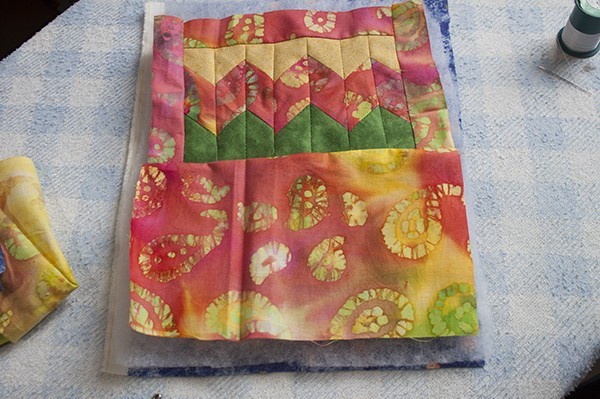
Step 7
Place a few safety pins to hold the three pieces of fabric together while you work on the quilting.
You can do the quilting by machine or by hand, I did it by hand, but if you do it by machine it will look great too.
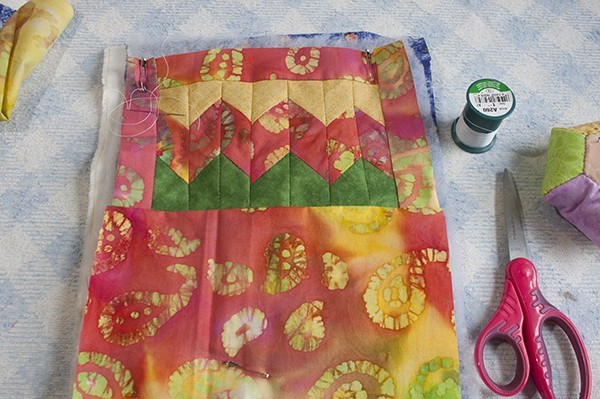
Step 8
After I finish the quilting, it looks like this, I decided to work the quilting on the back of the clouch quilting the design of the fabric.
Make a running stitches all around the edge of the top.

Step 9
Trim the batting fabric and the fabric for the inside of the clouch.

Step 10
It’s time to sew the inside pocket, double fold one edge and sew it on your sewing machine, simple fold on the bottom and sew it on your sewing machine.
Place the pocket on the back of the mini quilt, and sew by hand the bottom of the inside pocket, place a couple of pins to hold the pocket in its place while you work to make the clouch.
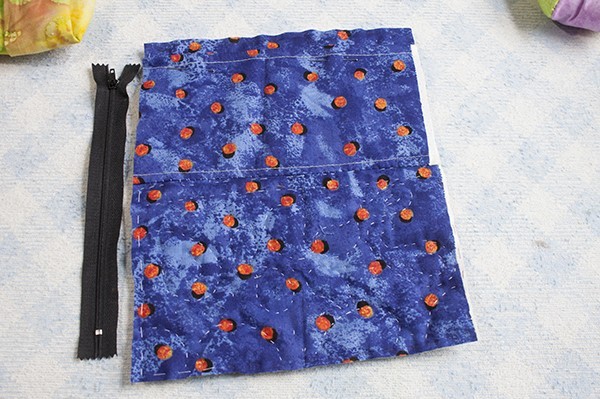
Step 11
Fold the clouch right side to right side, and sew both sides, place a piece of fabric on each side, sew it on your sewing machine, trim both sides, fold the piece of fabric on each side like bias and sew it to close by hand.
The next step is to make the box corners on both sides of the clouch, With the sewn fabric still right sides together, use both hands to pinch and pull apart the corner. As you pull, the fabric will begin to form a little peak with the corner point at the top and the seam lines running down the middle of the front and the back. Align these side and bottom seams. The seam allowances should be facing in opposite directions. Place a pin in the matched seams to hold them together. It is very important that you exactly match the seams; that is what will make the intersecting lines of your finished corner look good
Mark the depth of the boxed corner with a fabric marking pen or pencil and a straight ruler, positioning your ruler so the desired depth is measured from side to side at the base of the “peak.” Our desired boxed corner depth is 1/3” (more on how to determine measurements below). Slide the ruler down from the peak until you reach the point at which your “triangle” is the appropriate width (1/3″ in our sample). Draw a horizontal line at this measurement. You can sew both boxed corners with your sewing machine. When you sew each boxed corner, place a piece of fabric to hide the seam.
Cut both corners with the scissors, and fold each piece of fabric like a bias and sew it to close by hand.

Step 12
Sew the bias on the top of the clouch by machine on the right side, open and fold it twice to close it like a bias, sew to close it by hand on the inside of the clouch.
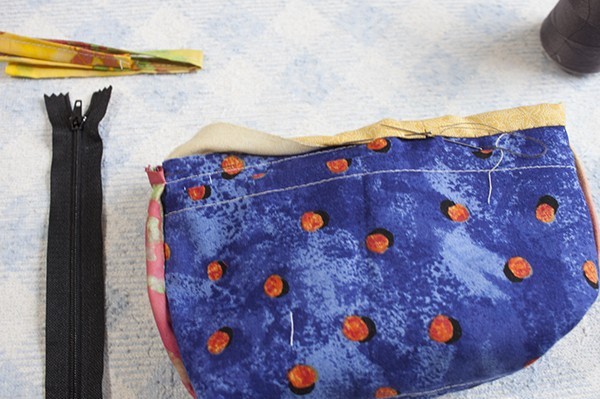
Step 13
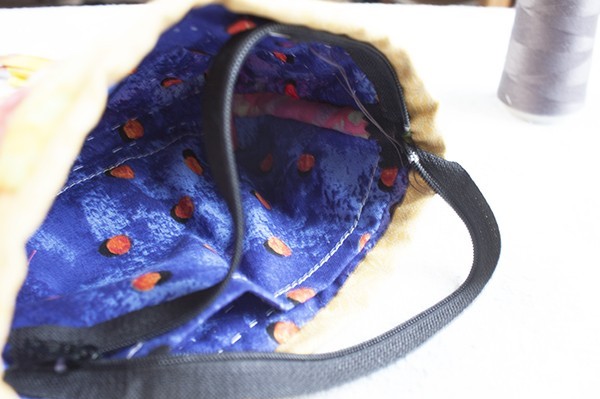
Sew the zipper on the inside, I like to do this step by hand, but if you want to do it by machine it will look good too.
Step 14
This time I forgot to sew the strap at the time to sew both sides of the clouch, but I came up with one solution that I think it will work better and looks good.
You need to fold the fabric strip for the strap like a bias, folding both sides of the strip and iron, then fold the piece in the middle and sew withe your sewing machine all the long of the piece.
Fold the strap in the middle, and place in one end a key ring, place the other end and cover it with the folded end, sew both ends to the strap with your sewing machine.
Place the key ring in the zipper.
The strap will help you to open and close the clouch easily and it will help you to carry the clouch more comfortable.
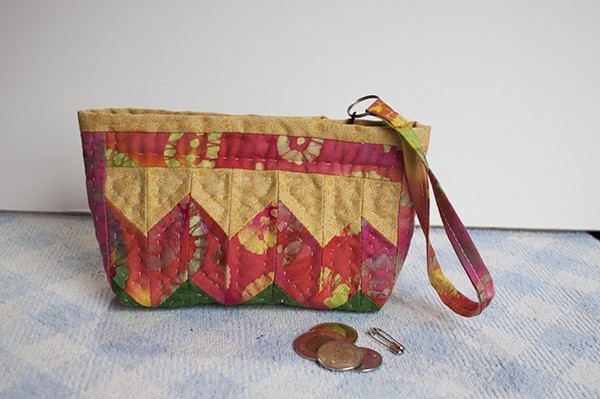
Congratulations your new patchwork clouch is finish and ready to be used or to give it as a present.
The blue patchwork pouch
This time I wanted to make another patchwork clouch, same size, same patchwork technique but in different colors and with a different design.
It’s so easy to use the same pattern and get a different design.
All you need to do is to cut some strips of fabric with a different color design, I won’t make this post longer with a full explanation of what I did, but it will be easier to make it for you, I’m sure of it.
All the steps to make this blue clouch will be the same, but the first one, you will need:
2 strips of pink fabric of 24 x 1″
2 strips of blue fabric of 24 x 1 1/2″
1 strip of yellow fabric of 12 1/4″ x 1 1/2″
1 strip of solid blue fabric of 12 1/4 x 1 1/2″
Step 1
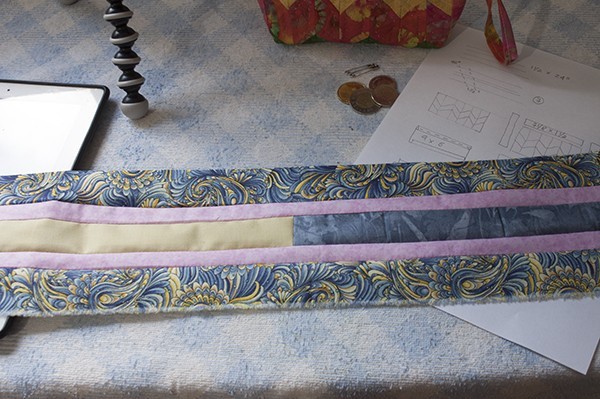
You need to sew the yellow fabric to the solid blue fabric to make one strip of fabric of 24″ long.
Then you can follow to sew all the strips together following this photo. After you sew all the pieces of fabric together follow the next steps to make the clouch as you did with the first clouch.
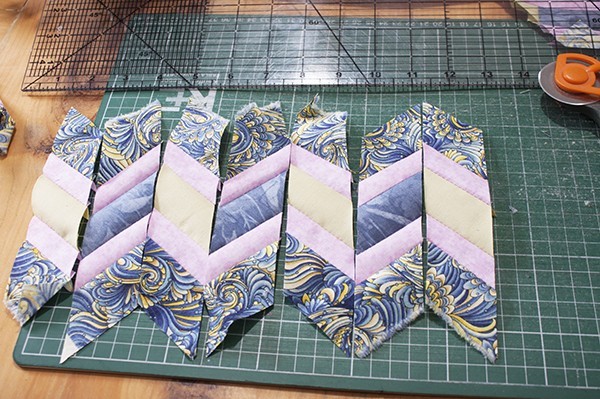
This is how the 7 pieces will look like when after you cut them with the help of the 45 degree line on the patchwork ruler.
Thanks so much for making the time to stop and read my blog, I hope you make this patchwork clouch, I think you will, and you will be making more than one.
As the Holidays are coming, I’m sure you will find this tutorial to make some of them to give them as a present.
If you have any question, please leave a comment and I will reply to it shortly.
If you want to see more from my work, you can follow me on Social Media to have the sneak peeks I share daily.
>>> Find the sewing machine to make your quilting projects here <<<
If you want to get more ideas to do more patchwork projects, you might find one project to make here.
If you want to save this post for later, you can PIN IT so you can find it later.
What a wonderful project! I am looking for ideas for friends and family this holiday season and this seems perfect. It seem like it could be very complicated, but you have written wonderful, very easy to follow, step-by-step instructions. I am not an a super accomplished quilter but I think I can do this and my family will love thes pouches, they are so cool. I really like that it should only take two hours of sewing and quilting, and uses just one or two pieces of fabric. Thank you for the suggestion I am going to get started on these this weekend!
There is no question from me, It is as transparent as it could be for me follow the instruction with figures. I am sure it will be same for all the viewers. It is easy to make and really a beautiful and useful product you generate within few hours.
Thank you for sharing.
Hello Anusuya,
Thanks so much for your visit and for taking your time to write a comment, I always love to hear from my readers.
I’m glad you find this tutorial easy to follow 🙂
Hello Alejandra! This is a wonderful detailed tutorial on how to make a clouch!
I’ve been sewing for years but never tried to quilt. My mother-in-law is the opposite. She has quilted for years but never really sewn much. I’ve made cloth pouches before and the basic pattern is very easy. In fact, one of my first projects was making one of these. It’s how I learned.
I will have to try your pattern out though. I really like the design you’ve done for this. And it doesn’t look very difficult at all. I do have a questions regarding this though. Is it possible to make this pouch reversible?
It would be the perfect bag if it could be turned inside-out and carry a completely different color scheme.
Thanks again for sharing!
Hi Tina,
Thanks so much for your visit to read my blog.
I always love to hear from people who like to sew, to answer your question, the only problem I see to make this clouch reversible is the zipper.
To make it reversible, you need to use another way to close it both sides and it should work good one way and the other.
I will work on this idea to make one clouch reversible. 🙂
Hi Alenjandra, I liked your site and the links you have pasted to Amazon in reference to some of the items you have recommended. Your Facebook page link took a little bit of time to load. Perhaps the is a lot of traffic there. I love your quilts especially for the beds. Thank you for giving me the opportunity to view your site. If you have I would appreciate you taking a look at my site and commenting. Thank you.
You are awesome, you made the whole process of making a patchwork pouch so simple, can’t wait to make one for my wife using this simple, step by step tutorial, Is it possible to make one using leather material? would also like to make a leather Patchwork for my wife.
Thank you so much for a great article
Hi,
The skills required to make these products must be exceptional, they look amazing, I don’t think I would have the confidence or skill to do it. I amagine it takes some time to learn such a trade.
I wonder if it is possible to purchase some of your finished products, I know it’s not easy to find hand crafted material like this and would love to make a gift out of it for someone I know that would really appreiciate it.
thanks,
Dave.
Hermoso Ale gracias por compartir!!!
Mil gracias a ti Graciela Ferrari, siempre un gusto que pases a visitar mi blog 🙂