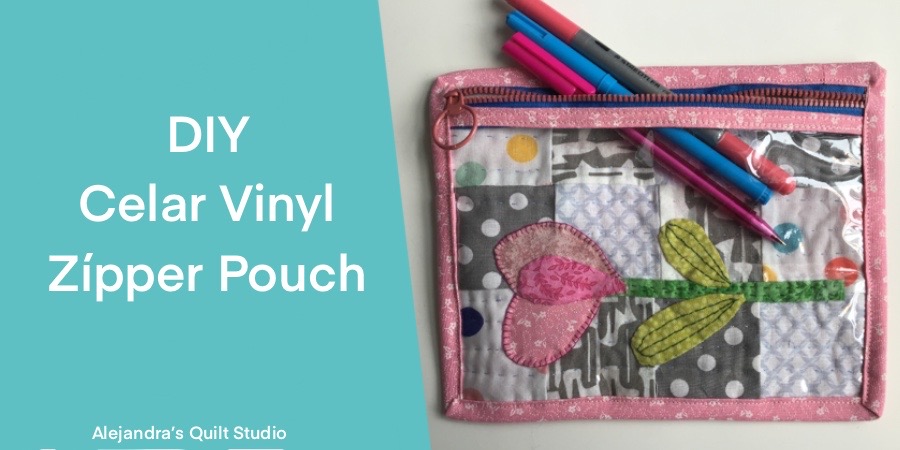
Clear Vinyl Zipper Pouch made with a small quilted piece to help you to keep everything, and easy to find what you need.
A pouch made with clear vinyl on the front, will help you to easily find anything you need, whether it is used to keep your pencils and pens, cream or makeup, or if you use it to keep all the notions for your sewing and quilting projects inside.
On this tutorial, I will share the easy steps to follow to make a cute clear vinyl zipper pouch with an easy to make applique for children, one with an applique flower and one with a dino applique.
Clear Vinyl Zipper Pouch Step by Step Tutorial

The clear vinyl zipper pouch can be made with a piece of fabric for the back, but I find making a patchwork and quilted piece, it gives the pouch more strength and it makes it even prettier. The tutorial to make the patchwork and applique piece is below.
Materials and Supplies
- 1 Quilted piece of 6 1/2 x 8 inches, it can be also made with a piece of pretty fabric.
- 1 piece of clear vinyl of 6 1/2 x 7 1/2 inches
- 1 zipper of 8 inches
- Bias tape
1. Sew On The Bias On The Zipper

Sew on the bias on one side of the zipper, it can be done on your sewing machine.
2. Sew On The Vinyl To the Zipper
Lay the vinyl on your work table, and lay the zipper over the vinyl piece, on the top, you can pinch two pins to hold the two pieces together, while you sew on the two pieces together on your sewing machine, do a double stitching, one on the edge of the bias and one stitching close to the zipper.
3. Sew On The Bias Around The Zipper Pouch

Sew on the bias tape on the back of the zipper pouch, around the four sides of the pouch.
To sew to close the bias, turn the bias up to the front of the pouch, fold the bias tape to cover the edge of the four sides on the zipper pouch, you can pin the folded bias tape to hold it on its place, or you can use small pins, sew on the bias on your sewing machine.
The Clear Vinyl Zipper Pouch is finished and it looks amazing!
How To Make A Patchwork and Applique Piece To Make the Clear Vinyl Zipper Pouch
- 12 pieces of 2 1/2 x 2 1/2 inches
- Assorted cotton fabric for the applique
- 1 piece of thin batting fabric of 6 1/2 x 8 inches
- 1 piece of cotton fabric for the back of 6 1/2 x 8 inches
1. Sew on 3 strips with 4 pieces of fabric, press, stitch on the three strips together to make the top.
2. Download the Free Applique Pattern For the Clear Vinyl Zipper pouch here, and do the applique.
3. Make the quilting sandwich by laying the three layers of fabric together, the back (pretty side down), batting fabric in the middle, and on top the piece you made with the patchwork and applique. Pinch enough safety pins to hold the three pieces together and do the quilting, it can be done by hand or on your sewing machine.
When the quilting is done, you can do basting stitches on the edge to hold the three layer of fabric together, trim the excess of batting fabric and the fabric for the back to the size of the patchwork top.
The piece is ready to be used on the clear vinyl zipper pouch.
Related Posts:
Thanks so much for sharing my blog on your Social Media!

Video Tutorial: