
As the weather starts to get cool, you might wonder if you can make a patchwork hat for winter with all those scraps of fabric you saved after you finished your last quilt.
When you love to sew and make quilts, finding a good project to make with scraps of fabric is always on your mind, and today I want to share the easy steps to make a hat for winter.
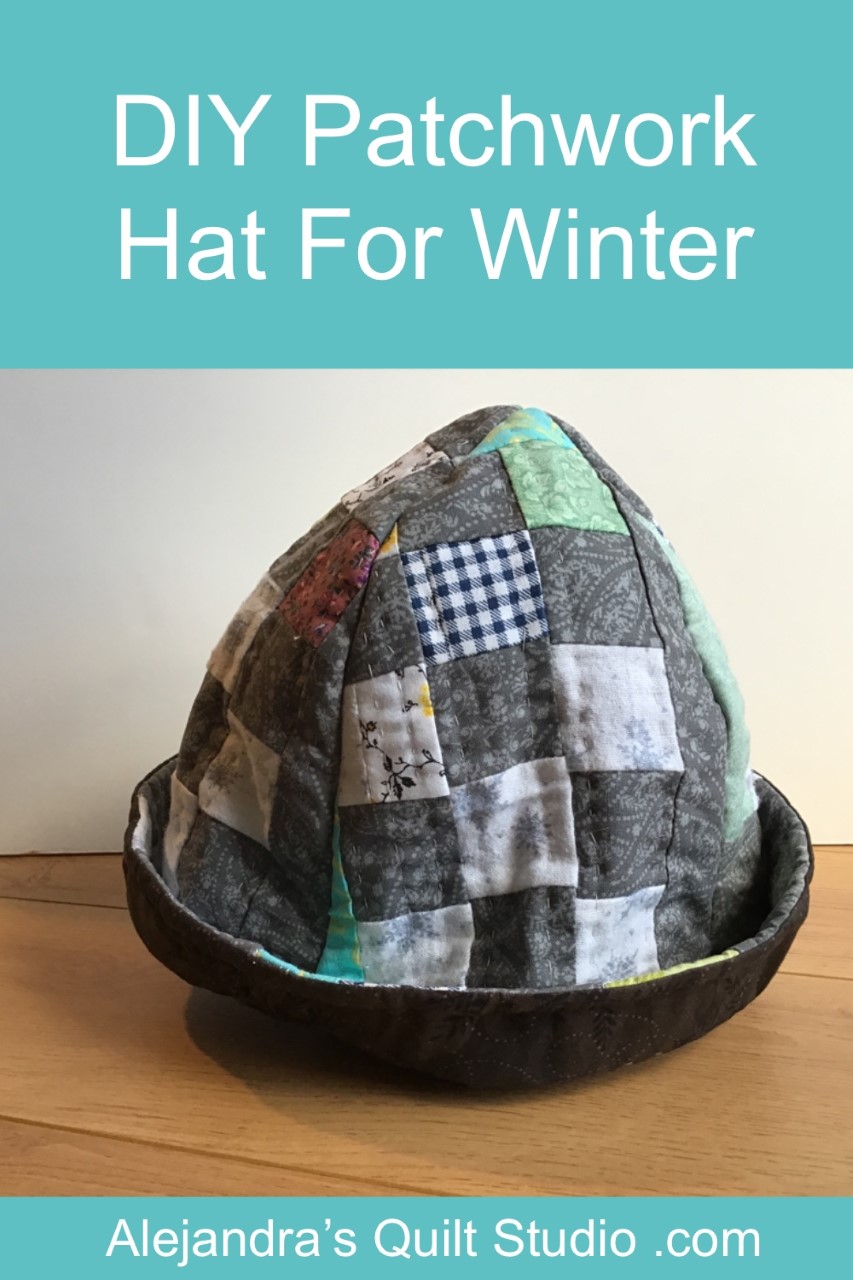
DIY Patchwork Hat For Winter is an easy and fun tutorial to share the steps to follow to make a warm and unique hat to keep your head warm during those Winter cool days, and it can be made with any quilt pattern!
Patchwork Hat For Winter Tutorial
You can make the hat for Winter with an orphan patchwork block or you can make a block with the scraps of fabric you have been saving to make something with them and use the Crumb Quilt Pattern or the Crazy Quilt Pattern.
1. Make Your Hat Pattern
Below I share the pattern I used to make the Patchwork Hat for Winter, you will need to draw the pattern on a paper A4 (paper for a copier) and I suggest to check on the measures for you or for the person you will be making the hat for.
This hat was made with —– inches for around the head and —- inches height, you can modify the pattern as you need the hat to be or you can use the same size of hat.

2. Cut Your Fabric
As hats for Winters need to be warm I suggest to use fleece as the inside fabric, but you can use flannel and batting fabric too.
Cut 4 pieces from fleece fabric.
3. Make Four Patchwork Blocks
Make four patchwork blocks of 11 1/2 x 7 inches, these patchwork blocks can be made with any Quilt Pattern, you can make the four blocks the same or different.
4. How To Quilt The Four Patchwork Blocks For The Hat For Winter
Lay on your work table the four pieces of fleece, lay over each piece one Patchwork block, pretty side up, pinch a few pins or safety pins and you can make the quilting on each piece by hand or with your sewing machine.

5. How To Trim The Four Quilted Pieces for The Hat
When you finish the quilting on the four pieces, remove all the pins or safety pins, lay the four pieces on your work table and with a pair of scissors for cutting fabric, trim the patchwork block on each piece, follow the shape of the fleece piece and when trimming each block add 1/4 inch for the seam.
6. How To Sew On The Patchwork Hat For Winter
Take two pieces at a time, and lay one over the other, right side to right side and pinch two or three pins, do the same with the other two pieces to make two pairs, sew on one side on each pairs, start from the top from 1/4 inch from the top, reinforce the stitching at the beginning and at the end. Remove all the pins.

Open the two pieces, and open flat the seams, place one piece over the other and match the seams on the top of the hat, pinch two pins and sew on from the top to the bottom on one side and then sew on the other side from the top to the bottom to the other side. Reinforce the stitching at the beginning and at the end.

7. How To Sew The Inner Lining
Draw the inner lining pattern on a A4 paper and cut the template, fold the fabric in the middle and cut 2 pieces of fabric.

Lay one piece of fabric for the inner lining over the other, pretty sides together, and sew on both sides, open and flat the seams.
Place the inner lining inside the hat, and pin it all around, if the lining is too big for your hat, you will need to make the seams wider, and if the linning is small for you hat, you can sew the seams smaller.
Sew on the seam all around on the hat, 1/4 inch seam allowance and make some small cuts on the seam all around, open the lining and flat the seam, fold the lining to the inside of the hat and pin it all around.

Start the quilting from the bottom edge of the hat to the top. When you’re working on the last row of quilting, fold the seam on the lining to the back and stitch it to the hat.

Your Patchwork Hat For Winter is finished and it looks amazing!
Another Idea To Finish The Patchwork Hat For Winter.
If you don’t want to sew on the inner lining on the hat, you can finish the hat by sewing a bias on the edge of the hat, it will look pretty too and it’s easier to sew!
Thanks so much for reading my blog today and I hope you join the fun of making a Patchwork Hat for Winter, as I think this is a way to make a warm hat to use during the cold Winter days and making a hat with a Quilt Pattern will make it unique!
I hope to see your hats on Social Media, don’t forget to add a hashtag so I can see it #patchworkwithalex
Note: There are a few different fabrics to use as the inside fabric on Hats for Winter, they need to be warm: fleece, flannel, wool and you can also use old wool sweaters.
Don’t forget to check if your hat is warm enough to be used during the cold winter days.
I tested the hat made with fleece with the inner lining on a day with 5 C (wind and rain) it was ok, but I think to use this hat during a cold winter day here in Canada with below 0 temperatures, it should be made with double fleece fabric.
Puedes leer el mismo tutorial para hacer el DIY Patchwork Gorro Para Invierno en español aquí!
More Patchwork and Quilting tutorials
Video Tutorial