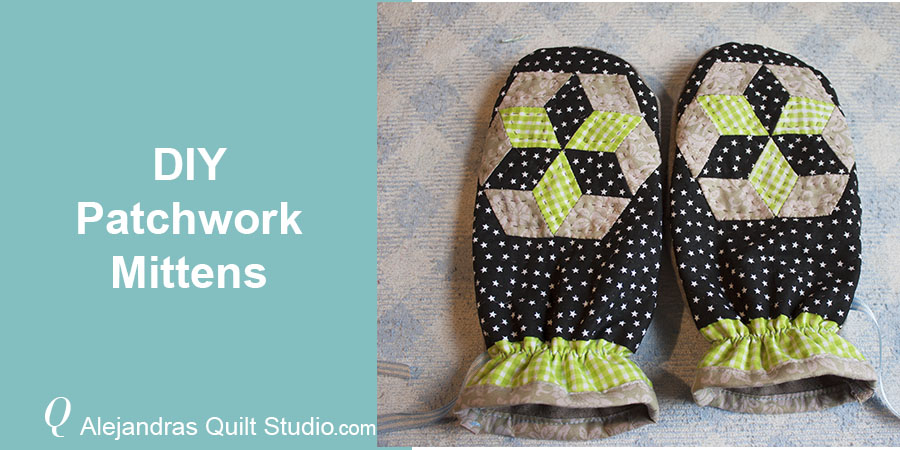
DIY Patchwork Mittens will give you the steps to follow to make a pair of mittens to keep your hands warm on a cold winter day!
If you live in a country with long and cold winters, you might know how good it is to have at least a good pair of handmade mittens made with wool fabric!
Winter weather can be cold in many countries, and you might want to learn how to make a pair of mittens and I’m sure you have good number of names on your list from family members and friends who will love to get a pair of mittens made by you!
Everybody who knows you, they know you’re a quilter and you always make beautiful things, but you might be wondering what else can you make to give as a present that is not a big quilt or a patchwork pillow!
Today, I have a different tutorial for you, this time we will make a pair of mittens with the EPP 6 pointed star we made on the previous tutorial.
DIY Patchwork Mittens
Supplies you need to make the Patchwork Mittens
This tutorial is to make a small size mittens, in case, you’re making a bigger size, you will need to get the measurements and make the pattern bigger.
- 2 EPP 6 pointed stars
- 2 pieces of wool fabric of 9.5 x 12.5 inches (I used for this tutorial a 25% wool fabric, you can use a 100 %, 50 % or 40% wool fabric.
- 4 pieces of wool fabric of 9 x 11 inches (same wool fabric)
- 2 pieces of 1/4 inch wide elastic (the length will be the wrist measure of the person you will make the mittens for less 1/4 inch)
- 2 pieces of 1/4 inch wide ribbon, any color
- Sewing thread
- Quilting thread
- Sewing machine
- Needle
- Pins
- Scissors
Download the FREE pattern to make the Patchwork mittens here, make 3 copies of the pattern to cut out the three pieces, once you get the three pattern pieces, when cutting the fabric for each piece, add minimum of 1/4 inch for the seams.
You can read the full English Paper Piecing Tutorial here to make the 6 pointed stars to make the mittens.
Step by Step Tutorial To Make The DIY Patchwork Mittens
Step 1 – How To Applique The 6 Pointed Star On The Fabric
Lay on your working table the wool fabric and lay over it the piece of fabric, as you can see on the picture below, I’m working with a piece of fabric made with two fabrics, you can do the same or you can do with one piece of fabric.
Fold the fabric in half to mark with your fingers the middle, this step will help you to center the applique star on the fabric.

Lay the star on the fabric, make sure the two points (top and bottom) match with the line you marked on the fabric. Pinch a few pins to hold together the three layers of fabric: wool fabric, fabric, and the patchwork star.
You can work to applique the star folding the seam to the back around the star.

Sept 2 – How To Hand Quilt The Mittens
I did the quilting on the mittens by hand, but you can do this step with you’re sewing machine, I’m sure it will look pretty too.
Do the quilting in the star and then lay over each mitten the pattern and pinch two pins, with a thread of different color than the fabric, basting around the pattern to mark the mitten shape. Quilt the fabric inside the basting.
Do the same step on both mittens.

This is how the quilting looks on the back, as I was working on the hand quilting I did all starts and ends between the fabric and the wool fabric so you won’t see any thread knots on the back.
Note: if you want to add a batting fabric to make the quilting sandwich, it will be OK.

When you finish this step, you will have both mittens looking like its shown on the picture below.

Step 3 – How To Make The Two Pieces Part For The Mittens
You need to cut 2 pieces of each pattern to make the palm piece for the mittens.

Lay on your working table one piece for each mitten, you need to be sure you lay on the table one piece for the left hand and one piece for the right hand, just follow how I lay the two pieces on the picture below and you’ll be good.
Lay over that two pieces the other two pieces, match the thumb on each pair, pinch a few pins and stitch on with you’re sewing machine.
I did the trimming to 1/4 inch on both pieces and then I stitched on with the sewing machine with an overlock stitching pattern, if you’re sewing machine doesn’t have an overlock stitching pattern, you can do this step with zigzag stitching pattern.
Make two little cuts on both sides of the thumb on both pieces. Remove the pins and turn out the thumb on both pieces.

Step 4 – How To Sew On The Bias On The Patchwork Mittens
Take one front part of the mittens and lay it on your work table, right side up, and lay over it one piece for the palm, do the same steps for the other mitten. Pinch a few pins and stitch on the side where the thumb is from the thumb to the bottom of each mitten, open up each mitten and do the overlock or the zigzag stitching on the open seams.
Stitch on the bias on the back side of each mitten.

Fold up twice the bias on the right side of each mitten, pinch a few pins and top stitch the bias. Do same step on both mittens.

Step 5 – How To Stitch On The Elastic On The Patchwork Mittens
Open flat both mittens and stitch on the elastic, I did this step with zigzag stitching.

Step 6 – How To Close Stitching The Patchwork Mittens
Close each mitten and pinch a few pins, stitch on you’re sewing machine, you will use the basting stitching to guide your stitching.
Stitch on inside the basting stitching.

Trim the seams to 1/4 inch with your scissors and do the overlock or the zigzag stitching all around the edge of each mitten.

Turn out each mitten and voila, you just made a beautiful pair of mittens!

I added one piece of ribbon when I was stitching to close each mitten, ribbons will help to tie them up together when you’re not using them and it will help you from losing one mitten.
Why To Make A Pair Of Patchwork Mittens With Wool Fabric?
As I was thinking about making a new tutorial for my blog, I was thinking about working different materials, I found on my stash a small piece of wool fabric and I though it would be good for something made with patchwork as a batting.
The touch of this wool fabric is soft and warm, and I wonder how good it will be for something made with patchwork, as it was just a small piece, it was enough to make a pair of mittens.
In case, you want to use a thicker wool fabric, it will go fine too, just be sure is not too thick for you’re sewing machine. When I was working for this tutorial, everything went well.
What Type Of Sewing Machine You Need To Make The Patchwork Mittens?
You can make the patchwork mittens with your basic sewing machine you have at home, you don’t need any special machine to make them.
At home, I have a Brother computerized sewing machine and I used the all-purpose presser foot.
In case, you’re using a thicker wool fabric, be sure to run a test to see how well you’re sewing machine will be working on it, it will depend on how thick is the wool fabric you’re using to know if you can use the all-purpose presser foot or if you need the walking foot.
How To Wash The Wool Patchwork Mittens?
As these mittens are made with wool fabric, you need to wash them with a mild soap, by hand and with cold water. Allow them to dry over a towel, don’t use the dryer.
Final Thoughts On the DIY Patchwork Mittens
 I must say, I liked to work with the wool fabric as a batting for a patchwork project, the fabric I used was soft and easy to work with, as I was doing the hand quilting, it was so easy to do and I like how the quilting looks.
When making a new quilting project, I like to test different materials and do something different from time to time, this time was to make a pair of mittens.
If you have followed me for some time, you might know already I live in Canada, winters here are long and cold, I like to have a home a few pairs of gloves so I can use them when I go outside for a walk.
I was wondering how well it will go to go out with a handmade pair of mittens using wool fabric, I had the chance to tested the mittens on a cold day of -3C with the wind factor the feeling was -8C, I went for a 30 minutes walk and I could say I was happy to see how well and warm I felt my hands all the way.
I was prepared with a pair of fleece mittens in my pocket in case the wool mittens didn’t do the job well, but I didn’t need to switch them for the fleece mittens.
In fact, I liked more how I felt my hands all the way with the wool mittens!
I might do a new pair of mittens with a wool fabric with higher % of wool and I will test them on a very cold day!
Now it’s your turn, let me know in a comment if you’ll be making these pair of mittens for yourself or to give them as a present to a member of your family or for a good friend!
Find More Patchwork and Quilting Tutorials here:
Puedes leer el mismo tutorial en espanol en mi blog de Ale Cose y Cose, Como Hacer Unos Mitones Con Patchwork!
You can watch the video here: