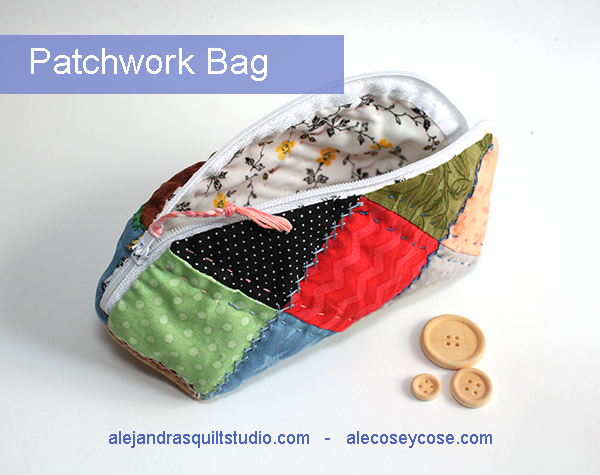
To start 2018 great, I have for you this cute quilted bag tutorial, weather is cold outside and house is quiet, perfect time for a small project to make.
If you love to sew and make some patchwork, I think you might have some small fabric pieces you want to keep to make something nice, today I will share a small project to do a Patchwork Bag with squares.
This patchwork bag is so easy and fun to make, I’m sure you will make it in a day, once you see how cute it is you might one to make a couple more.
It’s always handy to keep a small bag like this one for your makeup in your bag, or if you use it to carry a few different pens and pencils with you all the time, this bag will be perfect to help you to keep everything in one place.
Find more ideas to make Patchwork Bags here!
Patchwork Bag With Squares Tutorial
To make this bag you will need:
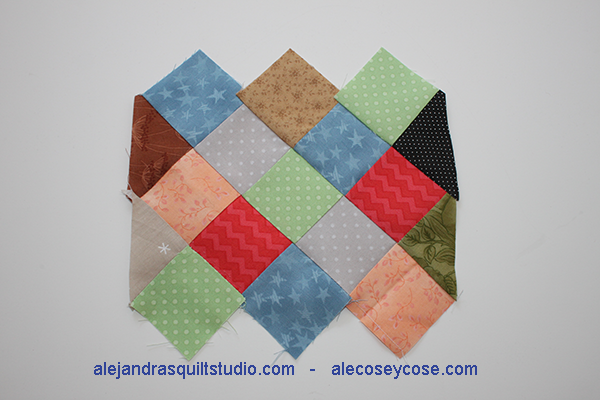
- 12 – 2.5 x 2.5 ” squares on different color cotton fabric.
- 4 – 2 3/4 x 2 3/4 ” triangles on different color cotton fabric.
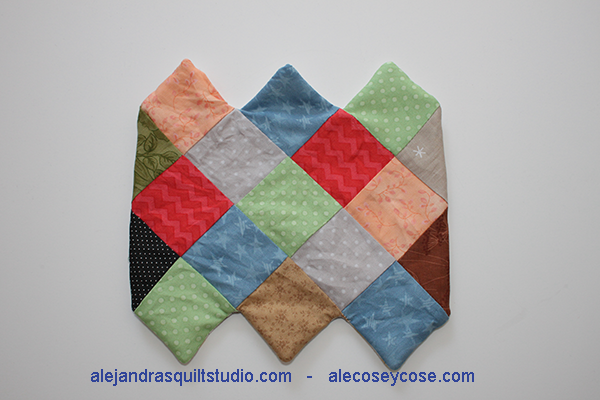
- 1. To make the top for this mini quilt to make this small bag, you will need to sew together 5 lines, you can follow this picture to follow the order to sew each row.
- Row 1 will be made with one triangle and one square.
- Row 2 will be made with 3 squares and one triangle.
- Row 3 will be made with 5 squares.
- Row 4 will be made with 3 squares and one triangle.
- Row 5 will be made with one triangle and one square.
- When you finish to make the five rows, iron each one of them with warm iron, then you can sew together each row to the next one, follow this picture to sew the top for this mini quilt.
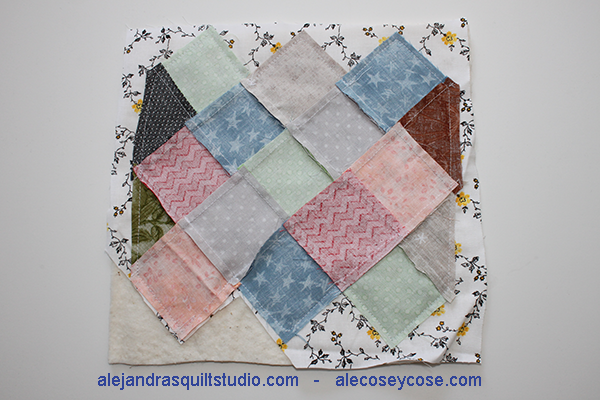
2. Once you made the top, you can place it upside down on a fabric for the inside of the bag, cut out this fabric one inch bigger each side than the top.
Place both layers on a batting fabric (thin) and cut out batting fabric same size as the fabric for the inside.
With your sewing machine you can sew around the edge of the top, follow the top shape and remember to leave open a place to turn it out, (2 inches open).
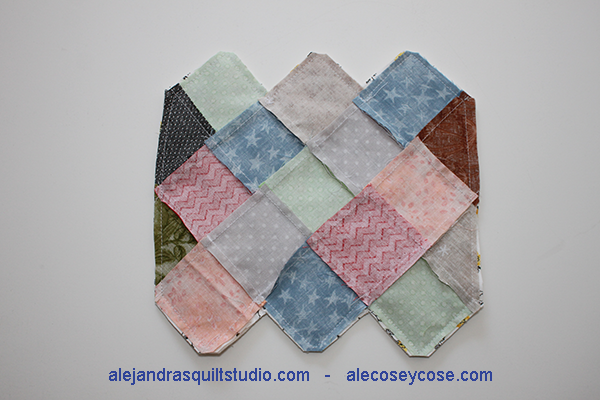
3. With your scissors, trim out the fabric for the inside and the batting, just follow the top.
To make it easier for you to turn the mini quilt out, cut every square point flat but be careful not to cut the sewing, and make one little cut where two squares meet with your scissors, but be careful not to cut on the sewing.
You can turn it out now, with the help of your scissors, push out every point and corner.
4. When you finish to turn your mini quilt out, it must look like this. With a needle and white thread, sew to close the open you left to turn it out.
Your mini quilt is ready to be quilted.
5. I always do hand quilting, but you can do it with your sewing machine, I’m sure you will do a great quilting job.
I always use a thimble and different threads to do the hand quilting, I love to do some hand embroidery with DMC floss
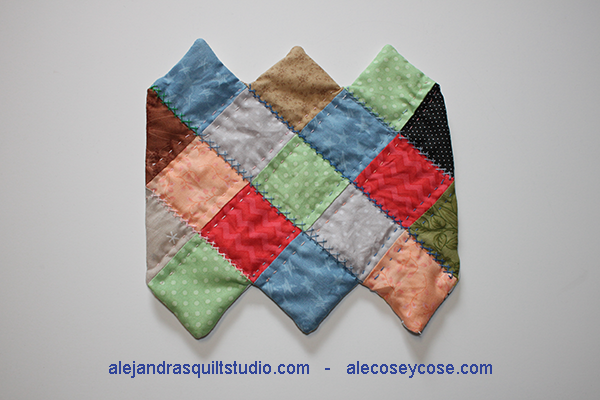
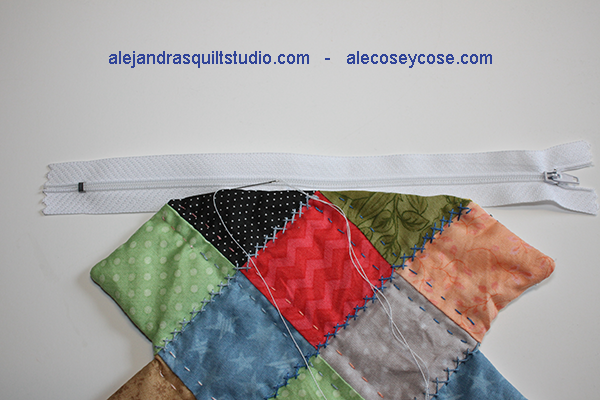
6. When the quilting is finished, your bag is ready for the next step.
Fold the zipper to find the middle point, and place it right under one of the flat sides of the mini quilt on the middle point, you can see on this picture, a square will guide you to find the middle point.
With a needle and thread, sew the zipper to the mini quilt, from the center to the left side, and then from the center to the right side.
7. Once you finish to sew the zipper on one side, it should look like this.

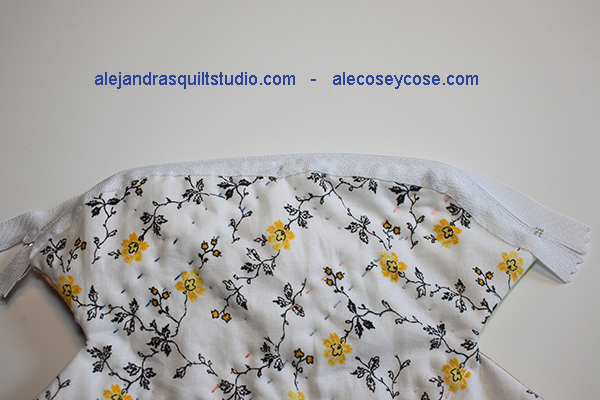
8. Turn the bag to see the inside side, and your zipper will look like this.

9. With a needle and thread, make little stitches to see the zipper edge to the bag. I do this step to hold better the zipper to the bag, and it will look much better.
Once you finish to sew one side of the zipper, do the last two steps with the other side of the zipper on the other edge of the bag.
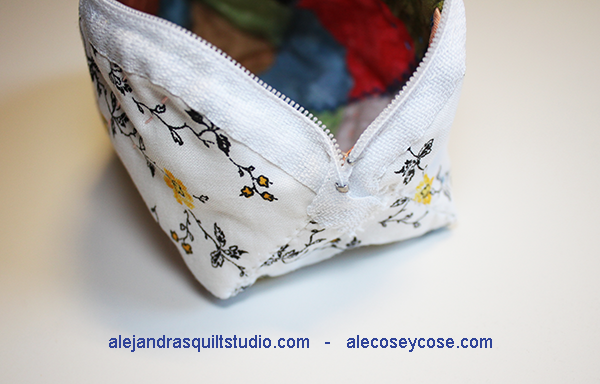
10. When you finish the two edges of the bag, it will look like this.
11. It’s time now to sew to close both sides of the bag, you need to sew it by hand, with a needle and thread.
Push gently the triangle to meet one of the sides on the open side, and sew it together with little stitches. When you finish one side, do same with the other side of the bag.
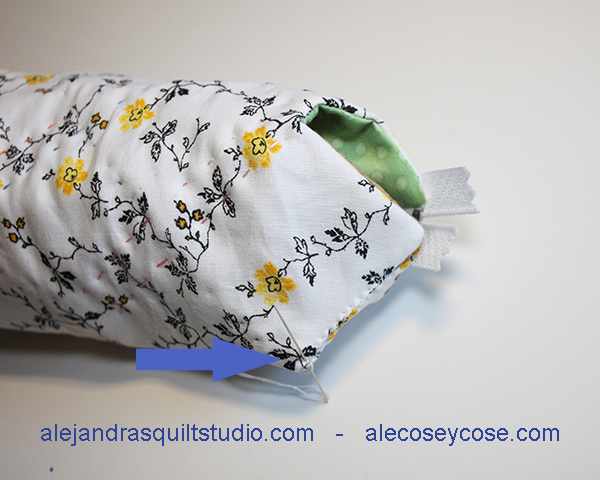
12. To hold the zipper edge on each side of the bag better, just do some stitches on each side of the bag.
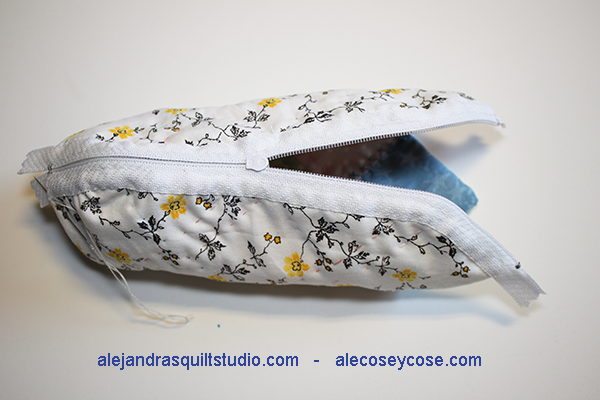
You can turn out your bag, and it will look like this!

Voila!! you finished your quilted bag, isn’t it cute!
Thanks you for spending a moment reading this tutorial, I’m sure your patchwork bag will look great, and you might make more than one, this little bag is perfect to give it away as a gift to a friend, if you have a coming birthday on your agenda, you have enough time to make it for your friend on her favorite color!
Don’t forget you can join now to may newsletter, so you’ll be the first one to get my next tutorial to make more great projects with patchwork! You can add your name and e-mail on the sidebar.
Si quieres leer este tutorial en espanol, visita mi blog en espanol Ale Cose y Cose.com
Find more free quilted projects to make here
Disclosure: Some of the links in the post above are affiliate links. This means if you click on the link and purchase the item, I will receive an affiliate commission. Regardless, I only recommend products or services I use personally and believe will add value to my readers.