If you love to get everything well organized, you will love to make a mini organizer with a patchwork block.
Patchwork Mini Organizer is an easy step by step tutorial to make a small quilted bag with four interior pockets to carry everything you need.
Whether you need to keep in the organizer, some extra face masks, some sanitary pads, or if you want to use it to keep in it everything you need for your sewing, you will make more than one, when you see how easy it is to make.
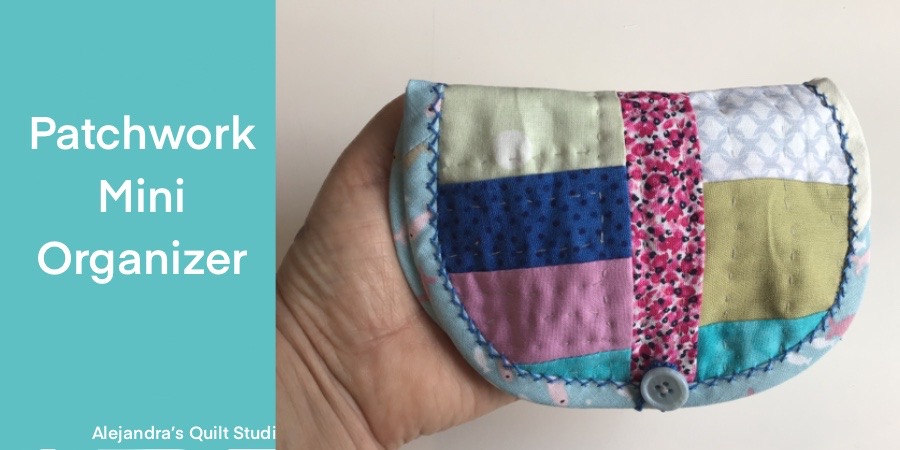
Patchwork Mini Organizer
You can download here the Patchwork Mini Organizer Free Pattern. Print it out and cut out the paper template.
Tutorial
You will need to make a 9 x 6 inches Patchwork block, you can make it with any quilt block pattern, I did mine with the Crumb Quilt Block pattern.
If you want to make it with a piece of embroidery, or with a pretty fabric, it will work great too, but you will need to put a fabric on the back as a lining.

You will need also
- 2 pieces of fabric of 3 1/2 x 6 1/2 inches
- 2 pieces of fabric of 3 x 6 1/2 inches
- Bias
Take one piece of fabric at a time, fold the top (lengthwise) twice and sew on your sewing machine, you can sew a bias instead of folding the top edge. Do the same with the four pieces of fabric for the interior pockets.
1. Lay the patchwork block on your work table, pretty side up, lay over this piece the paper template, you can pin the paper template to the piece, and trace the organizer shape on the quilted piece, with the help of a pencil or a marker for fabrics.
Remove the pins and the paper template.

2. Make a basting stitching on the pencil mark. Use a thread with a color that stands out from the fabric.
3. Cut out the piece with a pair of scissors for cutting fabric. Cut the piece out of the basting stitches.
4. Lay the cut piece on your work table, pretty side down, lay on one side of the piece one big fabric piece, pretty side up, then lay over this piece, one small piece, pretty side up, pinch two pins to hold the two pieces on the quilted piece. The top side of these two pieces should face to the center of the quilted piece.
Do the same steps, to put the other two pieces (one big, and one small piece) on the other side of the quilted piece.
5. Sew on the four pieces on your sewing machine, the stitching should be done on the edge, trim the pockets with a help of a pair of scissors, follow the quilted piece to trim the fabric of the interior pockets.

6. Sew on a bias all around the piece, you can do this step on the interior side.

7. Sew to close the bias on the pretty side, you can do this step by hand or with your sewing machine. When the bias is all stitched up, you can do an embroidery stitch to add a handmade touch, you can also do an embroidery stitching on the pretty side on the bias.

8. Sew on a snap button to close the organizer, or you can sew on a button on one side and sew on a loop on the other side.
Your Patchwork Mini Organizer is done, and it looks amazing!

I know when you see how easy is to make it, you will be making more than one, you can use it to carry with you some extra face masks, some extra sanitary pads, or you can use it to keep well organized everything you need for your sewing projects, some thread, a small pair of scissors, some needles and pins.
Thanks so much for reading my blog!

Video Tutorial