Row By Row Baby Quilt Tutorial will help you to make a pretty quilt to welcome a new baby in the family or to give it as a gift at a Baby Shower.
When you love to make quilts, making a pretty quilt to welcome a new baby in the family might be on top of your list, today I will share the steps to follow to make a Row by row baby quilt with solid fabrics.
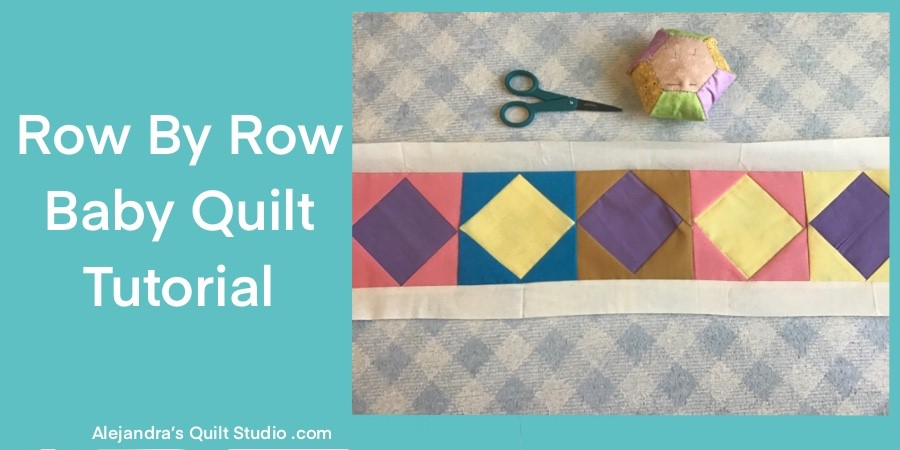
The first row will be made using a Paper Piecing Pattern to make 5 Square In A Square blocks.
Making a quilt with the Paper piecing pattern, is an easy way to make same size blocks all the time.
Row By Row Baby Quilt Tutorial
Materials and Supplies
- Cotton 100% fabric in assorted solid color
- 6 pieces of cotton 100% fabric in beige of 1 1/2 x 23 inches
- Pins
- Scissors
- Patchwork ruler
- Pencil or marker for fabrics
- Sewing Machine
- Square In A Square Paper Piecing Free Pattern
Learn more about what Quilting Tools I use to make patchwork and quilting projects.
Row By Row Baby Quilt Tutorial Step by Step
Step 1 – Prewash and Press All The Fabric
As this time you’ll be working with solid cotton fabrics, it’s always recommended to prewash and press all the fabric before you start making the quilt.
In case one fabric bleeds, you can wash it a few times until the bleeding stops. This way you can use that fabric on the quilt.

Step 2 – Download And Print Out The Paper Piecing Pattern
The first row of the quilt is made of 5 blocks of the Square in Square pattern and it will be made using the paper piecing pattern.
You will need to print out 5 times the pattern on paper and with the help of a pair of scissors for paper cut out the pattern.

Step 3 – Square in A Square Paper Piecing Pattern
The Square in a Square pattern is one of the easiest patterns to work with the paper piecing pattern and is made using just a few pieces of fabric.
Cut out first one square of fabric, any color you pick for the center, and place it in the right side of the paper and pin it, lay over it the piece of fabric for the number 2 on the paper piecing pattern (a triangle, right side to right side and pin both pieces to the paper, sew on your sewing machine on the line on the pattern, remove the pins and open the piece of fabric for the number 2.
Keep working on the same way on the number 3, 4 and 5. Press
With the help of a good pair of scissors or with the patchwork ruler, the rotary cutter and the cutting mat, lay over the cutting mat each block right side down, and trim the excess of fabric on the 4 sides of the pattern.
You can remove now all the paper from each block.

Step 4 – Sew On The Quilt First Row
Lay over your work table all the 5 Square in a Square blocks, and arrange them the way you like the blocks to be on the quilt.
Take the first block and flip it over the second and sew on one side, open and then flip block 3 over the block 2 and sew on, keep sewing on the same way block 4 and 5, press.

Step 5 – Sew On The Sashing
Sew on top and bottom the two strips of fabric for the sashing, you can pin each strip of fabric and then take the piece to the sewing machine to sew on, remove all the pins, open and press. Do the same with the second strip of fabric for the sashing.

The Quilt first row is finished and it looks great!

Making a row by row quilt can help any quilter to learn more about making a quilt, today we will stop here, but on the next tutorial you’ll be working on row 2 and 3.
I hope you like this small quilt and you make it, in case you make it, let me know about it on a comment.
Don’t forget to follow me on my Social Media, so you can get some updates of my work as a quilter.
- Alejandra’s Quilt Studio – Facebook
- AleBalanzario_Patchwork – Instagram
Puedes leer el mismo tutorial Quilt Para Bebe Patchwork Linea a Linea aqui!
You can watch the video to make the first row for the Baby Quilt here:
You can Pin this tutorial so you can find it later easily!
