Cathedral Window Quilts always stand out from the rest, todays tutorial is an easy and fun way to make it!
When you love to make quilts, you will be making a Cathedral Window quilt sooner or later, whether is to learn how it’s done, or if you want to add one to your own quilt collections made by yourself.
When I learned for the first time, how to make the Cathedral Window quilt, it was made with a big square of white or off-white fabric, and it has to be folded and sewn a few times, to make small squares of fabric, that should be stitched together to reach the size of the required quilt, then you will cut small pieces of another fabric, any color you like, and applique each piece to the quilt, by folding the edge of each folded square.
It was a lot of work to make a quilt, it could take years to finish one, and it needed a lot of fabric.
Today, I will share a few easy steps to make this quilt pattern, in an easier way, and it can be done by hand or with your sewing machine.
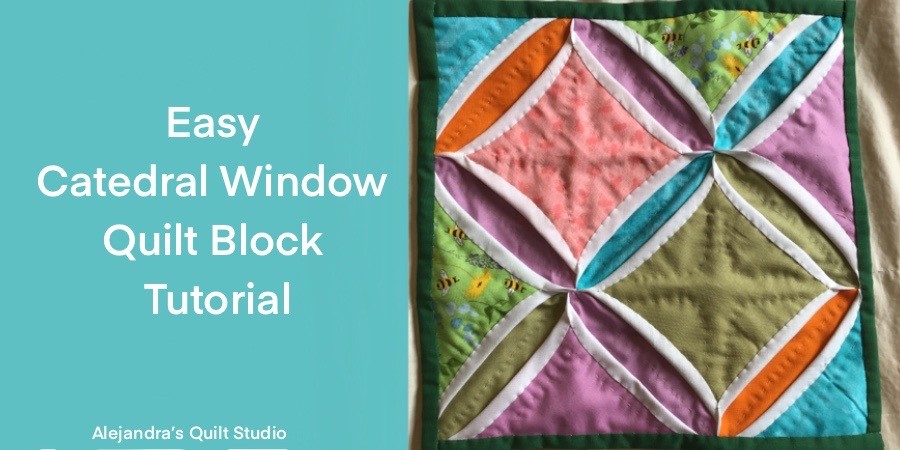
Cathedral Window Quilt Block Tutorial
For this tutorial, you will need to cut your fabric:
- 9 pieces of fabric same or different color of 4 x 4 inches
- 18 pieces of fabric in white or off-white of 4 x 4 inches (if you find a thin fabric, it will work better)
- 2 pieces of fabric in any color of 4 1/4 x 4 1/4 inches
- 4 triangles of fabric in any color of 4 1/2 x 4 1/2 inches
- 2 triangles of fabric in any color of 4 x 4 inches
1. Lay out the 9 squares of fabric (color fabric) on your work table.
2. Take one piece of the 18 squares of white fabric at a time, and fold it in half to make a triangle and press.

3. Put 2 folded pieces on each square, you can follow the way the triangles should be put over each piece from the image —- and pin each folded piece to the square piece.
4. Sew on the three pieces together, to make each one of the three strips, you can mark each line with its strip number, with a pencil, or put a piece of masking tape with its number. 1/4 inch seam allowance, open the seams and press.
5. Lay over your work table the three strips, now you can stitch on strip #1 to strip #2, and strip #3 to strip #2, open seams and press.

6. Lay over your work table the block, and put over each square that has formed on your piece, a color fabric square, and over the triangles, put a color fabric triangle, pin all the pieces.

7. On this step you will make the framing squares, which give this block the look of a Cathedral Window, fold to cover the edge of each color fabric piece the folded edge of each white triangle, you can pin each folded edge, or as you work to stitch on the folded edge, just keep folding the triangles edge to cover the color fabric one piece at a time.
This step can be done by hand, with small stitches, or it can be done on your sewing machine.

8. When all the Cathedral Windows are done, you can cut a piece of fabric 2 inches bigger on each side, to place it under the patchwork piece.
In case, you want to make it quilted, you can place a thin batting fabric piece, between the two layers.
9. It’s time to make the quilting, it can be made by hand or with your sewing machine.

10. Trim the batting fabric to the size of the Cathedral Window block, (in case, you used it) and trim one inch bigger on each side the backing fabric.
11. To finish the Cathedral Window Quilt Block, you need to fold twice each side of the backing fabric up to cover the block edges, pin each side and sew on by hand or with your sewing machine.
The Cathedral Window Quilt Block is finished and it looks amazing!
As this tutorial is how to make a quilt block with the Cathedral Window, you can use the finished block as a mini quilt on a table or a chest, but it can also be hung on a wall, or it can be stitched on a pillow, or on a tote bag.
Get more Patchwork Tutorials:
Thanks so much for reading my blog today!

Video tutorial.