I’m sure every time you see a little rabbit in Pinterest you wish you could make one, well today I’m sharing a free pattern to make this little rabbit.
But I need to tell you this little rabbit is so easy to make that I’m sure you’ll be making more than one!
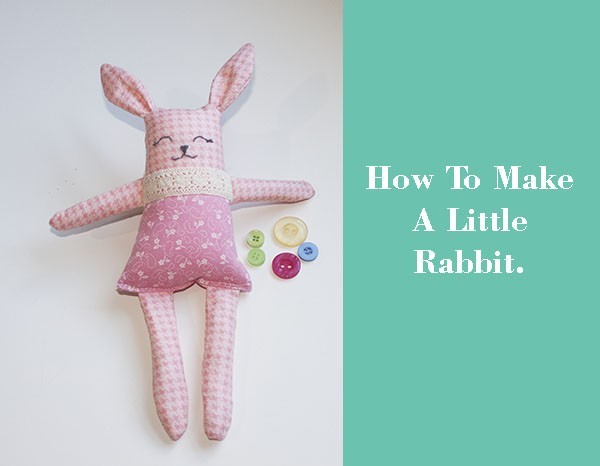
This little rabbit is not only cute and easy to make, it is perfect to give it as a gift to someone special to you like your daughter, your grand daughter, your niece or your best friend.
To make it you don’t need to be an expert, you just need to know how to sew with your sewing machine, download the free pattern and you can make it in about one hour.
Today I made it in pink, yes I’m thinking to give it to my grand daughter, but you can make it on any color you want to, blue, yellow, orange, violet, beige, it will look nice in any color you decide to make it.
To make this little rabbit you need:
- To download the pattern and print it twice, I always do this, so I can cut out one, and I can keep the second one in case I want to make another rabbit another day. Click here to download the free pattern.
- 2 pieces of cotton fabric on different color or prints.
- Some stuff for dolls.
- DMC embroidery floss in dark grey.
- Sewing machine, a pair of scissors, a needle, and a piece of lace.
Tutorial:
(I made a video so you can follow me while I make this little rabbit, but I did it in Spanish (sorry) so I will write for you the steps I followed to make it, so you can watch the video and read the step by step)/
1. Download and print out the free pattern.
2. Cut out the templates.
3. Sew on your sewing machine arms, legs and ears.
4. Cut each piece adding the 1/4 seam, make little cuts on the curved areas with the help of your scissors, and turn out each piece.
5. Stuff up each piece, you can decide whether to light stuff of stuff a little more, I prefer to stuff light with this doll.
6. I didn’t stuff the ears, as this time the ears are small and they don’t need any stuff at all.
7. Cut the fabric pieces for the head and the body, and sew them together. If you need to mark out again the templates on the fabric, do it as I did it.
8. Sew the body placing arms and ears in their places.
9. Trim this piece, and make little cuts with the help of your scissors on the curved area of the head. Turn the piece out.
10. Stuff this piece.
11. Fold inside the seams and sew to close with the two legs in their place.
12. With a needle and two strings of the grey floss do some back stitches to do the embroidery of the face.
13. Add the piece of lace on the neck with some tiny stitches with the needle and your little rabbit is finished.
If you have any question about this little rabbit, please leave a comment below and I will reply to it.
You can follow me on Pinterest, Facebook, Instagram and YouTube to be the first one to get the updates of my work.
I thank you for taking your time to visit my blog.
If you want to know what sewing machine I use to do my quilts and my dolls, you can read it here.
You can read also:
How to make a baby quilt – part 3