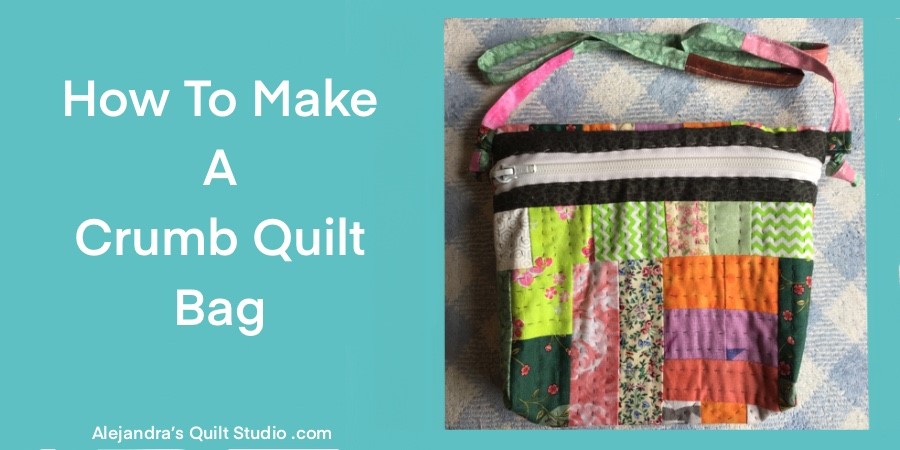
Crumb Quilt Bag is an easy patchwork tutorial to make a bag with all those scraps of fabric you have been saving to make something pretty with them!
When you love to make quilts, sooner or later you’ll have a good collection of pretty scraps of fabric, and we all know we love to keep even the tiniest scraps of fabric!
Crumb Quilts are a boom right now around the world, as it’s the best way to use all those pretty scraps of fabric, but if you want to make something different from a full size quilt, today I will share the steps to follow to make a pretty bag with a quilted block!
Crumb Quilt Bag Tutorial
Materials and Supplies
- 1 Crumb Quilt Block of 9 1/2 x 14 1/2 inches, quilted
- 1 piece of cotton fabric of 1 1/2 x the length you need it, this piece will be the bag strap.
- 1 piece of cotton fabric of 1 1/2 x 9 inches
- 1 zipper of 10 inches, it can be longer and it will be trimmed later.
- 2 pieces of cotton fabric of 10 x 1 inch for the top and bottom borders
- 2 pieces of cotton fabric of 1 1/2 x 9 inches for the bias
- Scissors
- Pins
- Hand sewing needle
- Sewing Machine
Crumb Quilt Bag Tutorial, Step by Step
Step 1 – Cut All Your Fabrics For The Crumb Quilt Bag Tutorial
You can read the Crumb Quilt Step by Step tutorial here to make the block you will need to make the bag, follow the steps on the tutorial, but make a block with the measures required for this tutorial.
Cut all your fabrics and get all the notions and supplies to make the Crumb Quilt bag.

Step 2 – Stitch On Fabric Pieces On Top And Bottom Of The Crumb Quilt Bag
Lay the quilted block on your work table and lay one piece of fabric A on the top and one on the bottom, right side to right side, stitch on each piece, 1/4 inch seam and open.

Step 3 – How To Stitch On The Bag Strap
Cut the fabric for the strap or make one like I did by stitching together a few different pieces of the same width (1 1/2 inch) and different length to make one strip.
Fold the two sides of the strip, 1/4 inch to the back lengthwise and press.
Fold the strip in the middle lengthwise and stitch on all the way.
Step 4 – How To Stitch On The Two Pieces Of Fabric For The Strap
With the fabric piece C, you will need to follow the same steps like you did with the strip for the strap, the difference here is this piece is one piece of fabric and its smaller in length, but is the same way to make it.
Fold the piece in the middle lengthwise and cut into two pieces with the help of a pair of scissors.
Step 5 – How To Stitch On The Zipper In The Bag
Lay the quilted block on your work table, right side up and lay over it the zipper on the top, zipper right side to the right side of the quilted block, you can pinch a few pins or make a few running stitches. Stitch on your sewing machine.
When the top side is done, follow the same steps to stitch on the zipper to the bottom side of the bag. On the image below you can take a look on how it looks like.

To make the zipper sides to look nicer I did a herringbone stitch all along both sides of the zipper to the quilted block.

Step 6 – Top Stitching Both Sides Of the Zipper
Turn the piece to its right side, and to a top stitching on the fabric border, this step can be done by hand or with your sewing machine.

Step 7 – How To Stitch On The Crumb Quilt Bag
Turn the piece to the pretty side inside, and lay it on your work table, set up the piece with the zipper on one side on the top.
Push the bottom of the bag inside one inch each side, and pinch a pin on each side.
Take one piece C and fold it in the middle lengthwise and place it inside the bag on one side on the top, pinch a pin, do the same on the second piece C on the other side of the bag.
Place one piece of fabric on each side centered, and fold to the back each end of the piece, stitch on each piece on your sewing machine all the way.
Note: When stitching on your sewing machine where the zipper is, slow down or jump the area where the zipper is, to avoid breaking the sewing machine needle.
When you finished stitching on both sides of the bag, turn the bag out and check if both sides are done well, if there is any mistake, remove the stitches and stitch on again.

Step 8 – How To Stitch On The Bias On The Crumb Quilt Bag
Turn the bag to the pretty side inside and lay it on your work table, fold each piece of fabric on each side like bias and pinch a few pins, stitch on your sewing machine.

On the image below, you can take a look how pushing the bottom inside makes a nice looking boxed bottom in the bag.

Step 9 – How To Add The Strap To The Crumb Quilt Bag
Take the strap and push each end inside the folded piece on each side of the top of the bag, make a knot at each end of the strap.
If you notice the knot on each end of the strap is not big enough to stay in its place, undo the knot and fold the end of the strap, make the knot with the end folded, this will make the knot bigger.
The Crumb Quilt Bag is finished, and it looks amazing!
Don’t forget to follow me on my Social Media, to get more ideas and tips about Patchwork, Quilting and Embroidery!
- Facebook – Alejandra’s Quilt Studio
- Instagram – alebalanzario.patchwork
Crumb Quilt Bag Closing Thoughts
When you love to make quilts, soon you will have many scraps of fabric that you’ll be saving for making something pretty with them, no matter how small they are, the Crumb Quilt is a good technique to use them all.
If you love to make quilted bags, I’m sure you will love to make the Crumb Quilt bag, it’s easy to make it and it will look pretty always!
Whether you’re making this bag for yourself or to give it as a present, I’m sure you will be making more than one when you see how easy it is to make it.
Thanks so much for visiting my blog again, and come back to read more about how to make the patchwork, the quilting and embroidery!
More Patchwork and Quilting Tutorials:
- How To Make A Drunkards Path Patchwork Bag – Make a cute drawstring bag!
- Patchwork Pencil Case Tutorial – Keep all your pencils and pens in one place with this cute pencilcase made by you!
Puedes leer el mismo tutorial en español en mi blog de Ale Cose y Cose en Bolsa Crumb Quilt!
Thanks so much for sharing my blog on your Social Media.
