Patchwork Bags to Make is a post where you can find the most liked bags I share on my blog, most of them are tutorials for beginners and more advanced quilters.
I’m sure you love to make patchwork and you love to make bags, I’m also sure that you’ll fins more of one tutorial to make, you can start with one and save this post to your Pinterest so you can find my blog later.
Patchwork Bags To Make
Easy Patchwork – Log Cabin Pouch
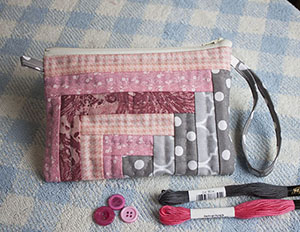
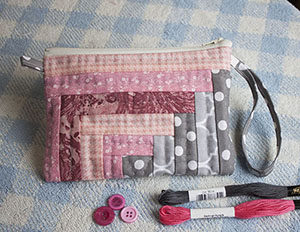 Everyone love the Log Cabin Pouch tutorial, and it’s because it’s so easy to make and no matter what fabrics prints or color you pick to make it, it always look fantastic.
It won’t take you long to make it and it will be perfect to carry all your important things like some money, your smart phone and your keeps, everything in one place!
I made it with a selection of pink and grey cotton fabrics, simple hand quilting with embroidery floss.
 If you want to learn how to make the hexies from a circle, this is the tutorial you might want to try, no matter is you work with a small or a big circle, the steps are the same and it’s the easiest technique to make a quilt with hexies.
All made by hand the quilting with a black cotton embroidery thread to add some texture to it.
Finished with the Japanese technique that will save you tons of time when you make it!
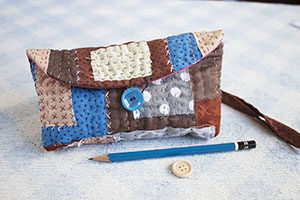 More and more this is becoming the second most liked tutorial to make a patchwork bag on my Pinterest account.
The Boro technique is also becoming the loved sewing and quilting technique by many, so easy to work with and you’ll get beautiful results all the time.
So easy and fun to make that I’m sure you’ll be making more than one, as your friends will ask you to make one for each one of them as well!
Easy Patchwork Cross Body Bags.
Easy and fun to make, you can find the tutorial to make each one of these Patchwork and Quilted Bags.
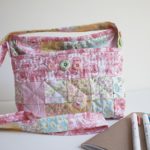
Small Quilted Cross Body Bag – Use all those leftover small squares to make this quilted bag.
Camila Bag, the bag front has a applique bird, make the top with strips of fabric.
Regina – It’s an easy tutorial to follow to make this pretty quilted bag.
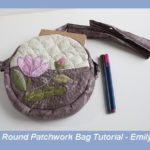
Emily Bag – It’s a round bag made with applique and quilting techniques.
Small Bag With A Heart, it will be your favorite to carry with you your cell phone and some money on it!
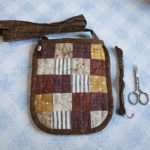
Patchwork Japanese Style bag, how to make an easy small bag made with squares of fabric.
Drawstring Back Patchwork Bag
Easy Drawstring Backpack tutorial: Working with patchwork and applique to make a backpack any kid will love to have!
Backpack Drawstring Patchwork Tutorial: When you have an orphan patchwork block, you can make this lovely drawstring backpack to carry everything with you!
How To Make A Patchwork Bag?
If you’re a beginner quilter, you always can start with an easy patchwork block to make like the Log Cabin.
The best way to make a patchwork bag is to follow a step by step tutorial, it will be easier for you to work at the same time on each step as you read the tutorial.
Before you notice you’ll finish your first handmade bag made by you!
What Sewing Equipment Do You Need?
You’ll be needing the same sewing equipment as any quilter use everyday to make any quilting or patchwork project, a sewing machine, a good pair of scissors, a rotary cutter, a cutting mat, cotton fabric and batting fabric, needles, pins, thread and safety pins.
You can take a look to the Patchwork tools I use everyday to work on my sewing and patchwork projects here
How long will take you to finish it?
The time required to finish a Patchwork bag will depend on the bag you want to make, some are easy to make and some will require more work and time to finish them.
The Log Cabin bag is one of the easiest pattern I share on this blog and it won’t take you long to finish it, for beginners it might require more time but for advanced quilters it will require one or two hours of sewing to finish it.
Bags made with applique and hand quilting will require to work more on them and for this reason it will take longer to finish them.
How to wash a Patchwork Bag?
I wash my patchwork bags by hand with soft laundry soap, I rinse them until the water comes out clear and I let them dry in the shade.
