Rag Doll Pattern is an easy project to make to use those small patchwork blocks that you have been saving to make something cute with them.
Whether you make the Rag Doll to give it as a present to someone special to you, or if you make it for your own rag dolls collection, I’m sure this will be one of your favorites.
As a quilter, you know well we have always some orphans blocks left after finishing a quilt, this doll is made with two small patchwork blocks as part of her body and it gives the doll a touch of cuteness.
Rag Doll Pattern
Download The Rag Doll Pattern

Download and print the Rag Doll Pattern, and with a pair of scissors to cut paper, cut out all the paper templates.
Make A Patchwork Block
If you love to make quilts, you might have two orphan small blocks of 5 x 5 inches , if you have none, then you can make two blocks using some scraps of fabric with any quilt pattern.
Cut from a solid color of beige, white, pink, or brown, two pieces of fabric for the faces of 3 x 5 inches, the color of this fabric will be on your preference to make the rag doll, any color is good.
Sew on the fabric for the face on each patchwork block, open and press.
On one of these pieces, trace with a pencil the pattern for the doll on the back, you can stitch on outside the pencil mark with you’re sewing machine.
How To Make The Arms For The Rag Doll

Cut the 4 pieces of fabric to make the arms of 1 3/4 x 4 1/2 inches, and make two pairs by laying one fabric on the other, pretty side to pretty side, you will have two pairs.
Lay the paper template on each pair and mark the paper template with pencil on one of the fabrics and the back side of the fabric.
Sew on each pair with you’re sewing machine by stitching on the pencil mark, trim each piece with your scissors leaving the seam allowance, make some cuts on the curved seam with your scissors.
Turn out each piece and stuff with pillow stuffing.
How To Make The Legs For The Rag Doll
Cut the fabric pieces to make the legs:
- 4 pieces from fabric A of 5 x 2 inches.
- 4 pieces from fabric B of 2 x 1 1/2 inches.
Lay one piece of fabric B on one piece of fabric A and sew on both pieces together, do the same with the four pieces to make the legs, open and press.
Trace the leg paper template on the back of two pieces for the leg.
Lay one piece marked with the leg template over one piece for the leg, pretty side to pretty side, do the same with the other two pieces.
Sew on each pair with you’re sewing machine, stitch on the pencil mark.
Trim the piece, leave the seam allowance, and make some cuts with your scissors on the curved seam, turn out the two pieces and stuff each piece with stuffing for pillows.
How To Sew On The Rag Doll

Lay the piece for the body of the doll where you marked the doll template on your work table, pretty side up, place the arms on their place and pinch one pin on each arm, you can watch the video to see how I did this step.
Place also the legs where they should go and pinch a pin to hold the legs on its place.
Sew on the arms and legs with you’re sewing machine, this step will hold the arms and legs on their place and you can remove all the pins.
Lay on your work table the doll body piece with arms and legs, pretty side up, lay the other piece for the doll body over this piece, pretty side down, you can pinch a couple of pins, to hold the two pieces together while you sew.
Sew on the two pieces together, arms and legs should be inside the two pieces, leave a gap on one side of the body to turn the piece out.

Stitch on the pencil mark. Trim the piece leaving a seam allowance of 1/4 inch, make some cuts with your scissors on all curved seams and cut diagonally on the bottom corners.
Turn the piece out and stuff with stuffing for pillow, you can also use some batting fabric scraps.
Stuffing soft or hard the doll will be at your own preference.
Stitch on the gap left open by hand.
How To Do The Face Embroidery

With the help of a pencil, you can draw the face, I did one face on one side and a sleeping face on the other side of the doll.
The embroidery is easy to make.
- Back stitch for the mouth
- Satin stitch for the nose and eyes
- Long Stitches for the eye browns and eyelashes.
If you don’t want to do the embroidery on the face, it can be done with a permanent marker.
How To Make A Rag Doll Skirt
Cut a piece of fabric of 12 x 4 1/4 inches.
Fold the piece of fabric in the middle lengthwise and stitch on, 1/4 inch for the seam allowance. Open the seam and press.
Make a fold of 1/4 inch on the bottom and stitch on.
To make the top of the skirt, I did some over lock stitching with my sewing machine on the edge, if you’re sewing machine doesn’t have this stitching pattern you can use zigzag stitching.
Fold the top edge to the back 1/2 inch and stitch on, leave a gap open to insert the elastic, stitch on the two ends of the elastic together and sew to close the gap left open.
The skirt is ready.
If you want to make pants for the doll, all you need to do is to follow the instructions to make the skirt, and then with the skirt with the pretty side inside, make a stitching in the middle with U shape, 1/4 inch between the two stitching of the U shape, and cut with your scissors, you can do a zigzag stitching on the seam, turn the pants out and they are ready to dress the doll.
How To Make The hair For The Rag Doll

Make a wig with some yarn and stitch it on the head of the doll by hand, then you can make a braid with the same yarn and stitch it on the top of the head.
You can trim the yarn on the wig and on both ends of the braid.
Final Touches On The Rag Doll
As final touches I did a yoyo and a small bow, I stitched each one on one side of the doll.
Note: you can sew on some buttons and beads to decorate the doll, but if you’re planning to give your doll to a young child, do not sew on any button or bead to avoid any accident.
Always think on children’s well-being when making anything for them.
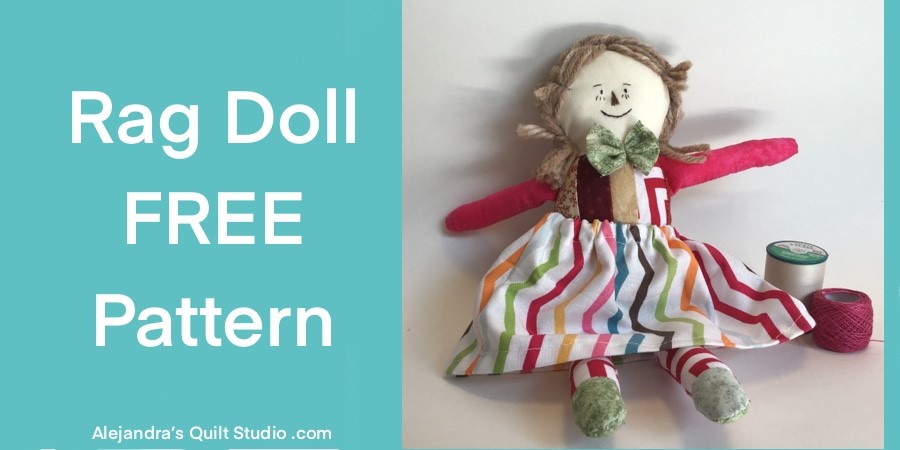
Your Rag Doll Is Finished and it looks so pretty!
I hope you have fun making the Rag Doll as much as I did, this is another way to use those orphan patchwork blocks we always have left after making a quilt.
Thanks so much for sharing my blog on your Social Media!
Puedes leer el mismo tutorial para hacer la Muneca de trapo en espanol aquí!
You can find more sewing tutorials to make a Rag Doll here:
- DIY Patchwork Rabbit –
- Pajama Pillow Tutorial –
- How To Make A Softie Doll – Owl –
- Easy Baby Bib Tutorial –
- How To Make A Baby Bib Patchwork –
- How To Make A Baby Quilt –
- Making a Rag Doll –
Video Tutorial: